Showing posts with label do it yo'self. Show all posts

Wednesday, 1 April 2020

Made: DIY Journals


I thought that I would try binding a book, so I made a little journal from scratch.  It was quite the ordeal-- and the video I taped was not helpful.  I should post it purely for entertainment value-- but it would make all actual book diners (bookies? no... that's something else) cringe with anger.  So you will have to settle for pictures of my final (finally!) project.

For materials I used American Crafts "Wildflower" paper collection (which is really hard to find!), some chipboard and plain white paper.


Because I like pockets in my notebooks, I put on in and added some uplifting cards to remind me that this Q-Tine can't last forever.


I used the We R Memory Keepers Bookbinding tool to put it together.  It was pretty easy to use, and it comes with everything you need to bind your first book (Even thread- even though the reviews say it doesn't.).


I used some embroidery thread that I swiped across a beeswax candle for more slide as I sewed the binding.  Sometimes its nice to have a pop of colour where you aren't expecting it.


If you want to make your own journal, here are some tutorials that are way better then what I would have come up with.  I'm going to follow the experts for the next one I make.

Sea Lemon Book Binding Stitches- Jen is a book binder extraordinaire.  She has a whole playlist on book making for every style.

SundayMornings- Journal making 3 Ways- She gives you 3 different styles of journals AND step-by-step instructions on making them using what you have on hand.

DIY Art Journal for Beginners- Johanna uses an old book as the start of her journal-- way to recycle all those books you are clearing out since the big clean you did while being at home!

If you are anything like me- you have many notebooks- but being able to make your own is great.  You can make a notebook that suits your style and needs!  I will be trying this again.

Have you ever made a book?  Are you a book binder?  Any tips to share?


Sunday, 20 April 2014

Indoor Gardening: Window Herb Garden


Spring may actually be here.  We will see.  But for now, the sun is making me happier than I have been for a while.  A bright day can even make me productive! 

I've had an idea that I wanted a herb garden in the kitchen for a while since we have that nice big window in there-- but no ledge.  I have found a lot of inspiration online for ideas to add plants to a space where there is none.  The most inspiring and inventive DIY solution I found came from A Beautiful Mess (of course),  but I don't have a workshop, or all those great tool to work with.  Plus, it wasn't really what I wanted.  I wanted to make sure that I could have different types of herbs, which is difficult if they have to share a planter.  So I needed something that would separate the plants. 

On a wander through Ikea (my favorite place!) I saw these great hanging planters, and thought of a new plan for my hanging herb garden.  These pots are the perfect size for the herb plants they sell at my local grocery store, so I bought 3 and planned my herb garden for my kitchen window.

Want your own hanging herb garden?  Here's what I used:

Shopping List

3 SKURAR Hanging planter pots from Ikea- $4.99 ea ($15.00)
3 herb plants, I found mine at my grocery for $2.99 ea ($9.00)
3 plastic planting pots, because my herbs came in biodegradable pots- 1.00/ 6pk
3 hooks, I bought a package of 6 white vinyl coated hooks so that they would be inconspicuous- 1.00/ 6pk


I love how they look in our very small kitchen.  It makes it much more alive!  Here's what I learned while hanging and planting our herbs:
  • I shortened 2 of the pots chains by removing 11 links from each chain.  To do this I used some needle nose pliers and twisted the 11th link.  
  • If your plants have biodegradable pots, you will need a plastic pot to put them in, or else once the pot breaks down, your plant will be sitting on the bottom of the planter, and there will be no room for drainage. If you don't have plant pots, you can re use yogurt containers with some holes in the bottom.
  • Use hooks instead of nails, it provides space between the plant and the window for blinds or drapes.
  • Herbs need direct sunlight, so make sure you hang them in a sunny window.  Our windows face west, so we get late afternoon sun.
D and I finished this in just under an hour.  And it made me so much happier!  I'm not sure if I'm going to shorten the chains some more that that they are all the same length, and sit in the top half of the window.  We'll see how they grow like this.  Do you live in an apartment?  How do you fulfill your gardener's itch? 


Monday, 27 January 2014

Warm Knitted Mittens on a Snow Day


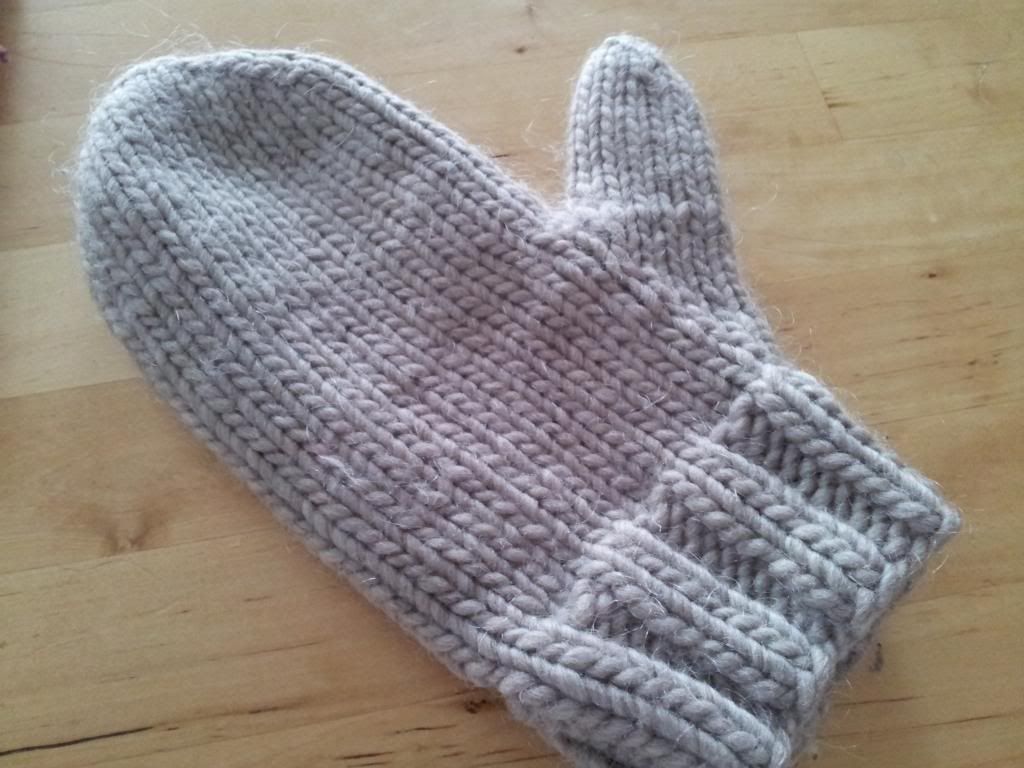
Today was a snow day.  So I sat with some coffee, and knit.  Mittens of course!  There's nothing I love more in the winter than my hand knitted mittens.  They are the only things I wear.  I have even managed to get D on the knitted mitten train.  I made him a pair a few years ago and he loved them.  But this year, he managed to get a hole in the thumb.  So he asked me to make him a new pair.  I've been making these mitts for so long, I don't know where I got the pattern originally.  I thought this time, I would write down the pattern I use so that I had it, and to share with you!  (If you knit that is..)


This pattern uses a bulky yarn.  I usually use Lamb's Pride Bulky for my mittens.  Its soft and dense, and my mitts always turn out perfectly when I make them.  The red and purple mittens above are made with a lighter weight of yarn (Manos de Uruguay Classica) held 2 strands together. 

This pattern makes a nice thick mitten.  Like the kind you would need in Canada (which is where I live.)  Here's what you need:

Materials:
1 skein Lamb's Pride Bulky, or other bulky weight yarn
1 set of 5 Double Point needles US size 9
2 stitch markers in different colors
yarn needle for weaving in the ends

Gauge:
4 sts/ 1 inch

Instructions:
Cast on 32 stitches onto 4 double-pointed needles. Join to work in the round. Mark the beginning of the round with one of the stitch markers.  Begin knitting in 2x2 rib. Continue 2x2 rib for 10 rounds or 2 inches.

Decrease round: begin stockinette stitch and K2tog, K to end of needle, on next needle K to last 2 stitches, SSK, on third needle, K2tog, K to end of needle, on fourth needle, K to last 2 stitches, SSK. You should have 28 sts on your needles.

Increase for thumb gusset: K14, M1, place marker (NOTE: not really necessary, I put one here because it helps me remember the number of increases,) K1, M1, K to end of round. Increase one stitch before the first increased stitch and after the last increased stitch every 3rd row, 4 more times. By the end of this round, you should have 38 sts.

Next row: K14, place next 12 stitches on scrap piece of yarn or a stitch holder. Cast on two new stitches over gap (I use backward loop method) and continue to knit to end of round.You should have 30 sts in the round.

Continue knitting hand portion of mitten until it reaches tip of little finger.

Start decreasing for the top of the mitten: 
First round: K2tog, knit to the end of the needle, on the next needle K to the last 2 stitches and SSK, on the thirds needle K2tog, k to the end of the needle, on the last needle, K to the last 2 stitches, SSK.  
Knit one round even.  Repeat the last 2 rounds until there are 2 stitches on each needle.  Take the yarn needle and pull yarn through the remaining stitches.  Weave in ends.

Thumb:
Pick up the 12 stitches for the thumb and put them on 3 needles, 4 stitches on each needle.  K one round and at the end of the round pick up 1 or 2 stitches over the gap.  Close the gap to complete the round.  K in the round until long enough for your thumb to just poke out the top.  K2tog, K1 to the end of the round.  K one round even.  K2tog to the end of the round.  Pull yarn through the remaining stitches.  Weave in ends.


These mitts are really quick to make up.  I finished the first one in about 2 hours.  I like them because they are quick and really warm.  If you make a pair, will you let me know?  I would love to see your mittens.


Friday, 11 October 2013

Cross-stitch Sentiment Art- Sentitmenart? Sartiments? Help me think of something here...


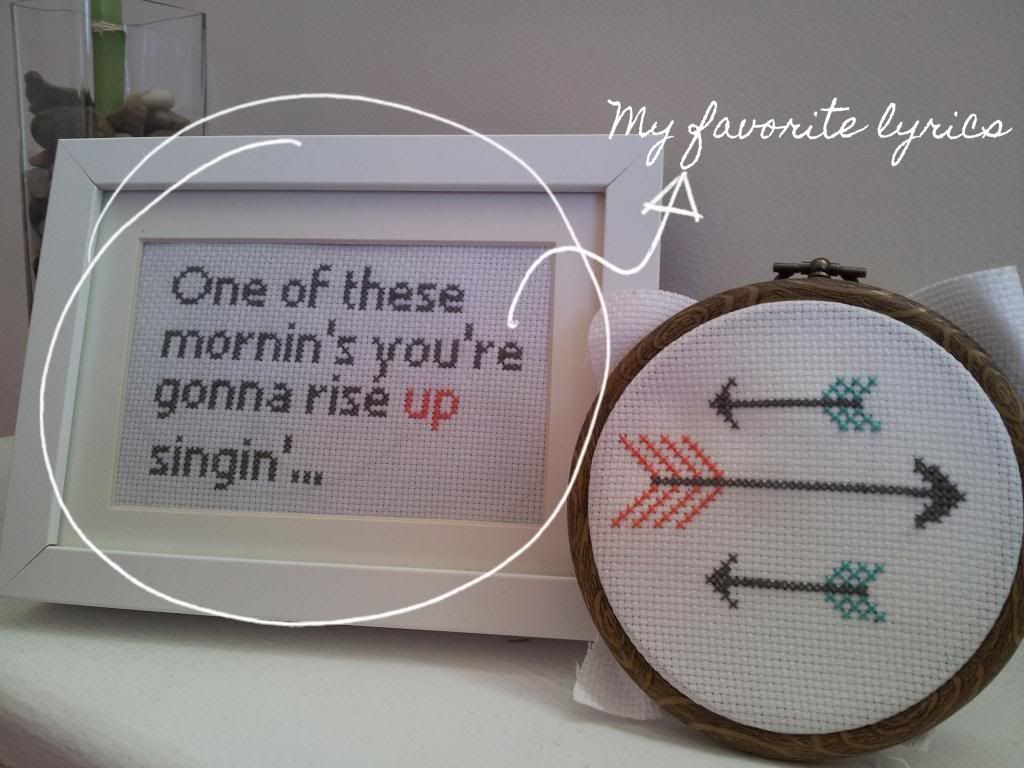
One this I've been doing a lot of lately is cross stitching.  I really like it.  Its relaxing; and its really versatile.  One thing I really love stitching is quotations.  I made these little things while watching TV.  It was really to put one of these together.  Pretty inexpensive too!  If you want to try and make your own, but have no idea how to cross stitch, I would have a look at this site. It even has pictures! 

To make my quotations, I used 16 count fabric (makes the letters a little bigger), a size 5 sharp needle, and 2 of the 6 strands in a length of embroidery floss.

The other super helpful site was this one, the Cross Stitch Writing Tool.  All you have to do is type in your words, and it will chart out the letters for you!  You can save the file as a PDF or print it out!  I typed in my words, and chose a font, and I was ready to start stitching!

The arrows I just made up.  But there are thousands of free cross stitch patterns of arrows out there.  Just use a little imagination, and sew it up!

But seriously.  I'm really into the trend of running two words together that have no business jammed up against each other.  Frenemy?  Love it.  So, in that tradition, what should this be called?  Sentitment-artity?  Cross- stitchitments?


Wednesday, 9 October 2013

DIY: Pumkin Spice Latte (Its ok that I spelled it wrong, I probably made it wrong.)


I'm back!  Since I took such a long break, I thought I would apologize with this peace offering on how to make your own addicting beverage.

I know so many people that are addicted to the Pumpkin Spice Latte from Starbucks.  And that's cool.  I used to love them!  But lately, I've noticed that they have been making my sick; and my tummy can't handle too much of a beating anymore.

Also, for those who know me, I am incredibly cheap when it comes to spending money on things I'm pretty sure I can make myself.  For a fraction of the cost.  And its probably way healthier for me.  And tastes better.

ANYWAYS, I was searching for people that have tried to make the PSL for themselves, and they had some great ideas!  But they seemed really time consuming for a cup of coffee.   

That's the pleasure of SBux, you don't have to do anything but hand over that money!  So here is a "latte" that is easy, fast, and cheap.


Steph's Pumkin Spice Latte (Its ok that I spelled it wrong, I probably made it wrong.)

Ingredients:

1-2 tbsp honey (or you could use less agave syrup)
A mixture of cinnamon, ground clove and nutmeg that equals 1/4 tsp
About 1 cup of Soy milk, or any kind of milk
3/4 cup of strong coffee

Method:


Mix the honey (syrup) and spices together well.  Set aside while you assemble the rest of the team.

For the coffee part, I use my Keurig brewer.  (See I told you I wanted fast!)  To brew your coffee this way, use a dark roast (bold) coffee.  Brew one up using only 6 oz. of water.  That will make a nice strong cup for you latte.


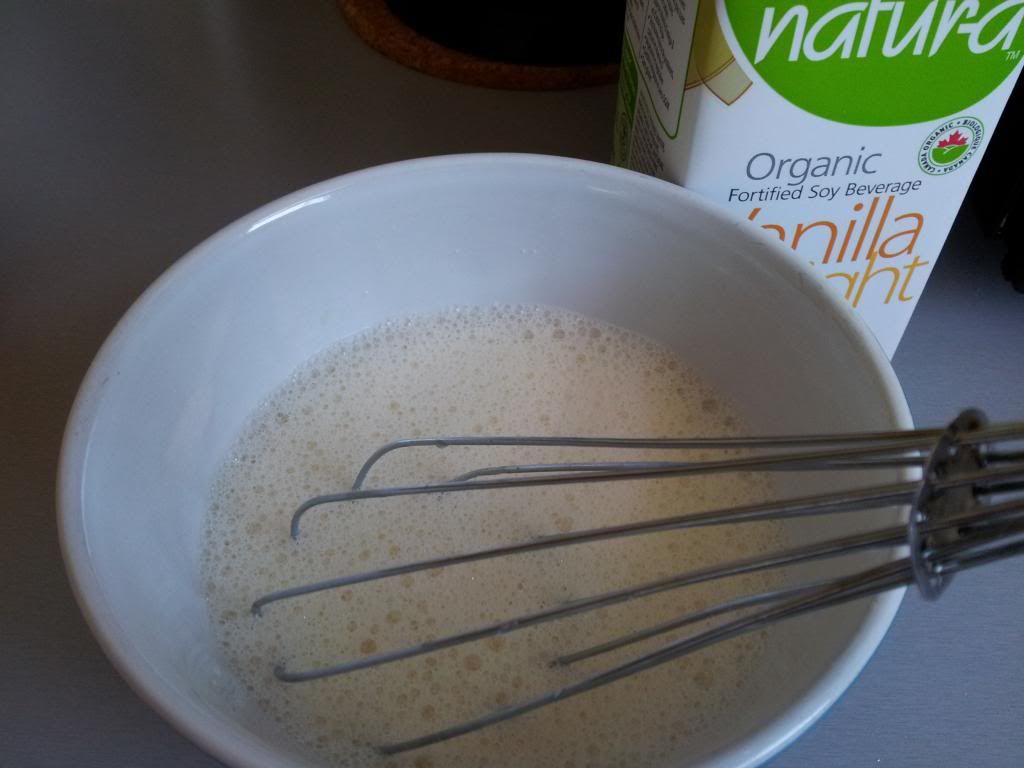
For the milk part, pour your milk into a high walled bowl.  With a whisk, beat it until its frothy.  About 30 seconds.  Put the milk in the microwave for 30 seconds (until hot.) Take it out, give it another quick whisking, and assemble the knockoff latte:

Add 1-2 tsbp of honey to your cup, pour the hot coffee over the syrup and mix well.
Then pour the foamy milk into the coffee, and spoon some foam on top.

You could sprinkle some cinnamon on top if you are obsessed with making it look legit.  But then drink it immediately, because you've wasted enough time.

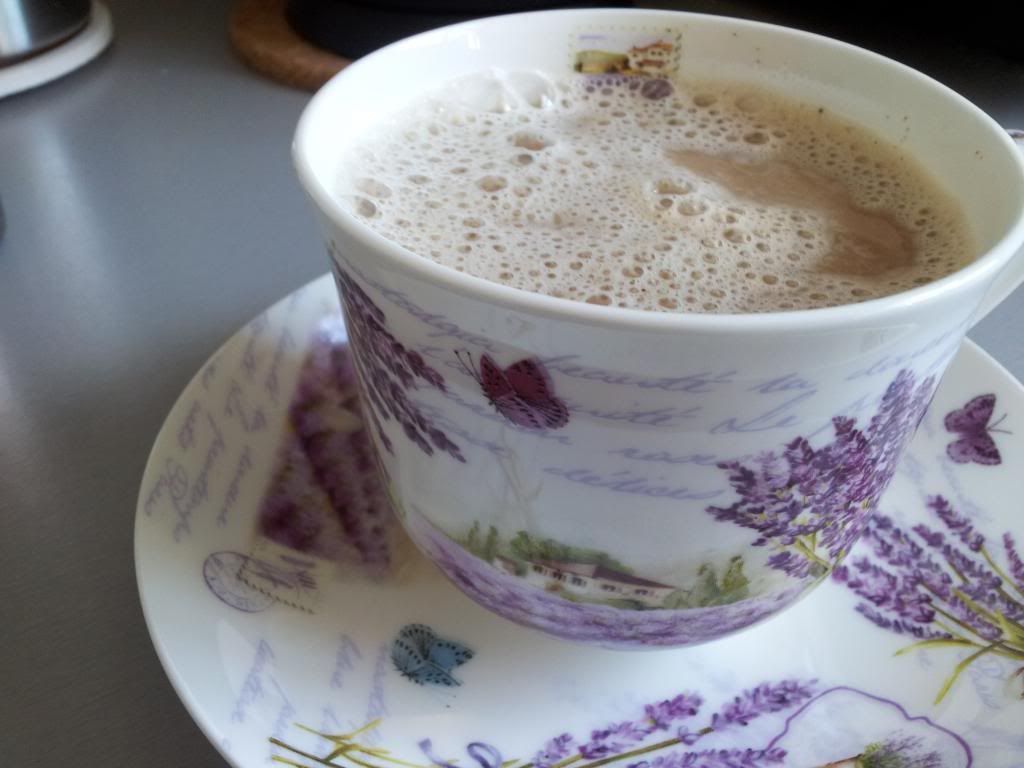
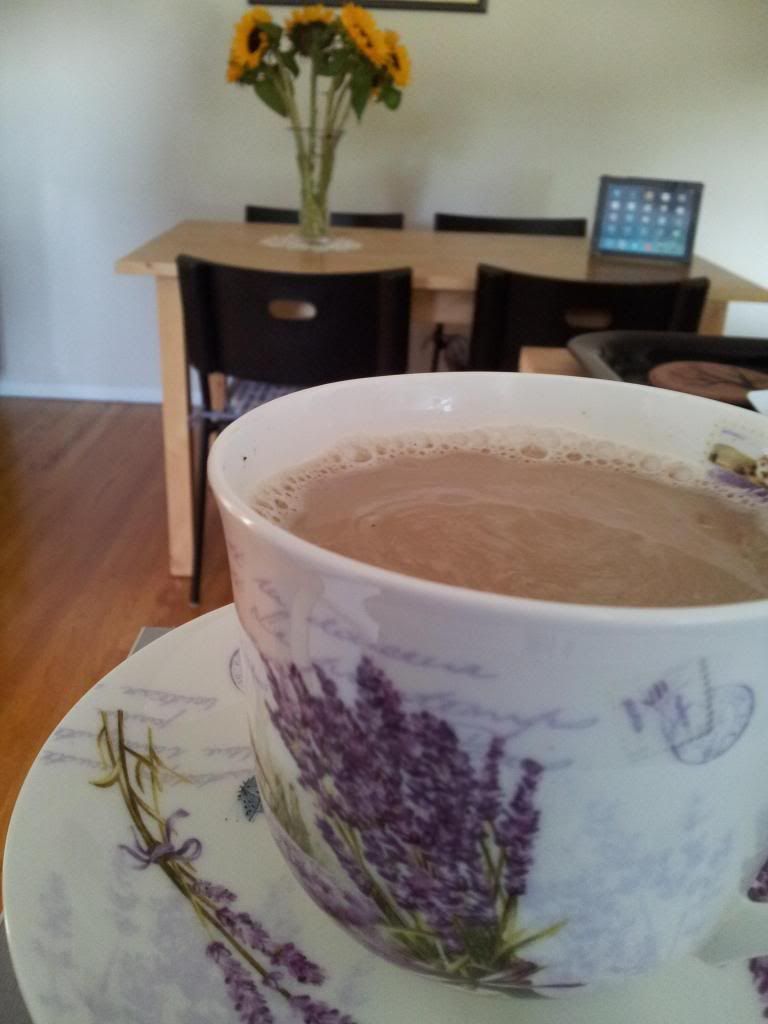
Or wait, and try to get some artsy pictures of it until the foam is gone:


Either way its delicious.  And I still have my 5 bucks.  And my Pumpkin Spice fix.  Enjoy!


Friday, 2 August 2013

Made: Bow Clutch (that I will probably use as a make-up case)


I used to be way into quilting.  But then I got the new career, and starting spending all my time on that.  I did use my sewing machine, but mostly for alterations for our clothing.  Not so much for fun.  When my old sewing machine broke, I didn't rush to replace it.  I missed sewing, but it was something I didn't have the time for.  Since I do all my sewing on our dining room table, it wasn't something I could start and leave for an undetermined amount of time.  I guess what I'm saying is I got lazy.  So once I finished my last quilt (for my gramma,) I didn't really do it so much.

For Christmas, D bought me a new sewing machine.  

And this summer, I finally found the time to learn how to use it.  There are a few differences with my machine.  I have come to know my old machine as a training machine.  Thats why it was so easy to use.  This new machine has a bobbin case and stuff, which I have to tread and such.  Its a little harder than the old one.  But, this one has great tension, and metal parts!  Like a grown-up machine should!

So to learn how to use my machine, I made a little pouch for my small knitting projects.  It turned out cute.  I was quite proud of it.  But it was not impressive.

So I tried something a little harder.

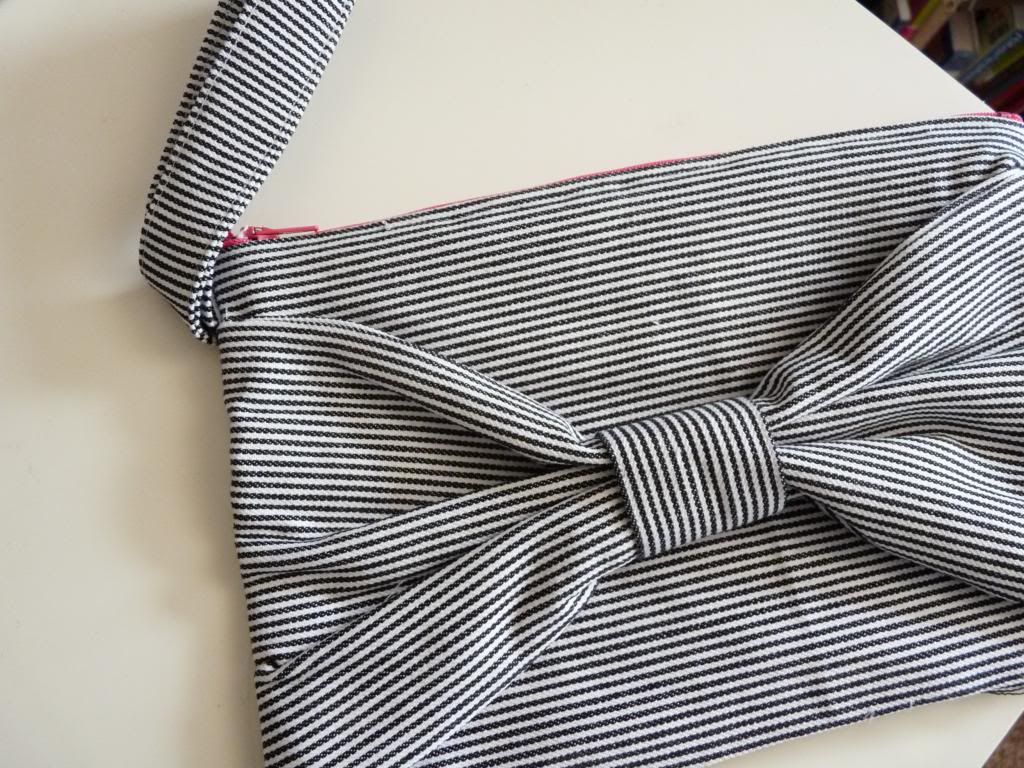
And I made this bow clutch:


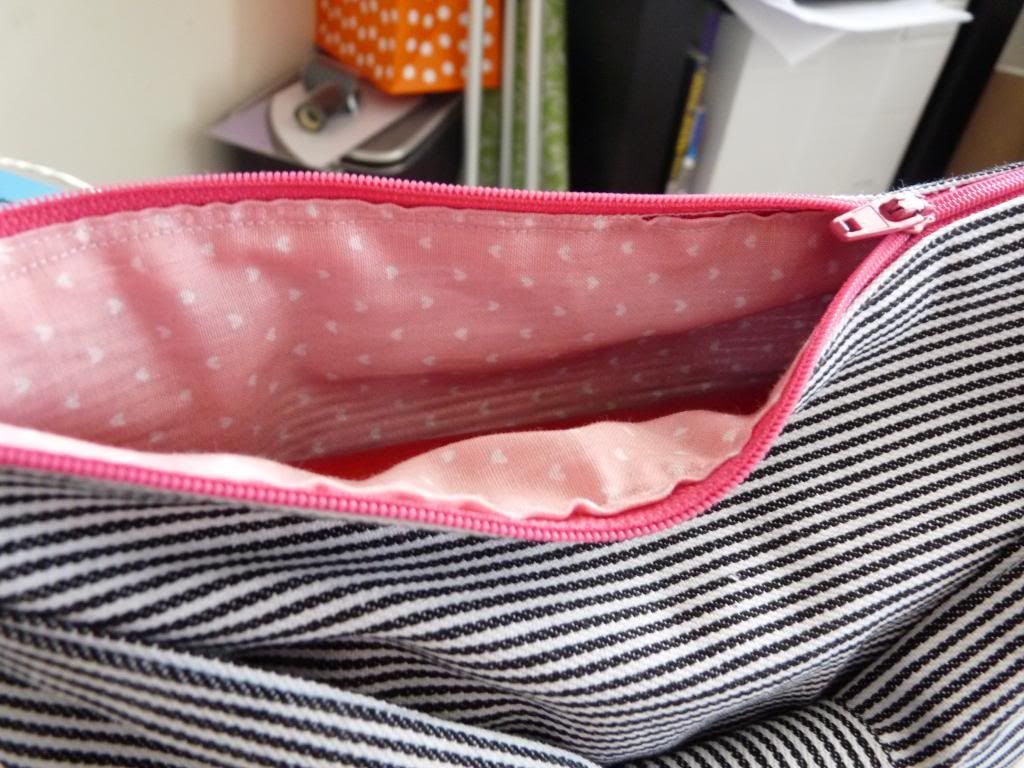
I love how it turned out.  I just used some fabric that I had laying around from the last time I was really into sewing.  I think it turned out really cute!  

But, I am not a clutch kind of girl.  I need to have my wallet and stuff strapped to my body, or else I will probably lose it.  At the very least, misplace it for a while.  So this clutch will probably turn into some sort of make-up case.  One that I carry around everyday, but in a bigger purse that I can strap to my body.  You know how it is.


If you happen to be a crafty-type and want to make one for yourself,  I used this tutorial from Elm Street Life's blog.  It was so clear, and very helpful.  She outlines every step of making the clutch, with pictures!  Having written my own sewing tutorial, I know how time consuming it is to write one that is helpful.  So if you use it, make sure you tell her how awesome her tutorial is.  

Have you tried sewing anything lately?  Do you sew?  
 

Monday, 29 July 2013

DIY Stationary Cards


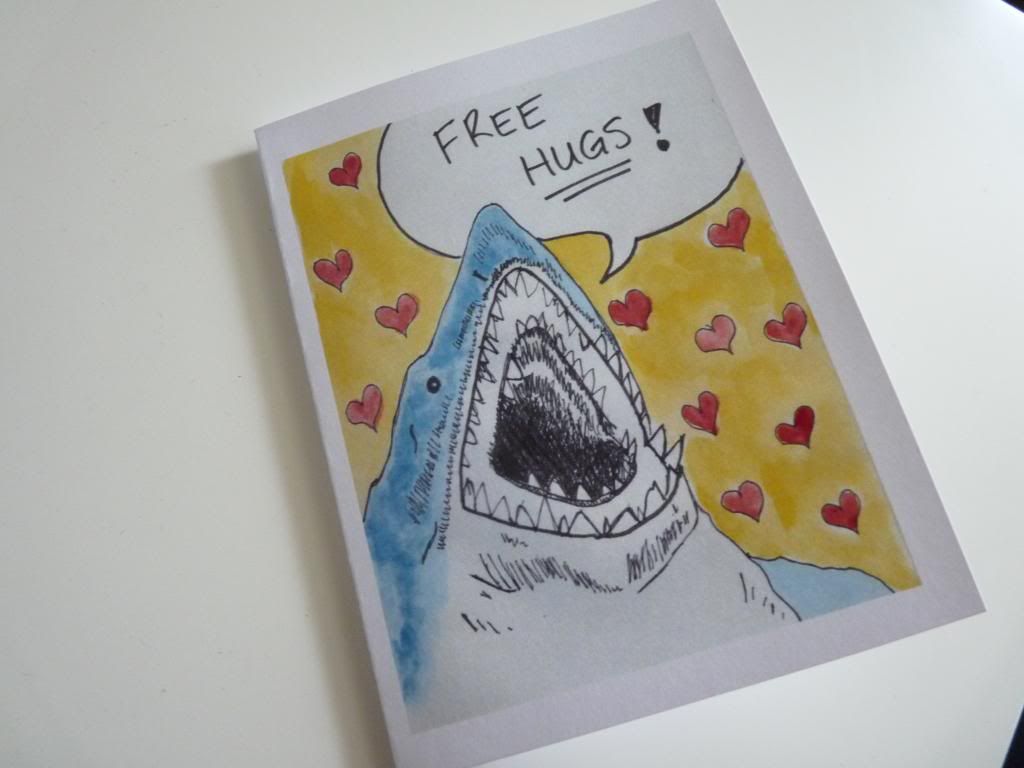
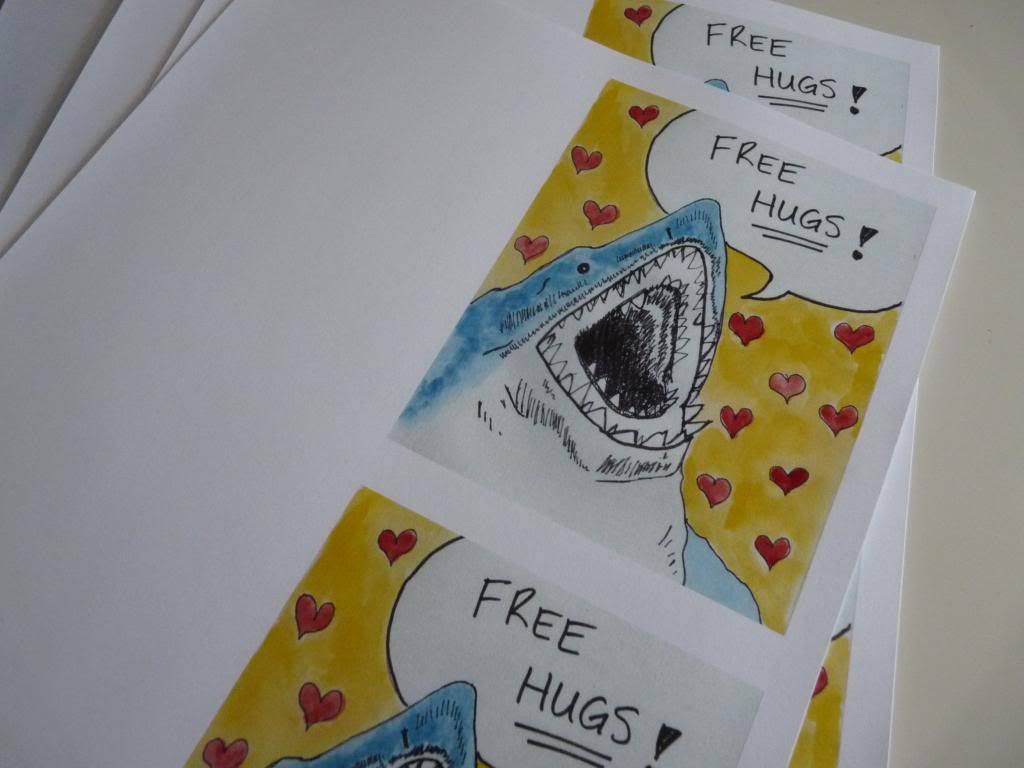
I love note cards.  I buy them a lot.  I like giving little notes to say "thank you," or "what's up?"   I wanted to create little note cards that are more personal; and original.  When I showed people the little shark drawing, they got a kick out of it too.  So, I thought it would be fun to have it on a little card, you know, to send as a pick-me-up to my friends when they needed it.

I would love to be able to make the note cards from scratch when I need them, but that is not always feasible for me because I get so busy.  So I took the picture, and created this little card.  It was super easy-- and really not expensive.


I printed them out on card stock, and cut and folded!  And that's it.  New note cards to give to friends.


Do you buy or make your cards? 


Tuesday, 16 July 2013

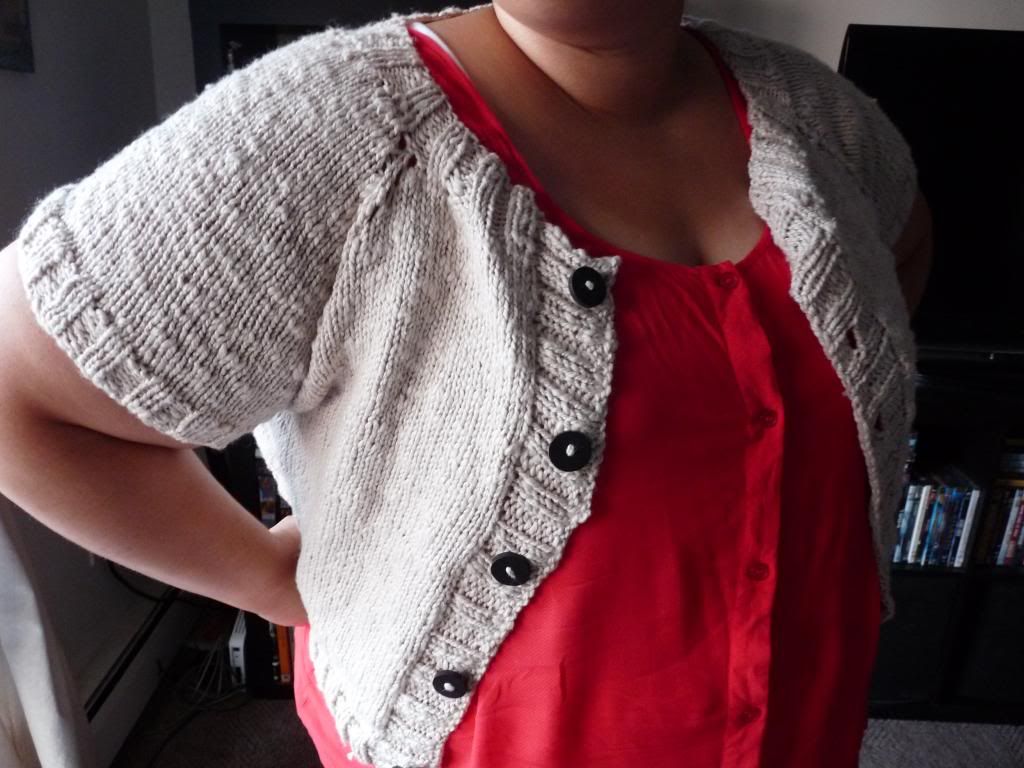
Made: Cotton Cropped Cardigan (Try and say that 3 times fast)


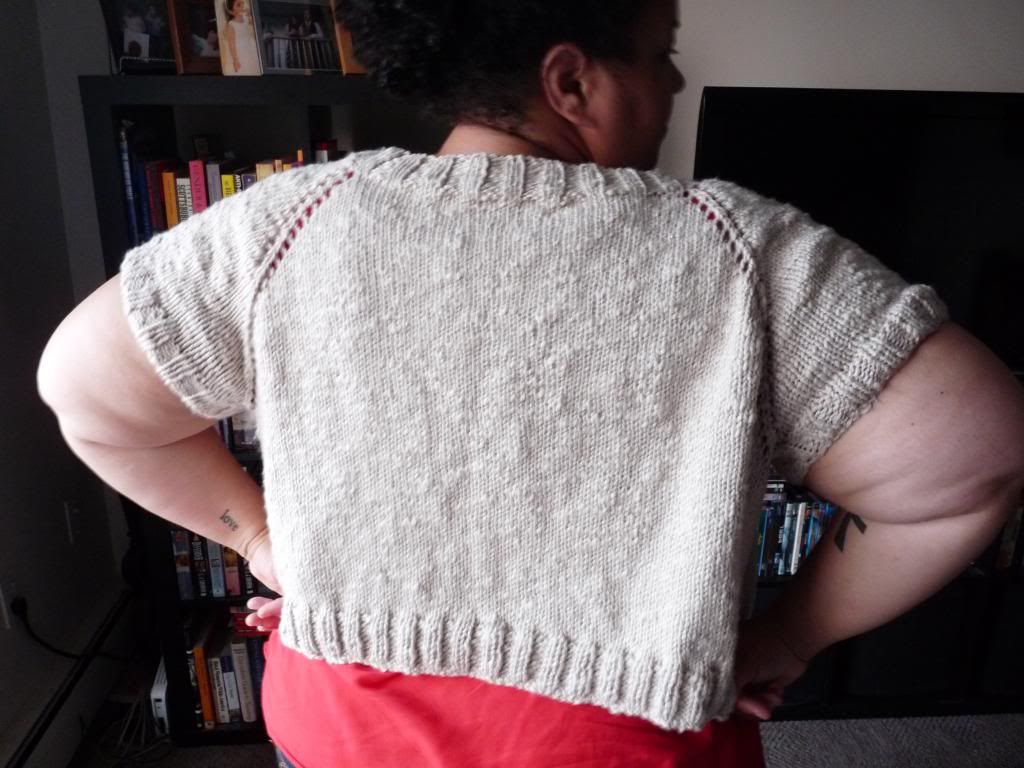
Even though I have been a somewhat absent blogger, I have been doing other things.  I've been having a crisis about my blog lately (more on that later), but I'm pretty proud of the sweater I just made, so I thought I would share.

I stopped knitting for a while, and then my friend opened a yarn boutique.  With her shop came more incentive to knit on!  The yarn for this project was one of the first things I bought there.  I finished it in under 2 months, which is pretty fast for me.  I wanted something light, that I could throw on at night in the summer.  So I decided to make something in cotton, and voila!


Its pretty warm, even though it is cotton.  I couldn't wear it around here right now since its so hot.  It figures that as soon as I finish a summer cover-up, it swelters.  It will cool down, I hope, so that I can wear it.


For those of you interested in such things, here are the specifications:

Pattern:  I made it up, but here is one that is similar for free at the Lion Brand Yarn website
Size: My size.  I tried it on as I went, so no measurement or numbers were needed.
Yarn: Mirasol Hap'i cotton (discontinued), 5 skeins in color "Natural"
Needles: US 9 circs
Time to Complete: About 1 1/2 months, but I only worked on it once a week.


P.S.  I have been thinking about the Trayvon Martin case, and I will have something to post on that coming up.  Right now, I'm still really sad about the whole deal. 

Sunday, 10 February 2013

Made: DIY Bow Headband

 
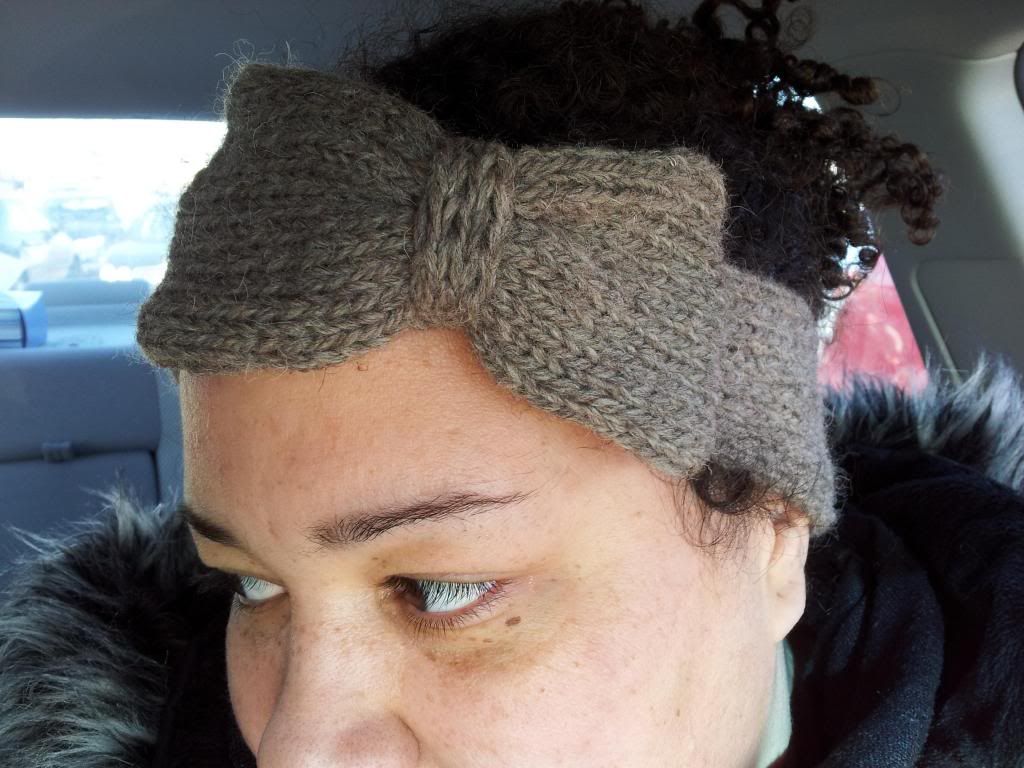
Its finally been cold here!  So, it was time for me to get my knitting needles out and whip up a headband for my ears!  I don't like wearing hats at school because I don't want to mess up my already frizzy hair.  And, its really difficult to find hats that a) fit over my afro; and b) don't cause my hair to become a frizzy mess after I take it off.  So, headbands are a total lifesaver for me here.  

I looked around for a pattern that I liked, and none of them were exactly what I liked.  So, I used this headband pattern, and made up my own bow pattern.  Which I will share with you right now:

 
Knitted bow pattern:

Materials:
Less than 100 yds of worsted weight yarn ( I used some alpaca/wool I got from a farm around here)
US size 8 (5 mm) knitting needles
Yarn needle for putting it all together 

Part 1: The Bow
CO 17 sts.
Knit in st st for 7 inches (18 cm) then cast off.  You will have a rectangle, with the sides curling inwards.  You totally want this.

Part 2: The tie
CO 6 sts.  This is the middle part of the bow.
Row 1: K1, P1, K1, P1, K1 P1.
Row 2: Same as row 1.
Continue in pattern until you have completed 8 rows.  
Cast off. This will be a tiny ribbed rectangle.

Putting it together:
Take the bow (part 1) and sew the ends together into a tube.  Fold the tube in half with the seam in the back center.

Pinch the middle of the tube into a bow shape, and wrap the tiny ribbed rectangle (part 2) around the middle of your bow.  Sew the tie in place, and secure with a couple stitches into the bow.  

Attach to your headband, and style that thing!


Saturday, 1 December 2012

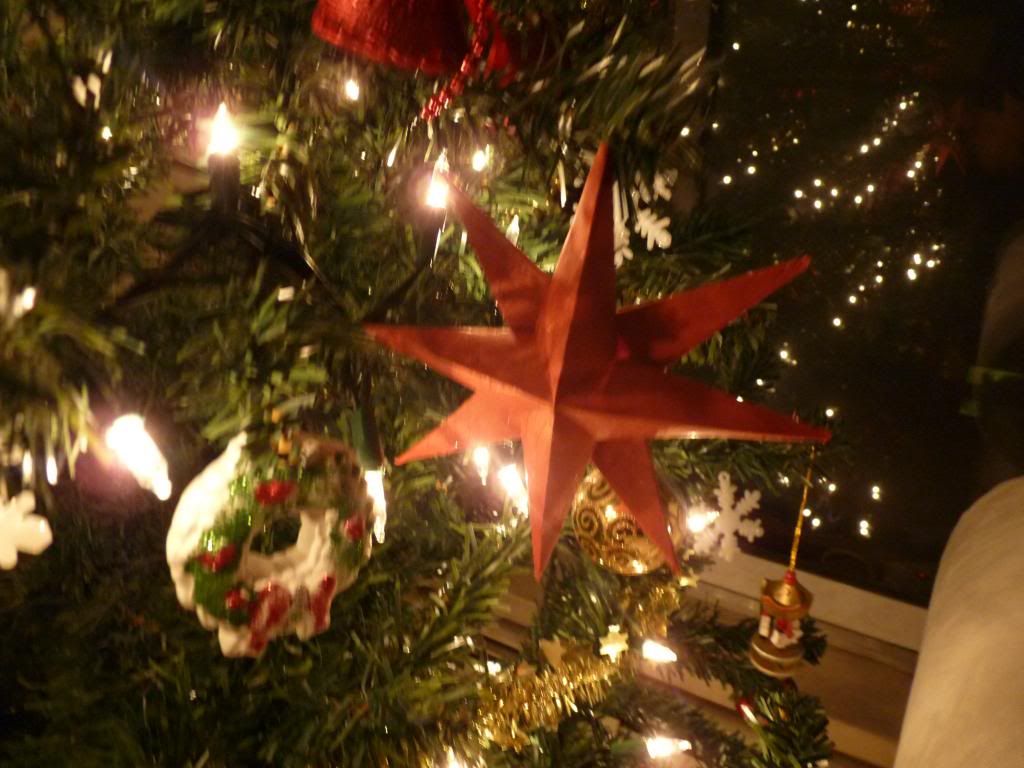
12 posts of Christmas: DIY Star Ornaments


Dude.  I love Christmas.  I'm not talking about the religious aspect of the holiday, I'm not into that part.  I'm into the gift-giving, meal-making, goodie-baking, fun-spirited aspect of the holiday.  So, in honor of the holiday season, I'm going to have 12 posts dedicated to the things I love about Christmas. 
 

I love my tree.  Every year, D and I have an argument about what colors we are going to decorate the tree in.  He likes multi-colored lights and tinsel; essentially he likes it if the tree looks like a carnival threw up on it.  Each year I lobby for something a little classier.  Up until this year, I lost the battle.  It was fine though, I like decorating the tree and having it up, so it didn't really matter what it looked like to me.

But this year... D reminded me that we made a deal; if we did the tree how he liked it last year, he would let me choose the colors this year.  So I went for the classy white-lighted, red and gold decorated tree.  And it looks so nice!  There was one small problem, we didn't have that many red and gold ornaments.  We had tons of balls, but not anything else.

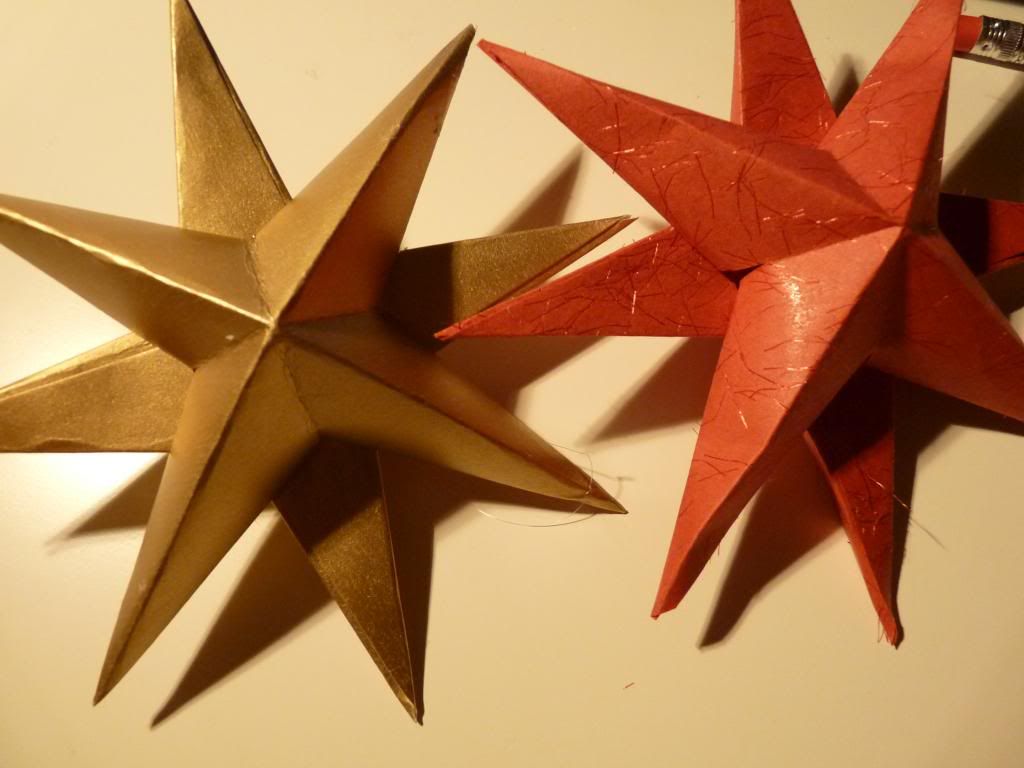
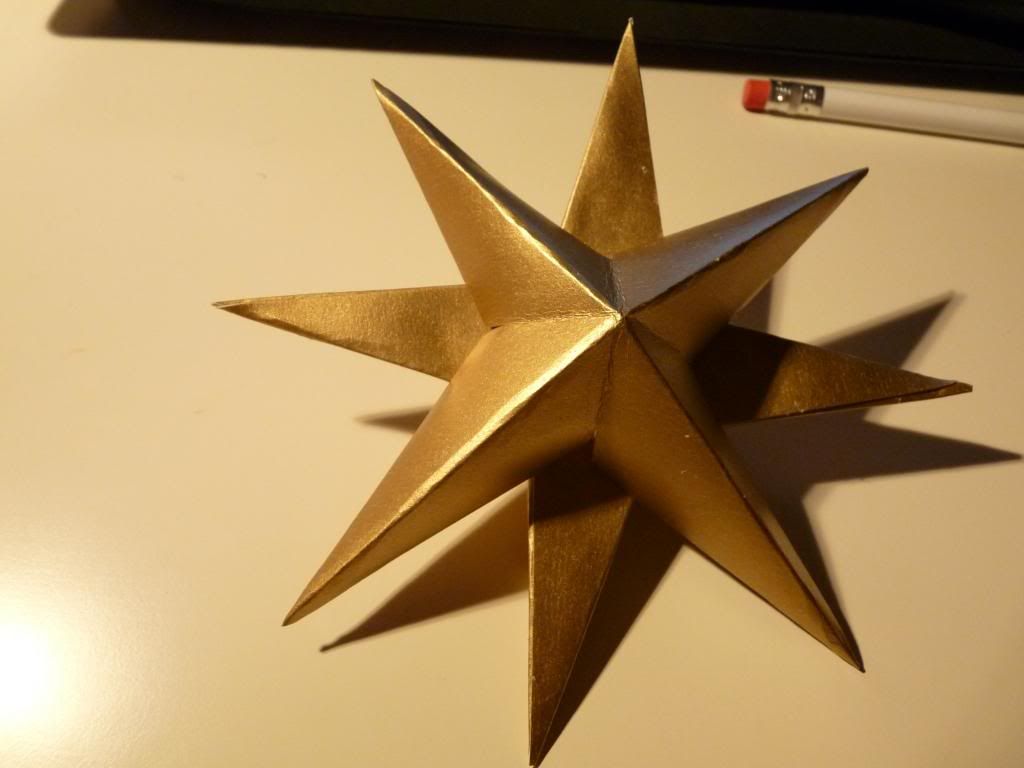
Well, thank goodness I'm crafty y'all.  I made most of the ornaments on the tree.  These ones are my favorites though.  They are fast, cheap and you can make them in any size and color you want.

And who doesn't love a tree full of stars?


These paper stars are great.  They are light, and pretty easy to make.  They are really fast too, so you can make 10 of them in no time. 

Materials:

Fancy paper (one sided is fine)- cut into 4 inches square. 
Scissors
Glue, I used white glue
Ruler
Pencil
Folder if you are using card stock

How to:


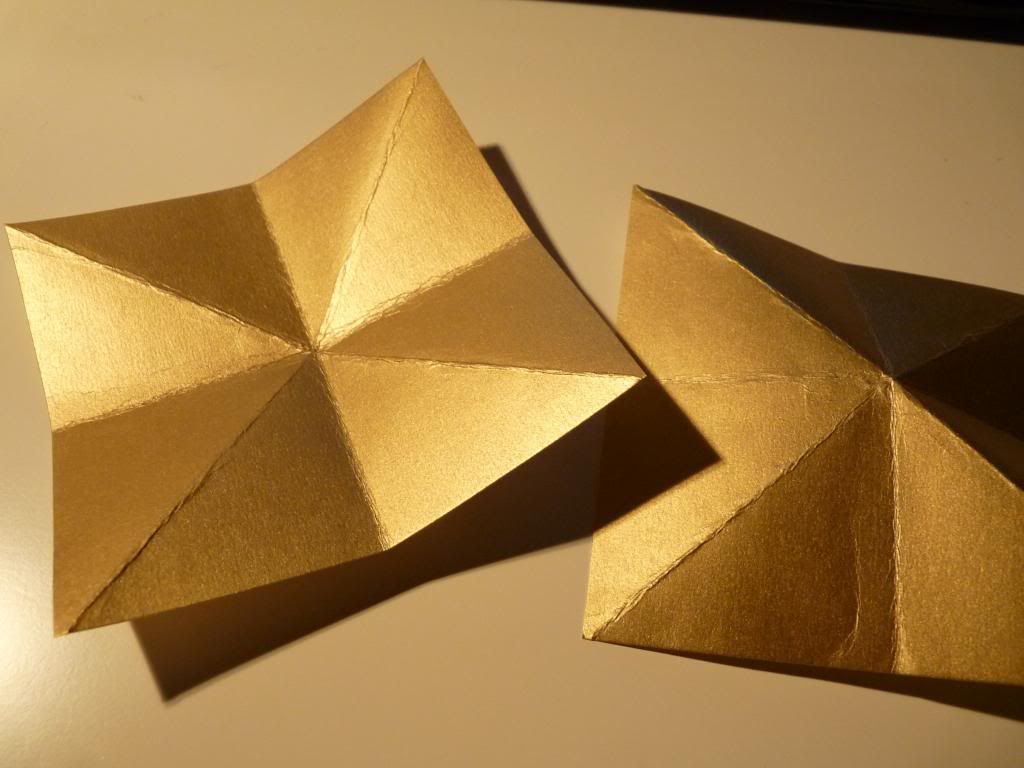
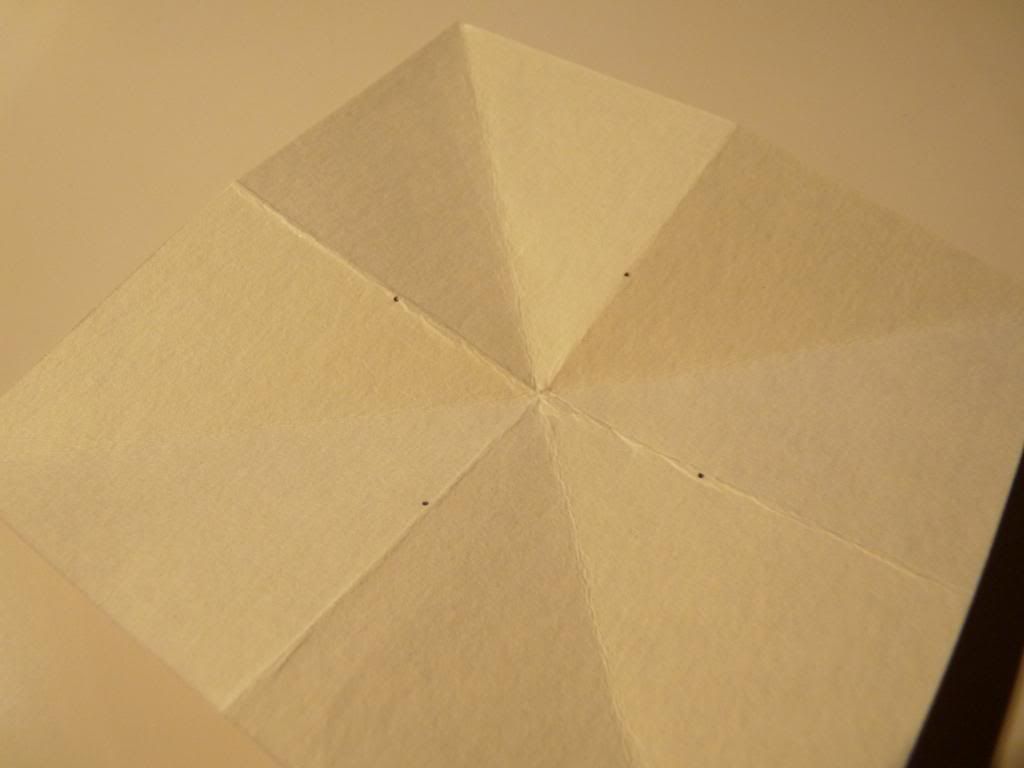
Turn your paper over (right side down) and fold your paper in half diagonally.  With the decorated side of the paper facing up, fold in half length-wise and width-wise. 


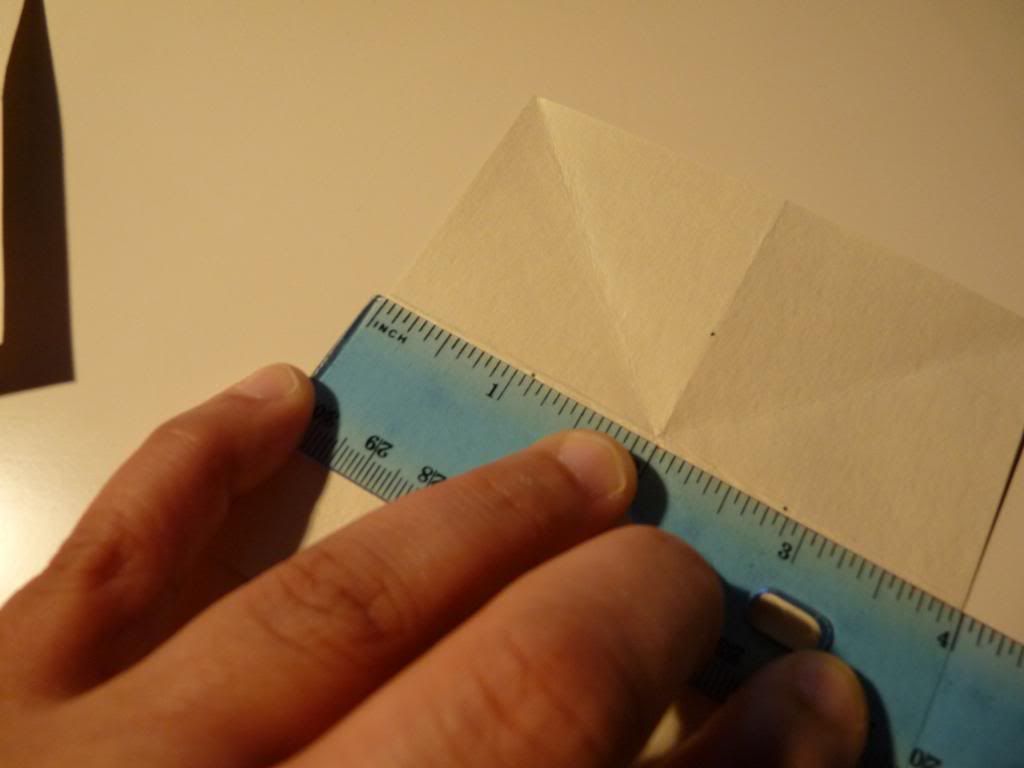
Turn the paper over again (right-side down) and mark just over an inch on the non diagonal seams that you folded.


Mark the same distance from the edge, all around your paper.


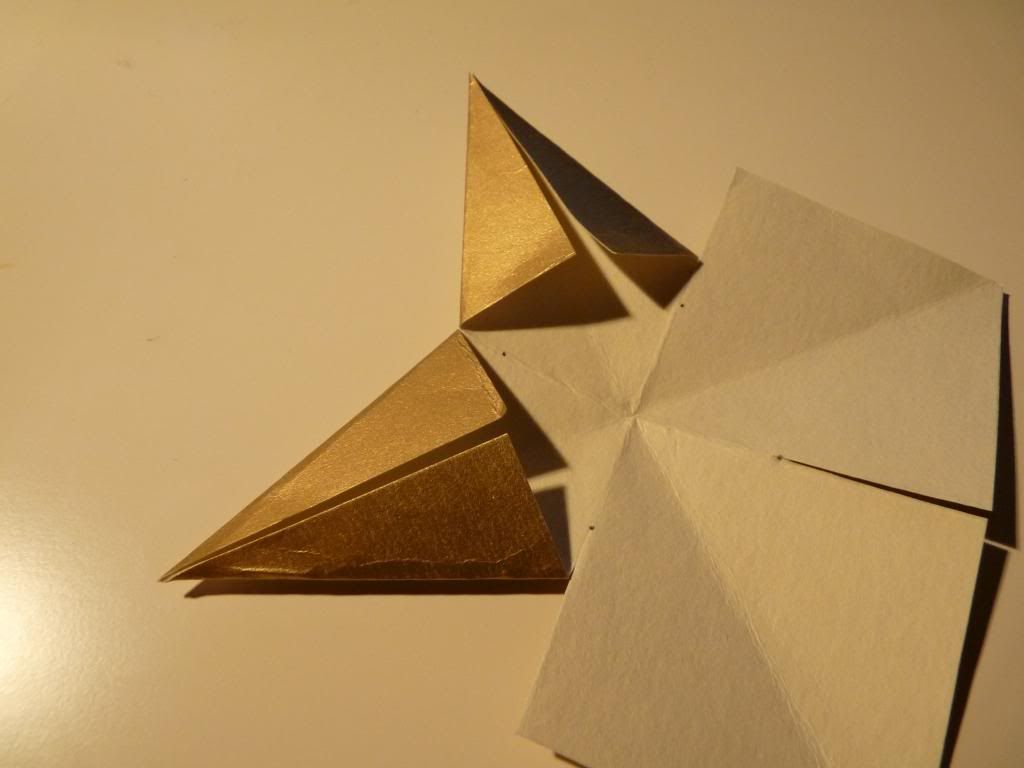
Cut along the seams to the point you marked.  You should have four cuts in your paper.  Fold the corners in towards the diagonal folds.  Do this for all four corners.  On ever other triangle, put some glue on, and over lap the triangles to create the points.  While you are waiting for it to dry, repeat these steps again to make the other half.


 Glue the halves together back-to-back to create an 8 pointed star!  Let it dry.

To hang the stars, I used a needle and some invisible thread and poked a hole in one of the points.  Ready to hang, and perfectly matched for my tree. 

I also made a bunch to hang off of gifts and stuff.  I've made these before, but larger and hung them from a window.  They are a pretty handy craft!

I'm thinking or crocheting some snowflakes or something...  What kind of ornaments have you made for your tree?


Saturday, 24 November 2012

Dirty Hippie DIY: Cure for the Common Cold


'Tis the season for coughs due to colds.  And a doozy of a cold has been going around my workplace.  I think I've caught it (or a mutated version of it) 3 times.  I think I'm starting on number four now.

But I don't like taking all sorts of chemically stuff when I'm at home and I can rest away my illness.  So I go the good old fashioned route and sleep and drink gallons of tea.  I have a special recipe for a mixture I drink in hot water-- it always makes my stomach feel better, and it usually soothes my throat.  And the hot water helps my stuffy nose.  And, it tastes good.  AND, there are no chemicals in it. 

There is no name for it.  I call it the "tea jar" in our house.  There are a few different versions that I've used, but this is my favorite.  You can make your own "tea jar" with 3 ingredients:

1/2 cup of honey
2 inch piece of ginger root
1 lemon

That's all you need for some soothing tea.


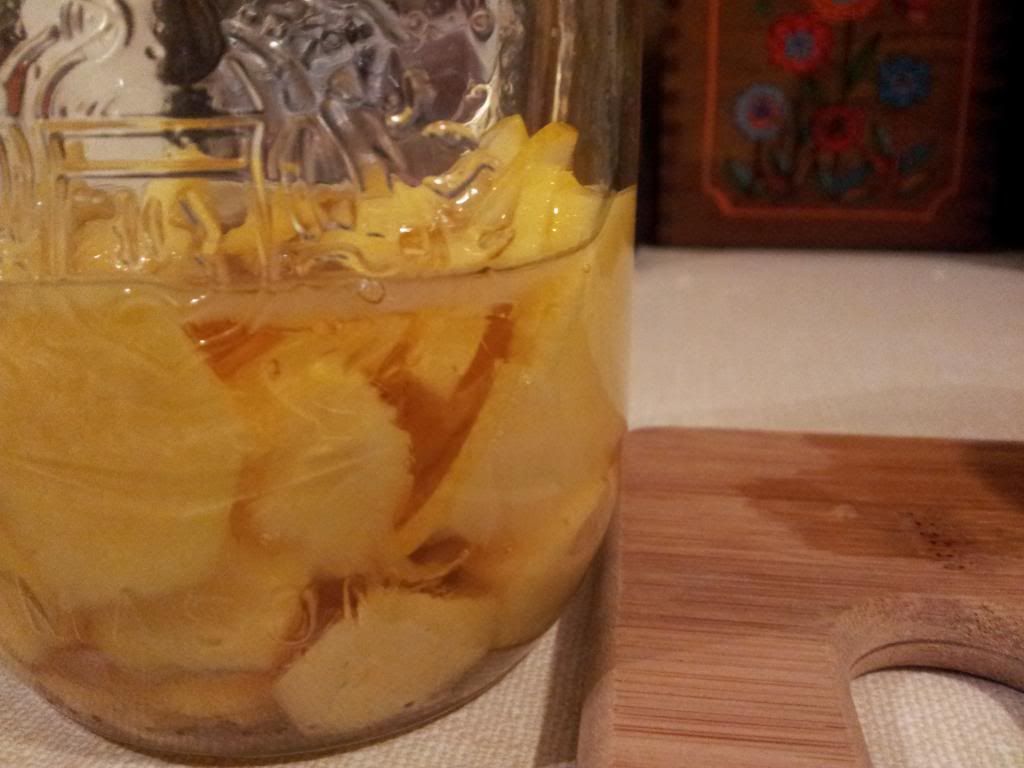
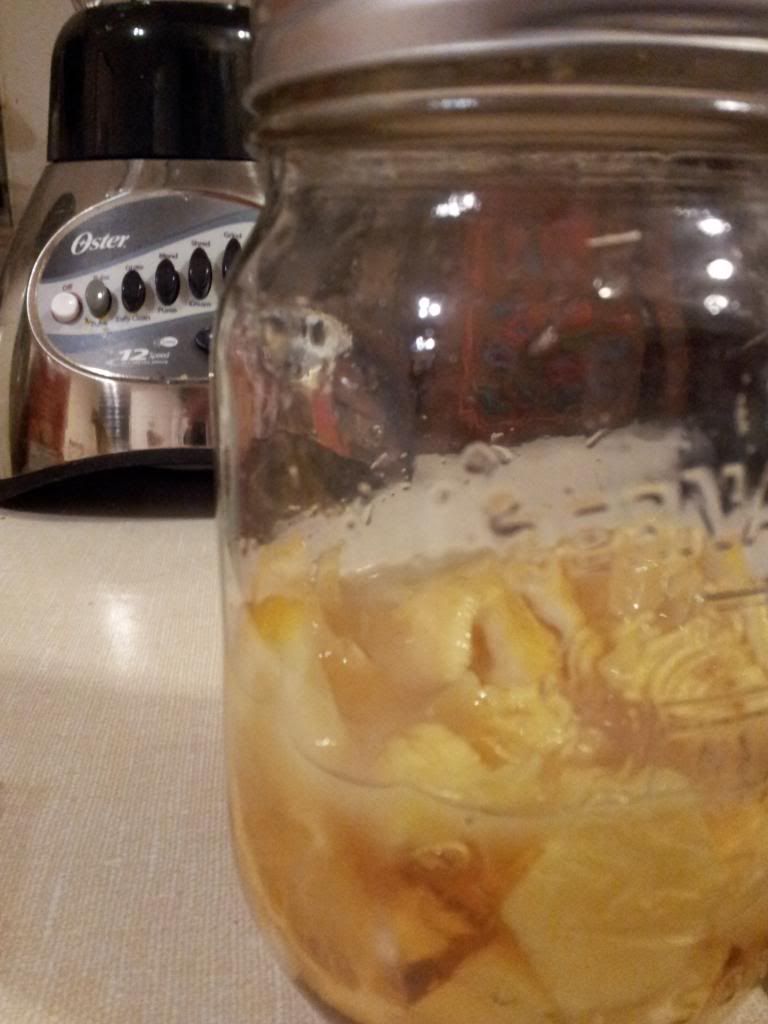
Peel the ginger root and slice it really thin.  Wash the lemon, squeeze some of the juice from the lemon into the jar and then slice it really thin.  Put the lemon and ginger in a mason jar, and shake it to distribute it in the jar evenly.  Pour the honey over the whole thing, and seal the jar.  Store it in the fridge.

You could probably use it right away, but it is better if you wait.  I usually wait over night, but a couple of hours is okay too. 


To use it, boil some water, and put a heaping teaspoon of the honey in your mug.  Pour the hot water over it, and sip. 

I think I'll go make some now, I feel an itch in my throat...


Friday, 24 August 2012

Made: Paint Chip Matchbook Notebook


I am always looking for a piece of paper or my notebook to jot something down.  I have a lot of ideas for blogging and such when I'm out on the open road.  But I don't carry my usual notebook everywhere because it is much too big and heavy.  So, I made these little notebooks out of some paint chips I had laying around.  I can throw them into my bag, no matter how small, and I always have somewhere to write ideas.  They are very handy, and super easy to make. 


What you need:
  • paint chip- I think these are from Walmart, they are for CIL brand paint, but any paint chips will do; it would just change the size and shape of your book.
  • Stapler
  • Paper, I used scrap paper
  • scissors- I used a rotary cutter; it made things much easier.
  • ruler
  • clear tape (optional)
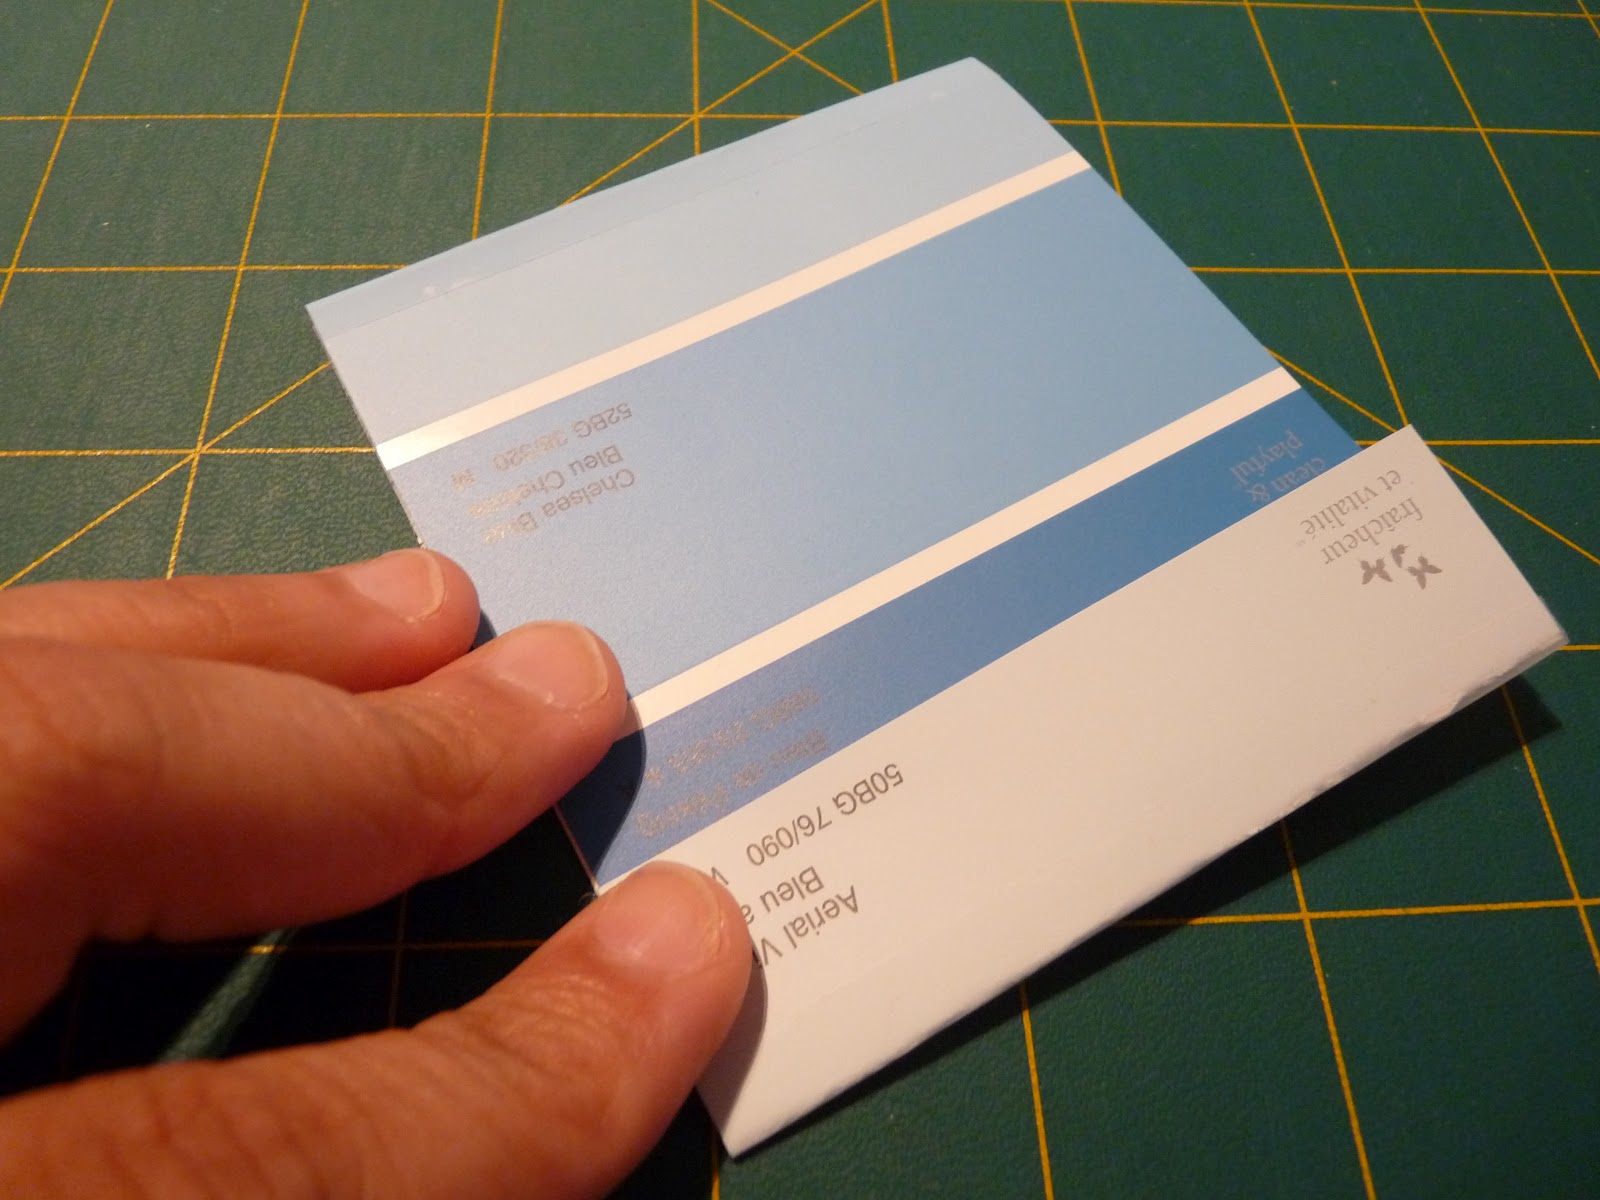
Fold your paint chip into three like a match book.  My dimensions were, 8.5 cm for the top section, 9.5 cm for the middle section and 2.5 cm for the flap.  I creased it well, and cover the fold with clear tape to reinforce them.  But that's totally optional.


Then it will look like a big matchbook.
 

Next, cut your paper the length and width minus a 1/2 cenitmeter of the entire paint chip.  You are going to fold the stack of paper in half to make the pages of your notebook.
 

I forgot to take a picture of the next part, but its easy.  Take the folded edge of your pages, and tuck them under the 2.5 cm flap.  Staple once or twice like a matchbook.  The fold should be under the flap so that you can flip the pages.


And there you have it!  A little notebook!


If you are anything like me, you made 6 and threw them in all of your bags.


What is your notebook solution?  Do you carry one?  Do you just grin and bear the extra weight?