Showing posts with label i heart handmade. Show all posts

Thursday, 29 July 2021

How I Make my Pink Lemonade Earrings


For my video this week, I decided to show the process of making some earrings that I sell on my site www.bassmakes.com.  It's not a tutorial per se, but it is how I go about making polymer clay slabs and cutting out earrings.  

I like these earrings for the summer- the bright lemons and the deep pink- they are really happy little dangles!  Super cute!  I didn't show how I made the lemon cane that I use in the slab, but I can do a video about that if anyone wants one.  

I was inspired by some scrapbooking paper I saw- I thought "THOSE HAVE TO BE EARRINGS!"  And that's how these happened.  

ANYWAYS, I hope you enjoy this relaxing video.  You'll hear my voice again next video.

Enjoy!


Sunday, 18 July 2021

A Concerned Bird on a Card


I like having cards for all types of occasions. Sometimes, things don't go one's way. If you're me, OFTEN, things don't go your way. So I needed more cards for friends that need a pick-me-up.  

2020-2021 is turning into the 2 years of needed "pick-me-ups," and I'm not prepared. How could you be prepared for a year, that if it was a person, you'd punch in the face? So, I've started making cards for event of the "Sorry, that happened. Totally sucks. Let's go eat a whole pizza" occasion.  I've never seen that header at the card store.

Here's one for someone who's received bad (but not tragic) news-- a sympathetic, and concerned, red bird done in watercolour style.

I made this card a while back. But I always remake it to keep it in stock. Here's the video I made for how to create this one:


Materials used: Stamps: Tim Holtz Crazy Birds and Crazy Talk, Simon Says Stamp Naughty Nautical Ink: Lawn Fawn Jet Black; Distress Ink in Pumice Stone Tombow Dual Brush Markers: Colors (Reds) 847, 885, (Brown) 977, (Yellow) 991, (Light Blue) 451 Paintbrushes: Royal & Langnickel Watercolour in sizes 12 and 6; Foam Tape Adhesive and Tape


Saturday, 26 December 2020

DIY Earring Display

My statement earring collection may be out of control...


You may or may not know, that I cut all my hair off.  Yep, I'm one of those girls who, in lockdown, decided to go for the big chop.  And since then, I've been obsessed with statement earrings.  So I started making them.  And then, selling them here.  

As a result, I've increased my earring collection immensely.  And they were sitting in a box.  Which was frustrating to find to wear.  So, I challenged myself to make an earring display out of what I have in my house.  I couldn't buy anything new to create this, and I think it turned out well for repurposed items. 

To make this display I used 2 small jute canvasses, a roll of natural-coloured ribbon, some of those pearl stickers, a picture hanging kit and some glue.  That's it!  Its pretty sturdy, and it holds a lot of earrings- evidently- but I can still see all the pairs I have to choose which ones I want to wear on any given day.

And then I hung up my necklaces to complete my jewelry display.  I like it hanging over my dresser so that I can choose my accessories after I'm dressed.  

Not that I'm getting dressed all that much these days.  But when it's time to get dressed again, I'll be ready.

Tuesday, 13 October 2020

Macrame All the Way!


I love learning new skills.  And I needed a plant hanger.  So I took up macrame and added another craft to my craft-lexicon.  Its relaxing.  But its not passive.  Its a lot of reaching (especially if you are working on a large piece).  But the results are really nice.  Its not the cheapest of hobbies, thicker rope is pretty pricey, so you don't want to waste it.  

But it is kinda quick, and the things you can make are really nice.  And its pretty quick to learn.  You can make nice things with 2 knots, and then you can learn a bunch of knots if you are so inclined.


This is the first thing I made.  I went for it.  And I learned a lot while making this, even though it only used 3 knots.  It hangs in my bedroom as part of Operation: Macrame my bedroom.  I'm going for a whimsical, but light theme for my bedroom, and this def fits.  It is pretty large too.  A little ambitious for my first macrame hanging, but I'm glad I powered through.


The other hanging I made for my bedroom is this plant hanger.  I got this lovely pot at the nursery I buy my plants from.  And its looks lovely.


I have a lot of plants.  So learning this has allowed me to hang my plants around.  One of my friends said it looks like "a hug for a plant." It does.


I have enough plant hangers, so I started looking for things I could make with knotted rope.  So I started making these coasters since I wanted some for our nightstands.  And I think they looked pretty cute.

I really enjoyed learning this, and I'm thinking of other ways I can incorporate macrame into my crafts.  Ooooh, maybe a lamp shade?


Thursday, 1 October 2020

Hand Sewn Patches (Iron-On because I did enough sewing)


For the past few weeks, I've been obsessed with embroidering iron-on patches for my jacket.  

You see, I couldn't find my favourite denim jacket when I was changing my closet over to fall and winter clothing (because I have a small closet, I store off-season clothes).  I was really sad, and I knew I'd miss it, so I bought a new one.  But, then I found it-- Of course I did.  So now I have one that I want to sew patches onto.  And since my tastes run, ahem, weird, I wanted to make my own.  And that's how it started.


I still haven't figured out my style.  I like super detailed things, so the patches I've made have a lot of details.  I waver between botanical illustrations, and graffiti.  Extreme. 


This bee was the first one I completed.  It was, ah, a little ambitious for my first one, but I like how it turned out.  


The process is kind of long though.  First I need an idea of a patch I want to make.  Then I sketch it out in a notebook, or on some paper.  Then I ink up the sketch so that I can see the lines to trace it onto the cloth. I trace it onto the cloth (I use cotton broadcloth for the backing).  I put my cotton and my stabilizer fabric onto the hoop, and start sewing.  I mostly stitch at night.  Its pretty calming.  


I've been saying "Dope" a lot since I got this shirt from my aunt:


So, you know... it made its way into my art.  And just because I think it so pretty, here's my organized embroidery floss container:


Sigh.  I love it when things are in rainbow order.  


Tuesday, 14 April 2020

Made: 3x3 Card and Card Holder


Sometimes you just want to make a bunch of little gifts to give to people so that they can have a bright spot in their day. Since its week 4 of Quarantine for me, I decided to make little things to give to the people that help me get food, and deliver medicine to me just so that they have one little nice thing in this dreary time.

So I made a tutorial, just in case you want something quick and cute to make to give to someone who could use a pick-me-up.

Materials:


1 12" x 12" sheet of 3" x 3" cut aparts (I used the Craft Smart Llama Love)
1- 6 1/2" x 7 1/2" solid coloured cardstock
1- design paper cut to 3 1/4" x 4"
1- design paper cut to 3 1/4" x 1 1/2"
5- kraft card stock (or any colour for card bases) cut to 6" x 3"
5 3x3 envelopes
Ribbon to decorate (optional)
Glue
Scissors
Paper Trimmer (optional)


Method:


Who are some people that you can make these for?


Wednesday, 1 April 2020

Made: DIY Journals


I thought that I would try binding a book, so I made a little journal from scratch.  It was quite the ordeal-- and the video I taped was not helpful.  I should post it purely for entertainment value-- but it would make all actual book diners (bookies? no... that's something else) cringe with anger.  So you will have to settle for pictures of my final (finally!) project.

For materials I used American Crafts "Wildflower" paper collection (which is really hard to find!), some chipboard and plain white paper.


Because I like pockets in my notebooks, I put on in and added some uplifting cards to remind me that this Q-Tine can't last forever.


I used the We R Memory Keepers Bookbinding tool to put it together.  It was pretty easy to use, and it comes with everything you need to bind your first book (Even thread- even though the reviews say it doesn't.).


I used some embroidery thread that I swiped across a beeswax candle for more slide as I sewed the binding.  Sometimes its nice to have a pop of colour where you aren't expecting it.


If you want to make your own journal, here are some tutorials that are way better then what I would have come up with.  I'm going to follow the experts for the next one I make.

Sea Lemon Book Binding Stitches- Jen is a book binder extraordinaire.  She has a whole playlist on book making for every style.

SundayMornings- Journal making 3 Ways- She gives you 3 different styles of journals AND step-by-step instructions on making them using what you have on hand.

DIY Art Journal for Beginners- Johanna uses an old book as the start of her journal-- way to recycle all those books you are clearing out since the big clean you did while being at home!

If you are anything like me- you have many notebooks- but being able to make your own is great.  You can make a notebook that suits your style and needs!  I will be trying this again.

Have you ever made a book?  Are you a book binder?  Any tips to share?


Friday, 3 May 2013

Made: Knitted Baby-Cardis


Did you know that I liked to knit?  I totally do!  I used to have a knitting blog, but I always felt bad that I was posting other things and not enough knitting, so I often felt guilty about the blog-- you know how blog-guilt is.  So I gave it up, and started this blog about all kinds of things.

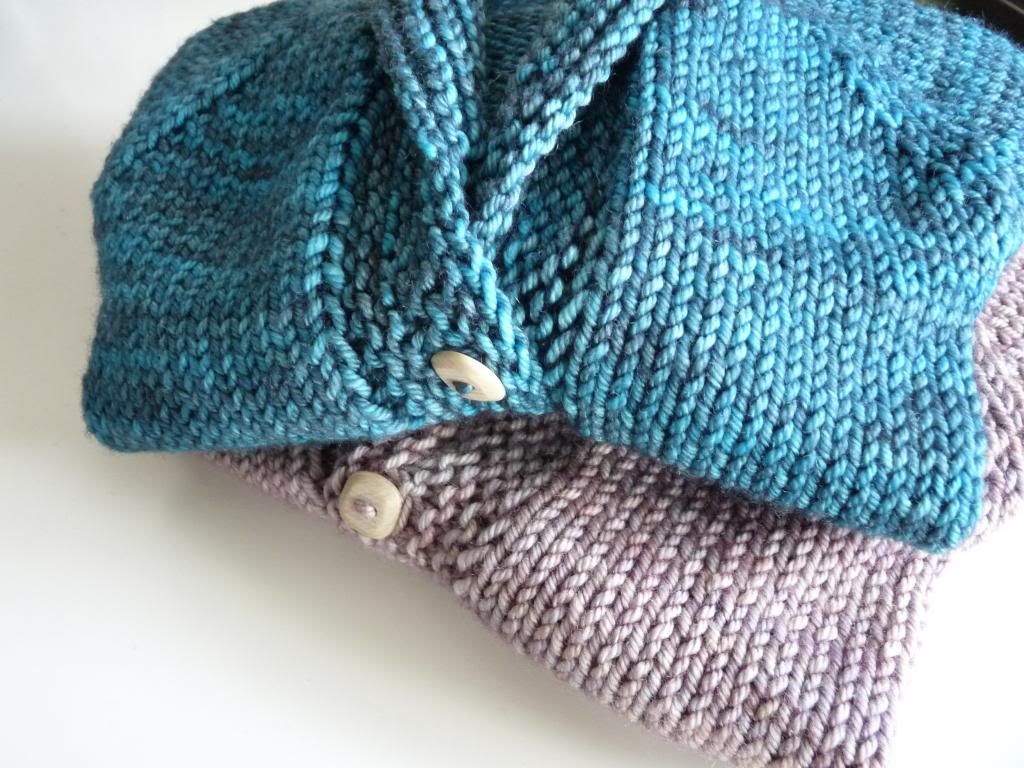
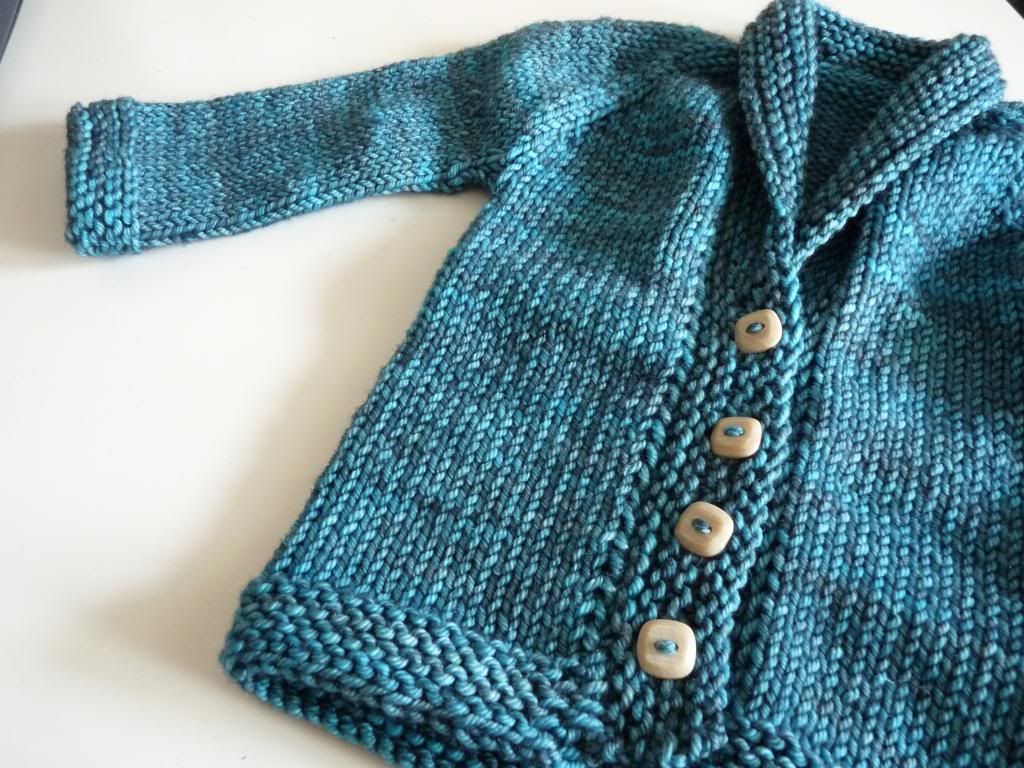
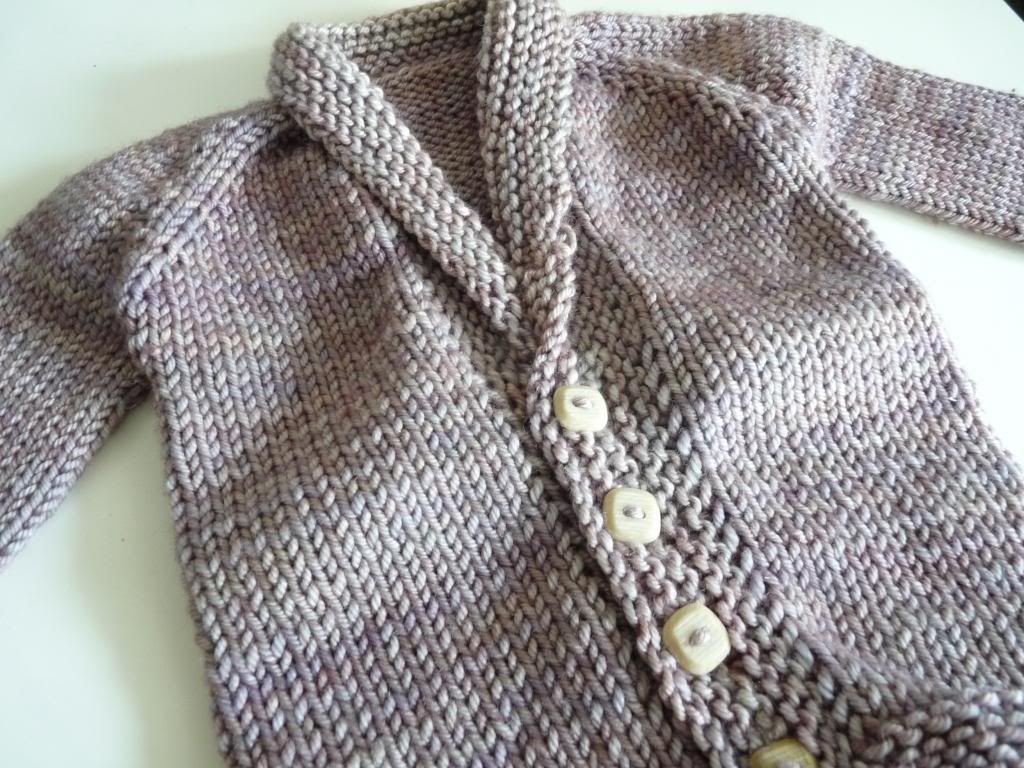
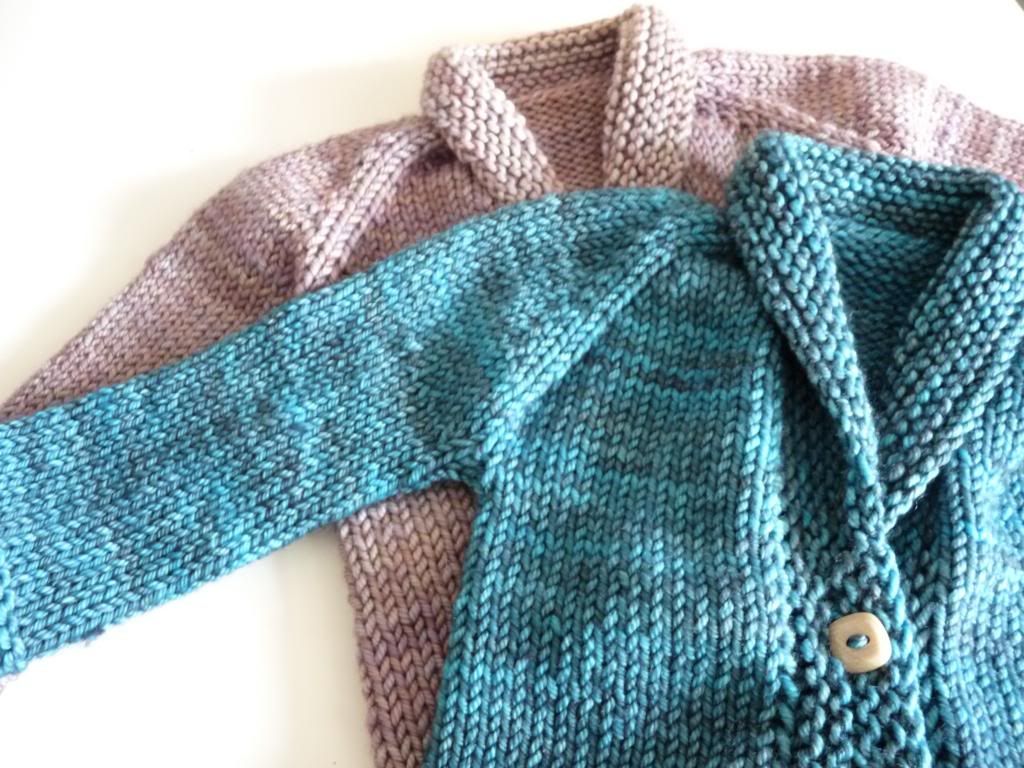
ANYWAYS, I still knit sometimes.  Especially when I find out my friends are having babies!  Lots of babies seems to be showing up in my friends bellies.  So I made these cute sweaters.


So I knit this pattern, and it was really easy!  Its "top-down," so no seaming.  And I really like how they turned out.  I think that they are classy; something a baby can read while reading a good novel, and sipping some single-malt scotch.

Obviously, I don't know much about raising a child.

But I do know that they need to be warm.  And these wool sweaters will do the trick.


I chose these colors because I don't know if the babes are going to be boys or girls.  Not that it matters, these sweater are cute enough for either.  The yarn I used is Madeline Tosh Vintage, in Opaline (grey) and Turquoise.   Each sweater took just over one skein of yarn.  It was also a little pricey-- but you only have one firstborn, right?  And I think every baby should have something handmade.


I love the buttons.  I "inheirited" some old buttons from a friend who's mom was one crafty lady.  I love using them on my projects.  I like that they are used on a project that is so special.

Overall, I'm pretty excited and a little impressed with these sweaters.  I hope that the moms-to-be that I give them to enjoy them.  And I hope that they keep the little babies warm.

If you are a knitter, here are the details of this project:

Pattern: Baby Sophisticate (Ravelry Pattern)
Size: 6-12 months
Yarn: Madeline Tosh Vintage, 1 1/2 skeins per sweater; colors Opaline and Turquoise
Needles: US Size 8, 20" circulars and DPNs
Time to complete: About 9-10 hours each


Thursday, 21 February 2013

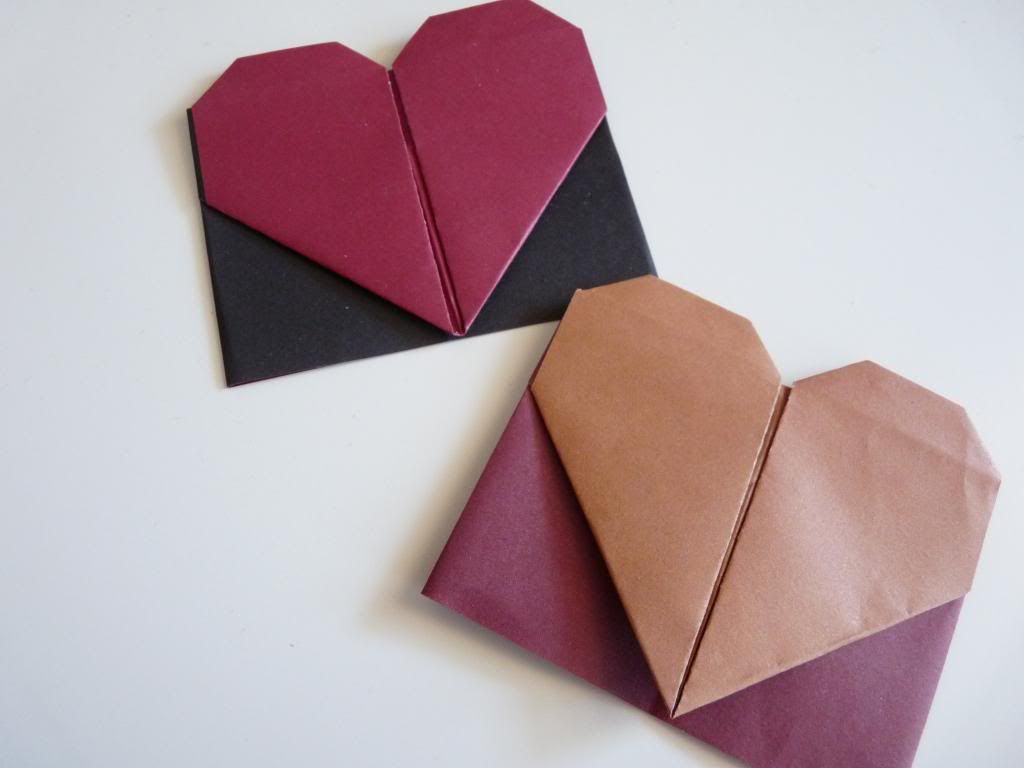
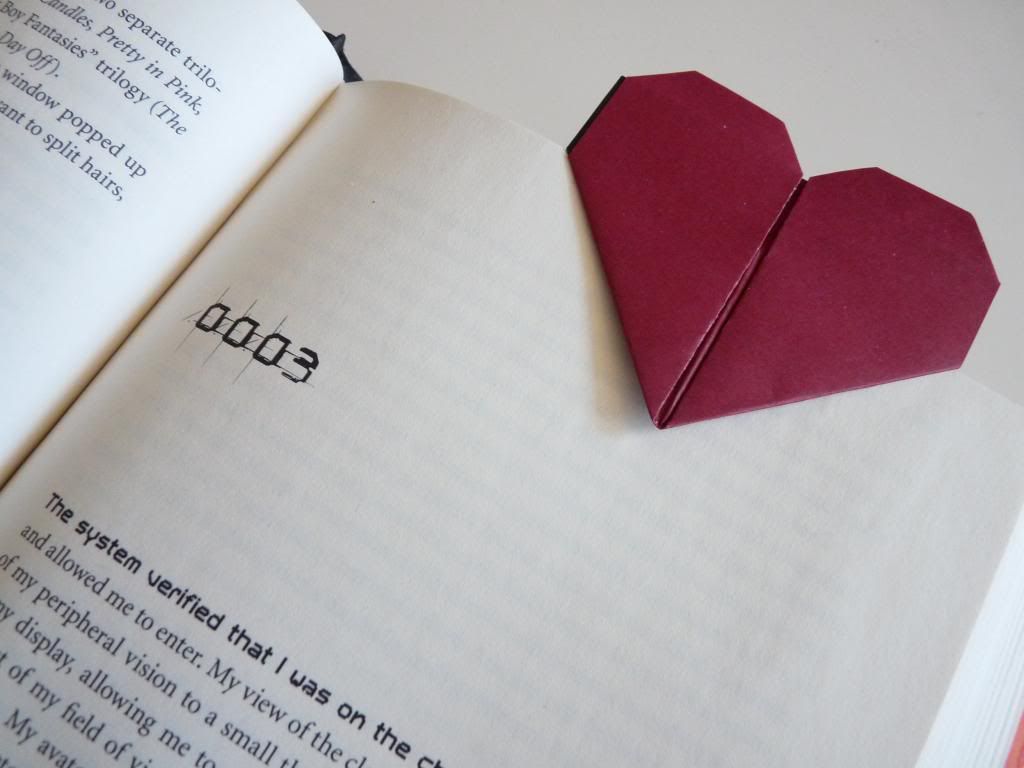
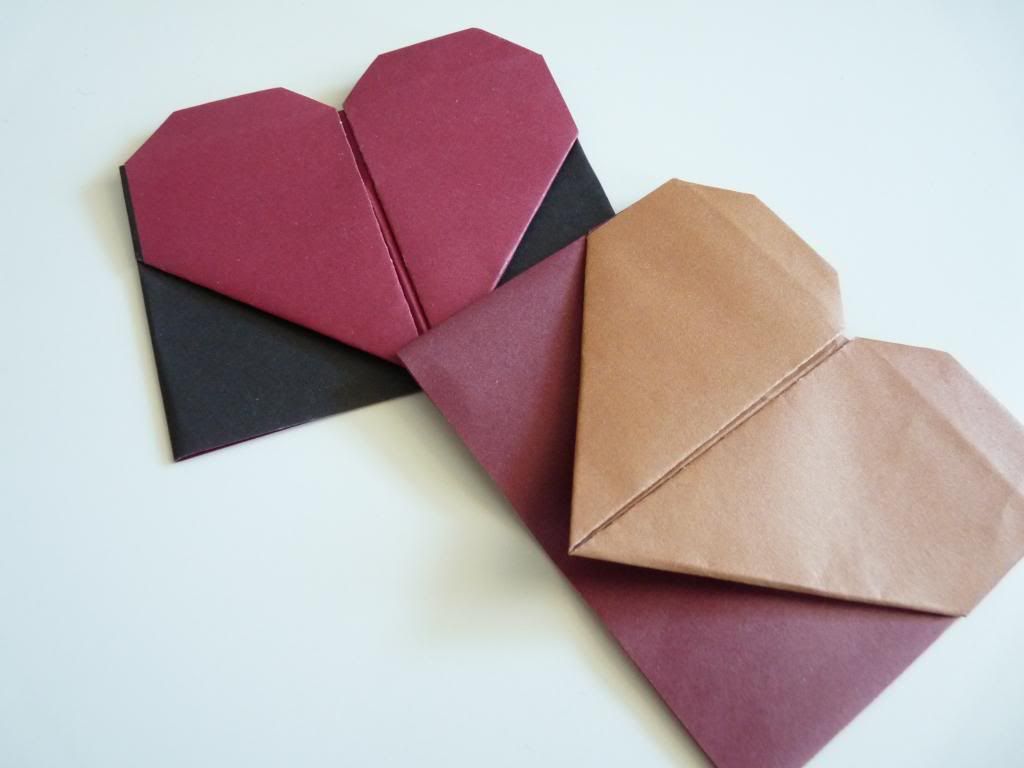
Origami Heart Bookmarks (Not in time for Valentine's Day at all.)


So I came across this tutorial on how to make this cute little bookmark!  I often read several books at a time, and so, I am always in need of bookmarks.  I used to buy them, but that got expensive and unoriginal-- I mean how many Twilight bookmarks does one person need?!


ANYWAYS, enter this sweet little bookmarker. It is easy to make, and its cute.  To make my book marks, I use two-sided origami paper since both sides of the paper are shown.  If you only have one-sided paper, that's cool too just remember that the side facing down when you start is the color of your heart. (If you want the patterned side of your paper to be the heart, it must face down when starting the tutorial.)

There you are, a poem to help you fold one.


Sunday, 10 February 2013

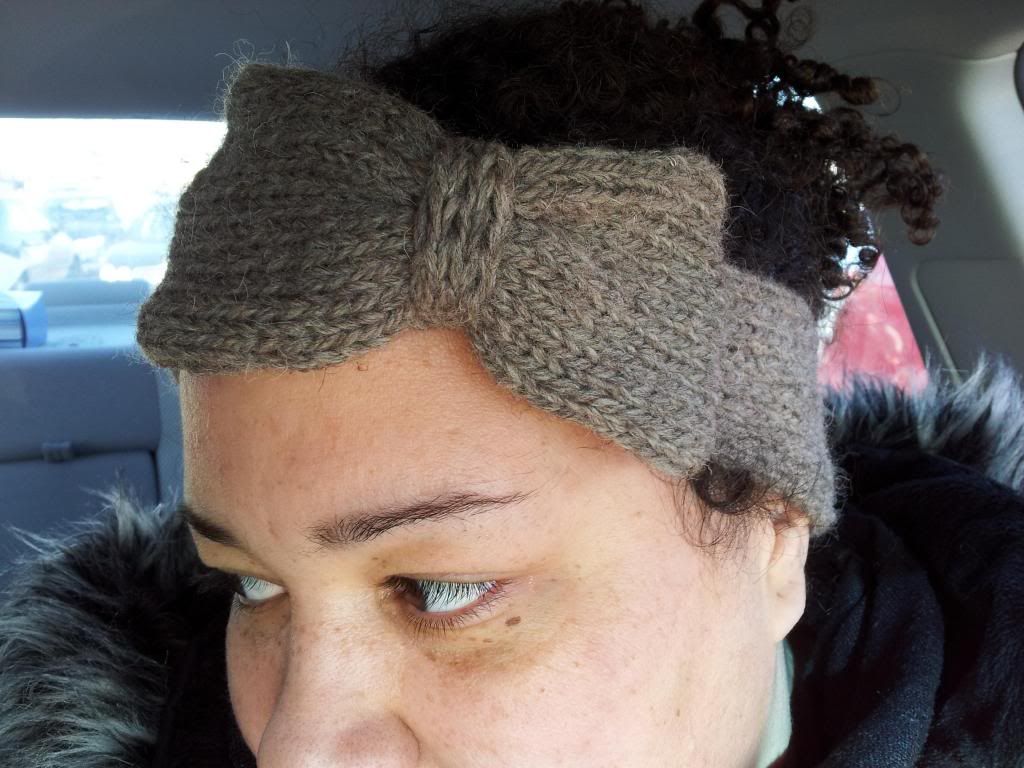
Made: DIY Bow Headband

 
Its finally been cold here!  So, it was time for me to get my knitting needles out and whip up a headband for my ears!  I don't like wearing hats at school because I don't want to mess up my already frizzy hair.  And, its really difficult to find hats that a) fit over my afro; and b) don't cause my hair to become a frizzy mess after I take it off.  So, headbands are a total lifesaver for me here.  

I looked around for a pattern that I liked, and none of them were exactly what I liked.  So, I used this headband pattern, and made up my own bow pattern.  Which I will share with you right now:

 
Knitted bow pattern:

Materials:
Less than 100 yds of worsted weight yarn ( I used some alpaca/wool I got from a farm around here)
US size 8 (5 mm) knitting needles
Yarn needle for putting it all together 

Part 1: The Bow
CO 17 sts.
Knit in st st for 7 inches (18 cm) then cast off.  You will have a rectangle, with the sides curling inwards.  You totally want this.

Part 2: The tie
CO 6 sts.  This is the middle part of the bow.
Row 1: K1, P1, K1, P1, K1 P1.
Row 2: Same as row 1.
Continue in pattern until you have completed 8 rows.  
Cast off. This will be a tiny ribbed rectangle.

Putting it together:
Take the bow (part 1) and sew the ends together into a tube.  Fold the tube in half with the seam in the back center.

Pinch the middle of the tube into a bow shape, and wrap the tiny ribbed rectangle (part 2) around the middle of your bow.  Sew the tie in place, and secure with a couple stitches into the bow.  

Attach to your headband, and style that thing!


Saturday, 1 December 2012

12 posts of Christmas: DIY Star Ornaments


Dude.  I love Christmas.  I'm not talking about the religious aspect of the holiday, I'm not into that part.  I'm into the gift-giving, meal-making, goodie-baking, fun-spirited aspect of the holiday.  So, in honor of the holiday season, I'm going to have 12 posts dedicated to the things I love about Christmas. 
 

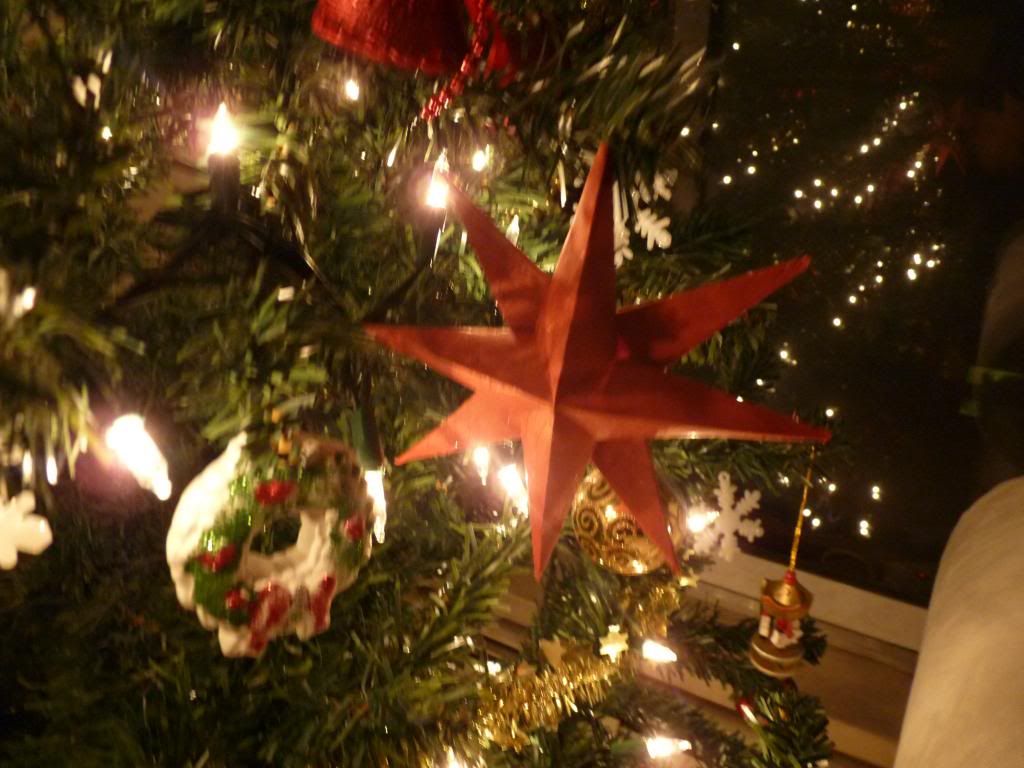
I love my tree.  Every year, D and I have an argument about what colors we are going to decorate the tree in.  He likes multi-colored lights and tinsel; essentially he likes it if the tree looks like a carnival threw up on it.  Each year I lobby for something a little classier.  Up until this year, I lost the battle.  It was fine though, I like decorating the tree and having it up, so it didn't really matter what it looked like to me.

But this year... D reminded me that we made a deal; if we did the tree how he liked it last year, he would let me choose the colors this year.  So I went for the classy white-lighted, red and gold decorated tree.  And it looks so nice!  There was one small problem, we didn't have that many red and gold ornaments.  We had tons of balls, but not anything else.

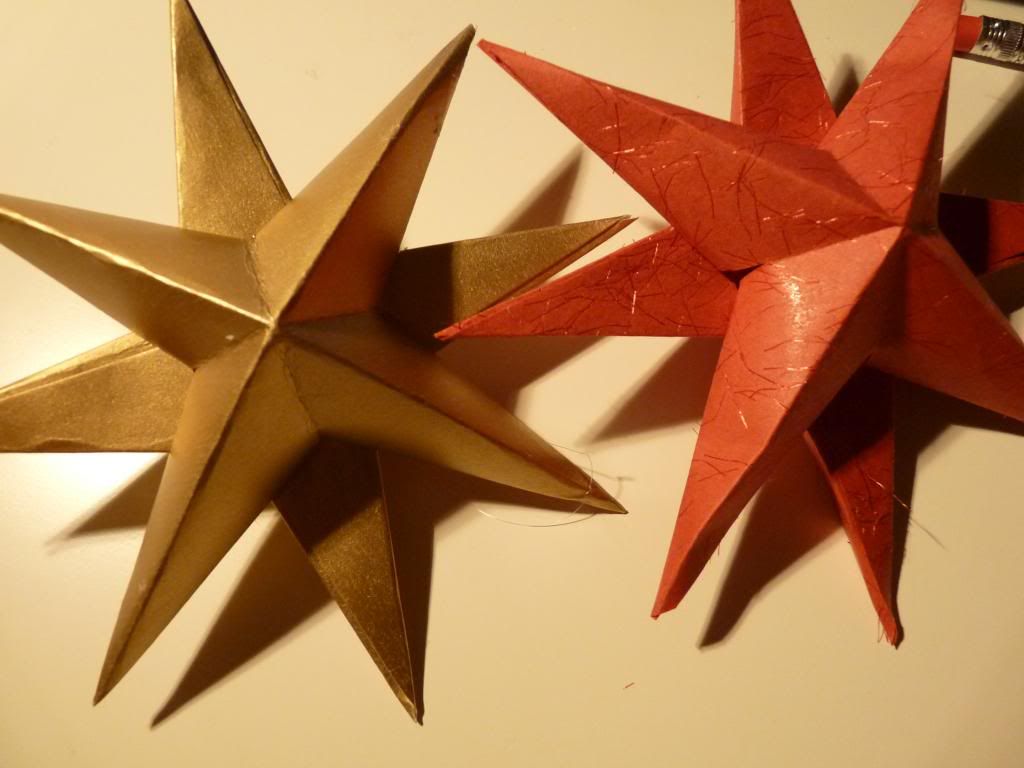
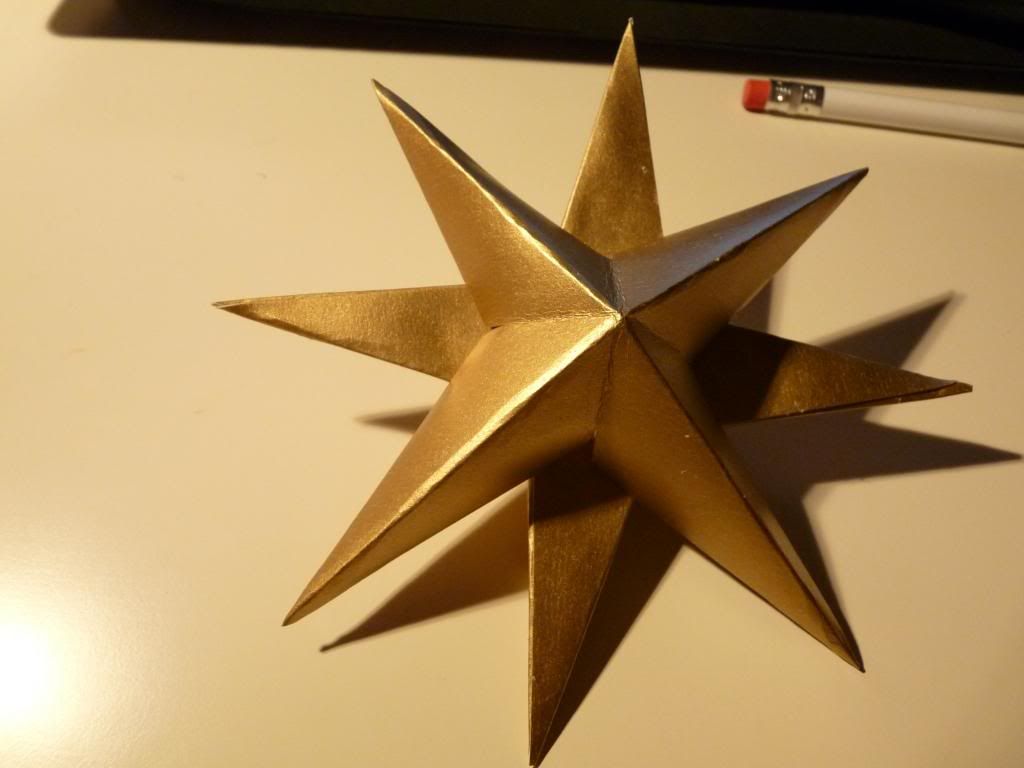
Well, thank goodness I'm crafty y'all.  I made most of the ornaments on the tree.  These ones are my favorites though.  They are fast, cheap and you can make them in any size and color you want.

And who doesn't love a tree full of stars?


These paper stars are great.  They are light, and pretty easy to make.  They are really fast too, so you can make 10 of them in no time. 

Materials:

Fancy paper (one sided is fine)- cut into 4 inches square. 
Scissors
Glue, I used white glue
Ruler
Pencil
Folder if you are using card stock

How to:


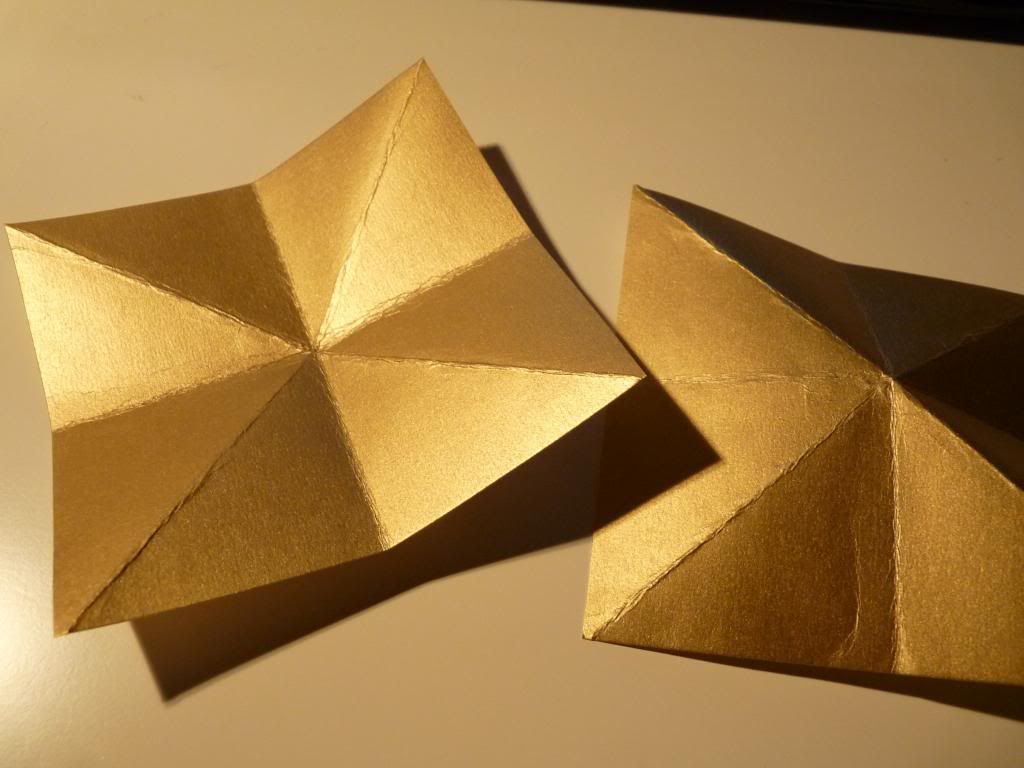
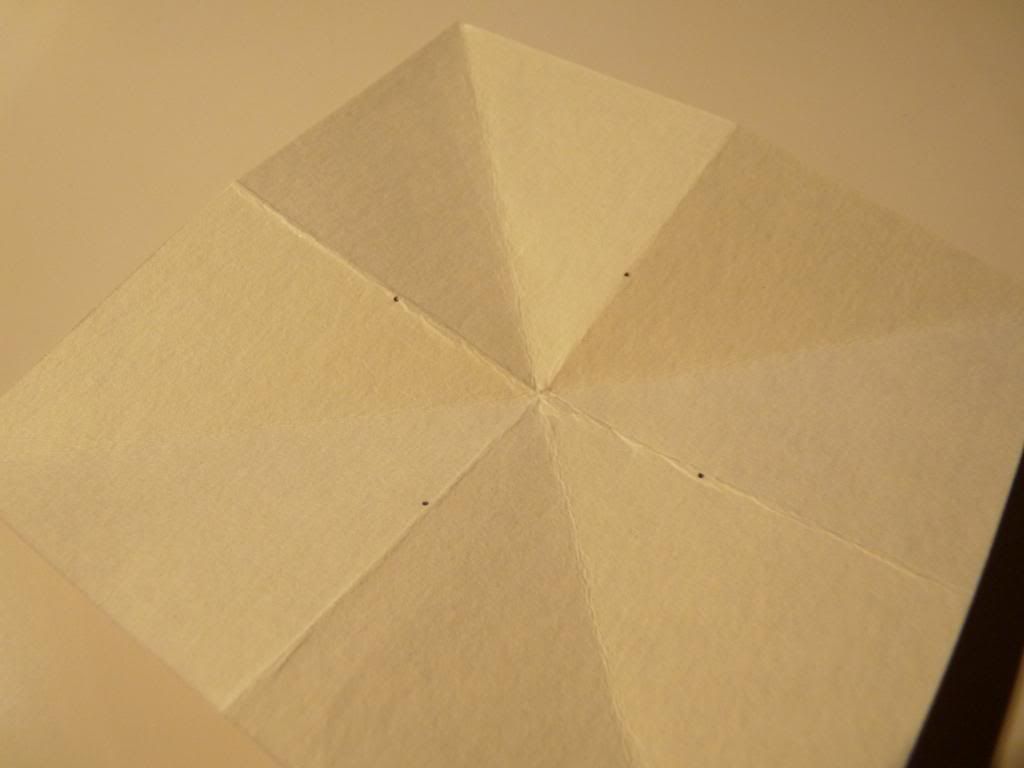
Turn your paper over (right side down) and fold your paper in half diagonally.  With the decorated side of the paper facing up, fold in half length-wise and width-wise. 


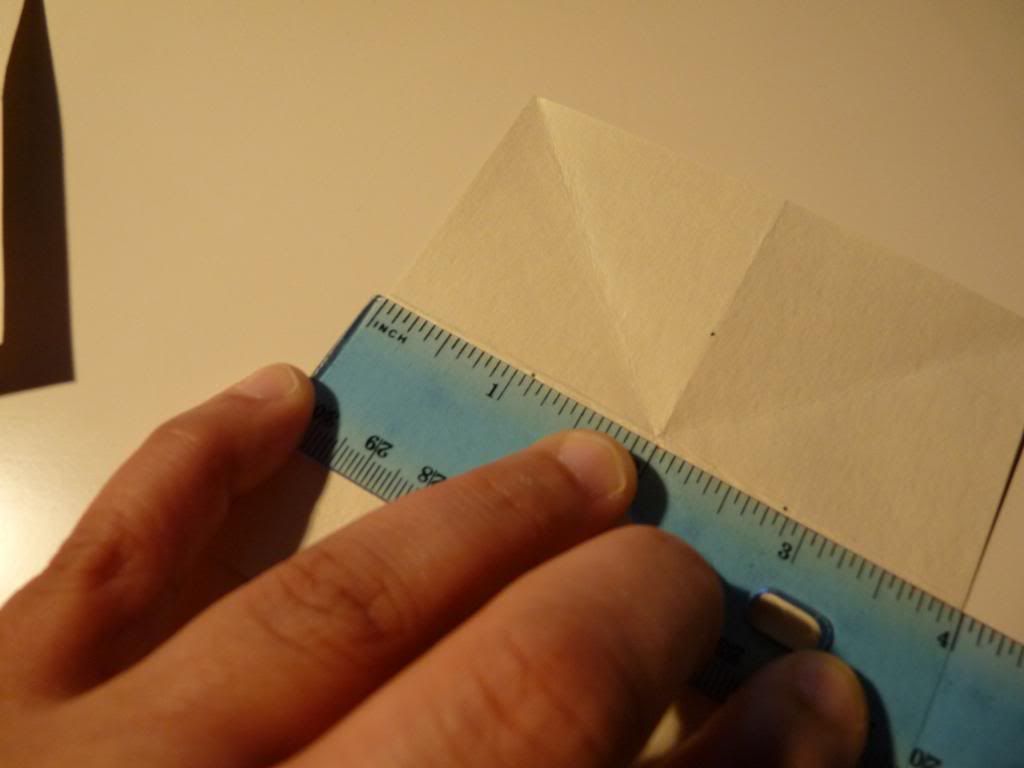
Turn the paper over again (right-side down) and mark just over an inch on the non diagonal seams that you folded.


Mark the same distance from the edge, all around your paper.


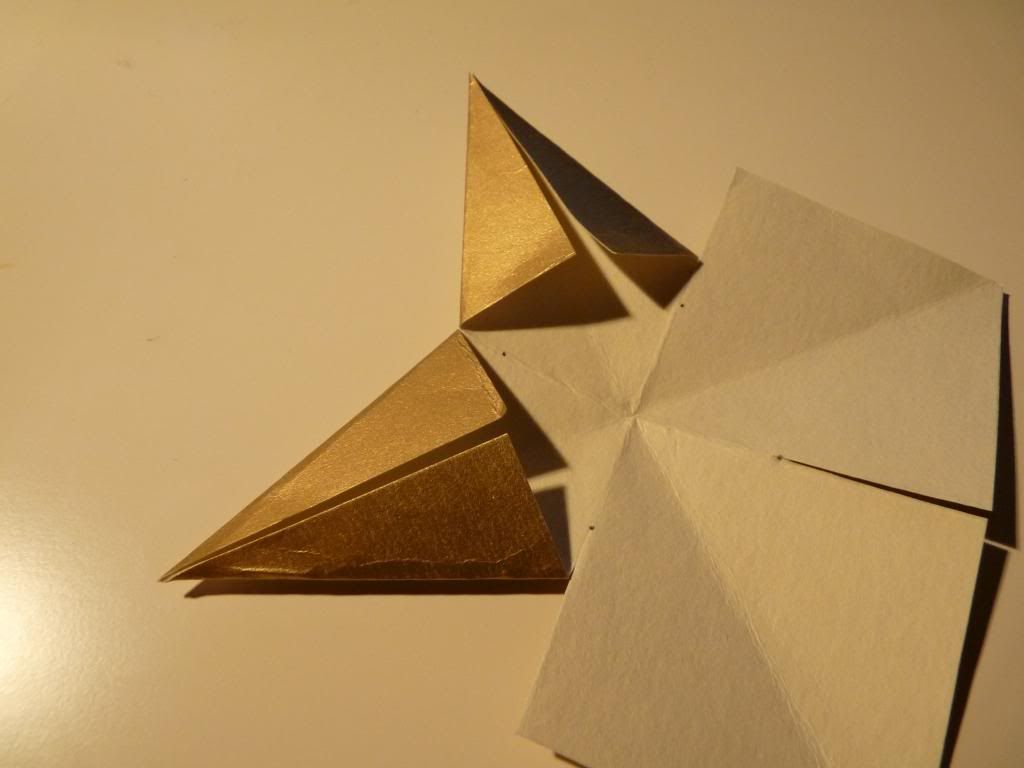
Cut along the seams to the point you marked.  You should have four cuts in your paper.  Fold the corners in towards the diagonal folds.  Do this for all four corners.  On ever other triangle, put some glue on, and over lap the triangles to create the points.  While you are waiting for it to dry, repeat these steps again to make the other half.


 Glue the halves together back-to-back to create an 8 pointed star!  Let it dry.

To hang the stars, I used a needle and some invisible thread and poked a hole in one of the points.  Ready to hang, and perfectly matched for my tree. 

I also made a bunch to hang off of gifts and stuff.  I've made these before, but larger and hung them from a window.  They are a pretty handy craft!

I'm thinking or crocheting some snowflakes or something...  What kind of ornaments have you made for your tree?


Saturday, 18 August 2012

DIY Week: Natural Make-Up Remover


I don't often wear makeup.  I don't like it on my face, and I'm not especially skilled at putting it there.  But, there are sometimes when I have to wear it; like when I'm in a show or play, or for formal events.  So, there's no way around it, makeup is a part of my life.  I found that the makeup removers that I can buy were either super irritating, or super greasy and caused some problems for my skin.  Not to mention they are kinda expensive.  So I found an alternative.


Here is what I use to make my makeup remover.  Its a short list of ingredients:

1/2 cup of distilled water 
1 tbsp of extra virgin olive oil
1/4 tsp of aloe vera gel
8 drops of Seabuckthorn Seed Oil
A clean bottle in which to store your remover

A Note: The Seabuckthorn Oil is not a necessity for the remover to work.  I add it because it has soothing properties, and because I use it on my face as a moisturizer every day.  I also like the smell of the oil, and I know that it is safe for use around my eyes.  It is pretty pricey, and a little hard to find; but like I said, it is totally optional for this recipe. 


Add all the ingredients to the water in your bottle.  The oils will sit on top of the water, because oil is hydrophobic.  Commercial cleansers get around this by adding emollients to integrate the oil into the water.  Instead of adding chemicals, all I do is shake this bad boy up before using.  The oil and the water mix briefly after a good shake.  Squirt a little onto some cotton while it is mixed, and remove that makeup!


The remover with start to separate again after you let it settle.  That's normal and not a problem.  Just remember to shake the bottle before using.  It works really well, it took off my mascara here.  I put a little on the cotton pad, hold it against my eyelashes for a few seconds, then rub it off.  Easy peasy!


Last day of DIY Week!  I've had a great time sharing some of the products I make for myself.  I hope that you found the tutorials informative, even if you don't give them a try.


Thursday, 16 August 2012

DIY Week: Homemade Deodorant


Well, "dirty hippie" installment number two here: make-your-own deodorant.  I didn't really talk about my skin allergies, and I won't go into too much detail, but my skin can't take much abuse.  If there is pressure on it for a long time, like from a bra or waist bands on pants and such, I develop bad bruising and rashes.  I have horrible scars around my ribcage from this.  Also, certain chemicals cause me to have sever contact dermatitis, which is a bad rash that is both itchy and painful.  For a long time i thought I would just have to bear it since I couldn't go naked, or without certain grooming products, like deodorant and hair gel.

But after years of suffering, I decided that I couldn't handle it anymore.  I met some friends that taught me all about natural alternatives to things like deodorant.  I have used a bunch of brands, and they all worked about the same.  I never smelled bad, but I did sweat.

I never really cared about sweat showing on my clothes; I'm from the Southern U.S.! We sweat there all the time.  But here in Canada,  the more people kept pointing it out to me, the more self-conscious I became.  So I went back to my old anti-antiperspirant. 

One day, my skin rebelled so fervently, that I had to take time off work because I couldn't function-- I had to keep my arms raised to have even a little comfort.  I realized that I needed an alternative; so I started making my own deodorant.  At first I used a recipe I found online, but then I changed it and honed it to my needs.

Why use a natural deodorant?  Well, it's no secret that there are tons of bad chems in regular deodorant that seep into your body through you skin.  Cancer researcher Dr. Philippa Darbre of the University of Reading says there is evidence that the aluminum-based active ingredient in antiperspirants can mimic estrogen in the body.  Parabens also increase the risk of breast cancer my mimicking estrogen, according to some experts. Researchers have found parabens inside autopsied breast tumors. Dr. Darbre comments on the study:


And that's not all.  Other harmful chemicals include: Propylene glycol (anti-freeze); TEA and DEA (hormone disruptors);  FD&C colors (carcinogens, and made from coal); and aluminum (a neurotoxin).   Dr. Samuel Epstein, specializes in environmental medicine points out, "Not a single cosmetic company warns consumers of the presence of carcinogens in its products." 


If you are going to use a homemade deodorant, you will have to get used to sweating.  This stuff will not block sweat from coming out of your pores.  So you will have sweat stains.  I am fine with this, so I love my homemade deodorant.  It makes me smell like oranges.

Ingredients:
1/8 cup of shea butter
1/8 cup of cocoa butter
2 tbsp of baking soda
2 tbsp of cornstarch
1/4 tsp of Vitamin E
8-10 drops of essential oil (I use sweet orange)
8-10 drops of tea tree oil

You can get most of the ingredients fairly cheaply from Goodness Me, or Whole Foods.  I bought the Shea butter Fair trade through Ten Thousand Villages.   

Substitutions: Some people use coconut oil.  I haven't tried it; I'm one of those peoples whose body and hair doesn't really like coconut oil; and because I have always used Shea and cocoa butter for moisturizers too.   You can use any essential oil scent you want, I use orange because I like all my grooming products to smell the same.  (This is going to sound odd, but I like making my own body products so that I can customize the scents.  All my products use the same scent.  I like smelling vaguely of oranges.)  Sometimes I add some Witch Hazel (or I guess you could use cheap vodka?) for evaporation of sweat, but I didn't in this batch.  If you want to use it, add 2 teaspoons.  It does the same job of the tea tree oil; its an antibacterial, to kill the bacteria that causes body odor.


This is super easy to make.  Put the Shea and cocoa butters into a microwave safe container that you won't be using for food.  Pop them in the microwave for one minute and take it out when the butters have melted.  In my microwave it only takes 20 seconds.  Once they are melted, add your baking soda (deodorizer); your cornstarch (absorbant); Vitamin E; Essential oils (smells nice); Tea tree oil (anti-bacterial); and Witch hazel if using (anti-bacterial and evaporation of sweat).  Always add your oils at the end of the process; if you heat of the oil, the fragrance will dissipate, and it will be useless.  Some oils are volatile, and can catch fire, so don't heat up the oils.  Give it a good stir, and let the mixture cool, and solidify.

This will give you about 125 ml of cream.  I store mine in a mason jar.  It doesn't have to go in the fridge, the Vitamin E helps preserve it.  Sometimes, when I have it, I add some grapefruit seed extract for preservation too.


It will get pretty hard.  To use it, I scrape some out of the container with my finger nail or a small metal spoon, and let it soften in my hand before I rub it onto my armpit.  I use an amount about the size of a soy bean once a day.  DIY hair gel, DIY deodorant, you too can be on your way to becoming a dirty hippie! Please let me know if you try this!
 There are still 2 more days of DIY Week left!  
Every day this week I will be sharing a new DIY project.  I hope you find them useful!