Showing posts with label Foxy and Crafty. Show all posts

Sunday, 18 July 2021

A Concerned Bird on a Card


I like having cards for all types of occasions. Sometimes, things don't go one's way. If you're me, OFTEN, things don't go your way. So I needed more cards for friends that need a pick-me-up.  

2020-2021 is turning into the 2 years of needed "pick-me-ups," and I'm not prepared. How could you be prepared for a year, that if it was a person, you'd punch in the face? So, I've started making cards for event of the "Sorry, that happened. Totally sucks. Let's go eat a whole pizza" occasion.  I've never seen that header at the card store.

Here's one for someone who's received bad (but not tragic) news-- a sympathetic, and concerned, red bird done in watercolour style.

I made this card a while back. But I always remake it to keep it in stock. Here's the video I made for how to create this one:


Materials used: Stamps: Tim Holtz Crazy Birds and Crazy Talk, Simon Says Stamp Naughty Nautical Ink: Lawn Fawn Jet Black; Distress Ink in Pumice Stone Tombow Dual Brush Markers: Colors (Reds) 847, 885, (Brown) 977, (Yellow) 991, (Light Blue) 451 Paintbrushes: Royal & Langnickel Watercolour in sizes 12 and 6; Foam Tape Adhesive and Tape


Monday, 23 November 2020

Pine Needle Basket-Weaving

When I was in university, I majored in a liberal arts type major.  When I was with my science or engineering friends they would introduce me and say my major was basket weaving.  Little did they know that I would grow to love basket weaving, and looking back, I would have majored in it if I could have.

ANYWAYS, a few years ago, I learned that my grandfather was bi-racial like I am- he was Black and Indigenous- which is really cool.  I started researching about that part of my history, and talking to members and elders from my grandad's tribe in NC.  I learned a lot in those conversations.  While researching the arts that this group does, I came across pine needle basket weaving.  I thought it was really interesting- that the throw away part of the tree could be harvested and used to make baskets is really neat.  I looked up some tutorials, and started weaving.  It takes a bit to get the hang of it, but by the time I finished my first basket, I was feeling pretty good about it.  


I spent some time this late summer and fall collecting pine needles.  I live in Canada now, on the Eastern part of the country where the types of pines that we would have in NC are not available here.  Where Southern Indigenous groups would use Ponderosa or Longleaf Pines, which don't grow in Ontario.  So I used needles from the Red Pine with are considerably shorter (by like half) which means weaving them is a little tougher, but still doable.  Because the needles I use are shorter, I make smaller baskets.  

It is pretty fascinating to make something truly from scratch.  I had to forage for the needles, sort them, remove the fascicle sheaths (the part that attaches them to the tree), wash them, boil them and then I could use them to weave.   My house smelled like pine for a while... Luckily Don likes the smell.  

I also may have made Don come and get needles with me.  He actually liked it.  That was actually a fun day.  

Depending on what I want the basket to look like, I start with a wooden piece for the centre or not.  This one, I used a laser cut out flower for something different.  I weave with wax covered thread, and I use a plastic straw as my gauge to keep my coils even.  I did love sitting outside and weaving in the sun.  


And this is the basket all finished!  I love how it turned out.  Its cute, and I painted the wooden centre to match the thread.


And I made a little basket with black thread and no centre, that I really loved.  I love the bowl shape, so a lot of my baskets are that shape.  These baskets are very sturdy, but little.  And useful.  I couldn't believe how useful these little baskets are.


I've made about 6 of these so far.  They are relaxing, if a little time-consuming, and I think cute.  Once they dry out, they turn this really pretty reddish color.  This is one of my more rewarding crafts.  I feel more connected to the artisans that would have made these in the past and currently. Which is super cool.  


Monday, 27 April 2020

Made: 3D Shadowbox Cards


Time for another tutorial!  For some reason, the sound in this one is not... great.  I'm not sure why; I used the same microphone.  Ah, technology.  So awesome, and so annoying at the same time.

Just like Quarantine (nice segue?), I made some Happy Mail for people since we're still in Quarantine, and found out that schools will be closed until May 31st 2020 now.  However, today there is supposed to be an announcement About the plan to "open up society" again.  I have no plans in going out until its safe again.  So, there's that.

ANYWAYS, tutorial!  I filmed a tutorial on how to make these cards.  They are fun to make, and I made a couple of them with some of my paper stash.


Heh, "I don't need therapy, I talk to my plants."  Would be funny if it weren't very true of me and my quarantine experience.  I even named my plants.  When they droop and need water, I call them drama queens.  Ah, I have fun.

Here are the materials you will need to make your own Shadowbox cards:

  • 1 piece of card stock cut to 8.5" x 11"
  • Glue
  • Scissors
  • Paper trimmer (not necessary but nice to have)
  • Scoring board (again, not necessary but nice to have)
  • Bone folder
  • Die cuts or stickers to decorate your card
  • Foam tape
Measurements:
  • Cut Card stock into 2 pieces, 1- 8.5" x 8.5" and 1- 2.5" x 8.5"
  • On the 8.5" x 8.5" piece, score on each side at 0.5", 1", 1.5", 2" 
  • Score on 2 opposite side at 2.5" and 6" (these are a cutting guide)
  • On the 2.5" x 8.5" piece, score at 1", 2" 5" and 8"
  • Liner pieces for the inside of the card measure 3" x 3" and 3.25" x 3.25"
Template- Cut away the pieces in grey.


And the video tutorial:


Tuesday, 14 April 2020

Made: 3x3 Card and Card Holder


Sometimes you just want to make a bunch of little gifts to give to people so that they can have a bright spot in their day. Since its week 4 of Quarantine for me, I decided to make little things to give to the people that help me get food, and deliver medicine to me just so that they have one little nice thing in this dreary time.

So I made a tutorial, just in case you want something quick and cute to make to give to someone who could use a pick-me-up.

Materials:


1 12" x 12" sheet of 3" x 3" cut aparts (I used the Craft Smart Llama Love)
1- 6 1/2" x 7 1/2" solid coloured cardstock
1- design paper cut to 3 1/4" x 4"
1- design paper cut to 3 1/4" x 1 1/2"
5- kraft card stock (or any colour for card bases) cut to 6" x 3"
5 3x3 envelopes
Ribbon to decorate (optional)
Glue
Scissors
Paper Trimmer (optional)


Method:


Who are some people that you can make these for?


Sunday, 20 April 2014

Indoor Gardening: Window Herb Garden


Spring may actually be here.  We will see.  But for now, the sun is making me happier than I have been for a while.  A bright day can even make me productive! 

I've had an idea that I wanted a herb garden in the kitchen for a while since we have that nice big window in there-- but no ledge.  I have found a lot of inspiration online for ideas to add plants to a space where there is none.  The most inspiring and inventive DIY solution I found came from A Beautiful Mess (of course),  but I don't have a workshop, or all those great tool to work with.  Plus, it wasn't really what I wanted.  I wanted to make sure that I could have different types of herbs, which is difficult if they have to share a planter.  So I needed something that would separate the plants. 

On a wander through Ikea (my favorite place!) I saw these great hanging planters, and thought of a new plan for my hanging herb garden.  These pots are the perfect size for the herb plants they sell at my local grocery store, so I bought 3 and planned my herb garden for my kitchen window.

Want your own hanging herb garden?  Here's what I used:

Shopping List

3 SKURAR Hanging planter pots from Ikea- $4.99 ea ($15.00)
3 herb plants, I found mine at my grocery for $2.99 ea ($9.00)
3 plastic planting pots, because my herbs came in biodegradable pots- 1.00/ 6pk
3 hooks, I bought a package of 6 white vinyl coated hooks so that they would be inconspicuous- 1.00/ 6pk


I love how they look in our very small kitchen.  It makes it much more alive!  Here's what I learned while hanging and planting our herbs:
  • I shortened 2 of the pots chains by removing 11 links from each chain.  To do this I used some needle nose pliers and twisted the 11th link.  
  • If your plants have biodegradable pots, you will need a plastic pot to put them in, or else once the pot breaks down, your plant will be sitting on the bottom of the planter, and there will be no room for drainage. If you don't have plant pots, you can re use yogurt containers with some holes in the bottom.
  • Use hooks instead of nails, it provides space between the plant and the window for blinds or drapes.
  • Herbs need direct sunlight, so make sure you hang them in a sunny window.  Our windows face west, so we get late afternoon sun.
D and I finished this in just under an hour.  And it made me so much happier!  I'm not sure if I'm going to shorten the chains some more that that they are all the same length, and sit in the top half of the window.  We'll see how they grow like this.  Do you live in an apartment?  How do you fulfill your gardener's itch? 


Friday, 11 October 2013

Cross-stitch Sentiment Art- Sentitmenart? Sartiments? Help me think of something here...


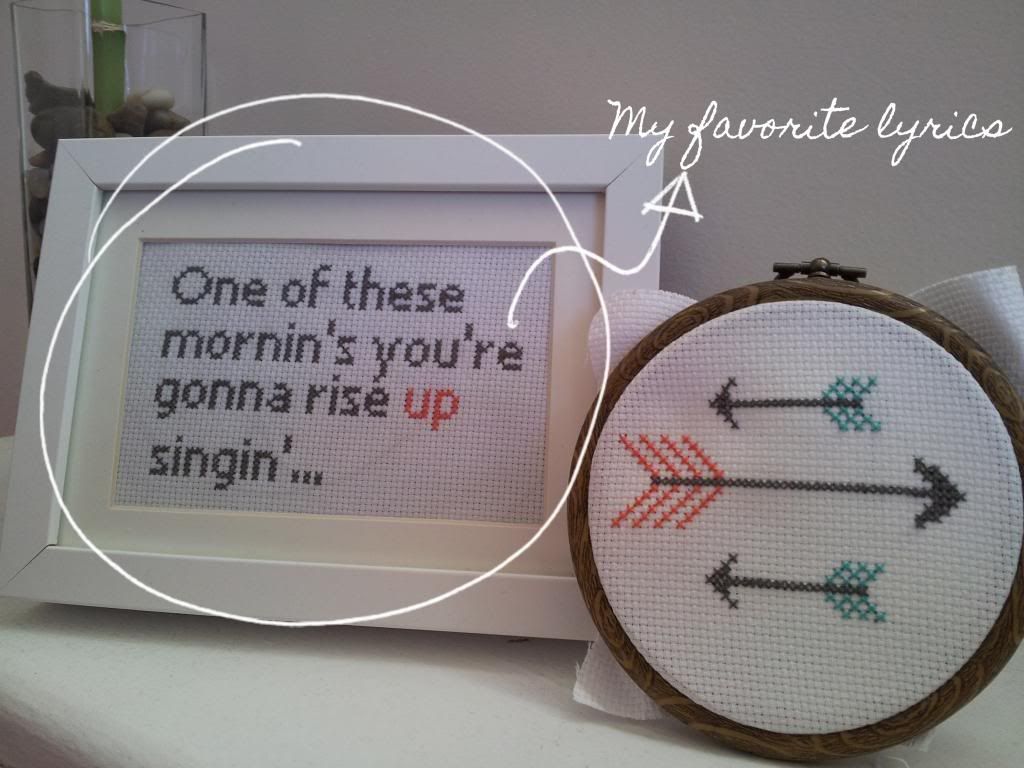
One this I've been doing a lot of lately is cross stitching.  I really like it.  Its relaxing; and its really versatile.  One thing I really love stitching is quotations.  I made these little things while watching TV.  It was really to put one of these together.  Pretty inexpensive too!  If you want to try and make your own, but have no idea how to cross stitch, I would have a look at this site. It even has pictures! 

To make my quotations, I used 16 count fabric (makes the letters a little bigger), a size 5 sharp needle, and 2 of the 6 strands in a length of embroidery floss.

The other super helpful site was this one, the Cross Stitch Writing Tool.  All you have to do is type in your words, and it will chart out the letters for you!  You can save the file as a PDF or print it out!  I typed in my words, and chose a font, and I was ready to start stitching!

The arrows I just made up.  But there are thousands of free cross stitch patterns of arrows out there.  Just use a little imagination, and sew it up!

But seriously.  I'm really into the trend of running two words together that have no business jammed up against each other.  Frenemy?  Love it.  So, in that tradition, what should this be called?  Sentitment-artity?  Cross- stitchitments?


Friday, 2 August 2013

Made: Bow Clutch (that I will probably use as a make-up case)


I used to be way into quilting.  But then I got the new career, and starting spending all my time on that.  I did use my sewing machine, but mostly for alterations for our clothing.  Not so much for fun.  When my old sewing machine broke, I didn't rush to replace it.  I missed sewing, but it was something I didn't have the time for.  Since I do all my sewing on our dining room table, it wasn't something I could start and leave for an undetermined amount of time.  I guess what I'm saying is I got lazy.  So once I finished my last quilt (for my gramma,) I didn't really do it so much.

For Christmas, D bought me a new sewing machine.  

And this summer, I finally found the time to learn how to use it.  There are a few differences with my machine.  I have come to know my old machine as a training machine.  Thats why it was so easy to use.  This new machine has a bobbin case and stuff, which I have to tread and such.  Its a little harder than the old one.  But, this one has great tension, and metal parts!  Like a grown-up machine should!

So to learn how to use my machine, I made a little pouch for my small knitting projects.  It turned out cute.  I was quite proud of it.  But it was not impressive.

So I tried something a little harder.

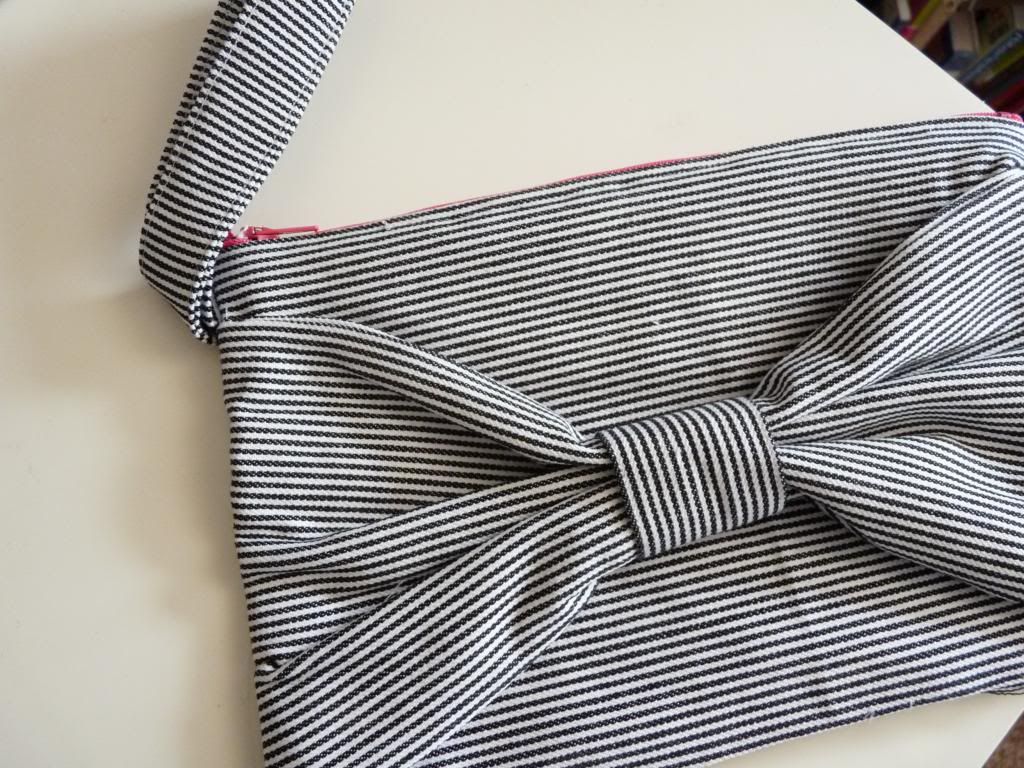
And I made this bow clutch:


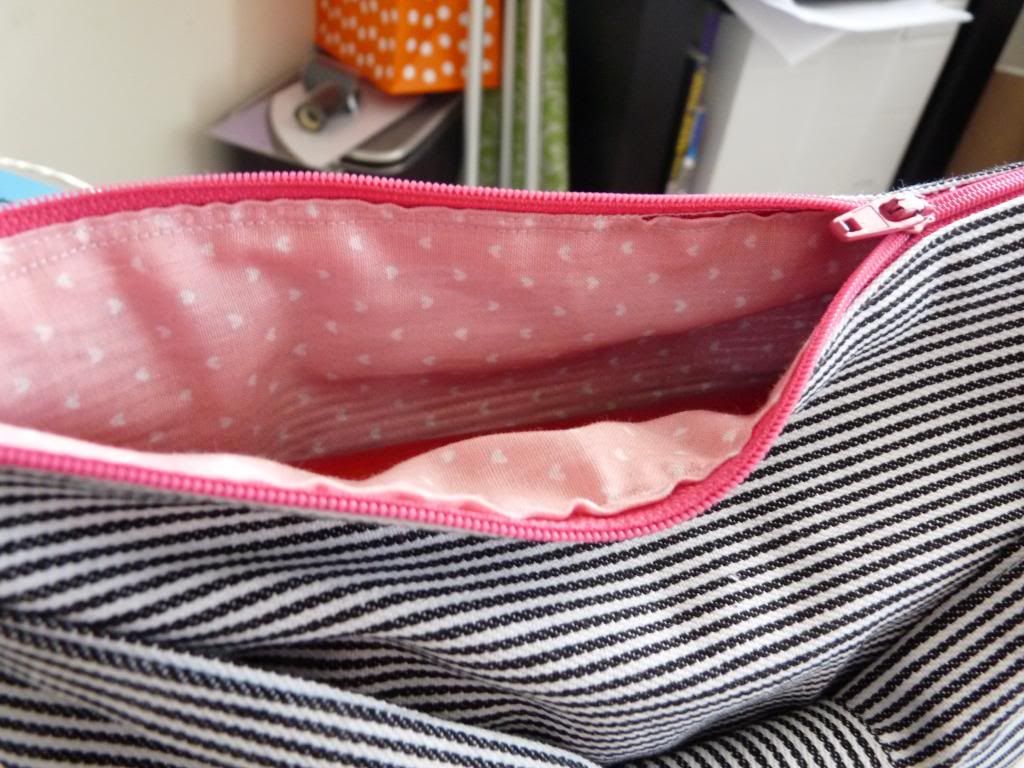
I love how it turned out.  I just used some fabric that I had laying around from the last time I was really into sewing.  I think it turned out really cute!  

But, I am not a clutch kind of girl.  I need to have my wallet and stuff strapped to my body, or else I will probably lose it.  At the very least, misplace it for a while.  So this clutch will probably turn into some sort of make-up case.  One that I carry around everyday, but in a bigger purse that I can strap to my body.  You know how it is.


If you happen to be a crafty-type and want to make one for yourself,  I used this tutorial from Elm Street Life's blog.  It was so clear, and very helpful.  She outlines every step of making the clutch, with pictures!  Having written my own sewing tutorial, I know how time consuming it is to write one that is helpful.  So if you use it, make sure you tell her how awesome her tutorial is.  

Have you tried sewing anything lately?  Do you sew?  
 

Thursday, 28 March 2013

Stress and the Art of Zen Doodling


I am not a fan of stress; but lately, life has been piling it on in heaps.  And even though I think I have a great handle on everything, the effects of stress start to creep up in my health and in my emotional stability, so that I don't even resemble someone who has her shit together.  Most days I do have my act together; then enter the 3 months of health hell; and bad performance reviews at work; an on-the-job injury and finally an uncommunicative husband, and Stephanie becomes a mess.  A weepy-at-anything, soppy mess.

Some folks meditate for stress relief.  I'm not very good that that.  I can't focus my thoughts, and the harder I try, the more scattered my mind becomes.  So instead, I doodle.  More accurately, I Zen Doodle.

A Zen Doodle is a way of focusing on drawing repetitive lines and patterns using a pen and no eraser.  It is a way of focusing your attention onto drawing lines.  Because you are only drawing lines, it is not stressful; you don't know what your drawing will look like until its done.


What I like about the process is that it actually helps me focus on one thing.  I don't think about anything else, just what line I'm going to draw next.  It creates a "break" for me from whatever anxiety I'm dealing with.  Usually, I can complete a whole page in about an hour.  After I finish, I feel calmer and more clear headed.  And I have a drawing that I think looks pretty neat.  And sometimes creepy. Like, I've been into eyeballs lately, and that is... weird.

ANYWAYS, It is really easy to start this type of meditation, even if you think you are not artistic or a good drawer.  That doesn't matter in this type of art.  If you can draw a line, you can doodle yourself into meditation.  (Heh, heh.)

All you need to start is a pen, and a piece of paper.  Many people use small pieces of paper; they take less time to fill up.  I like to use my sketch books.  Sometimes I leave them unfinished, but most of the time, I like to fill up the page.


For me the process is something like this:

I sit on my couch by my lamp for adequate lighting.  I have my sketchbook,  3 different thickness of felt tipped pens and a pencil for shading.  It is usually quiet, or D is playing some video game-- there is nothing else to divert my attention.  I will either start with a doodle, like the radio in the above picture, or divide the page with a line.  Any type of line, thick or thin, wavy or straight, depends on my mood.  Once I've divided the pages into sections, I start filling in the sections with patterns or shading.  That's it.  I keep adding to the design until I'm calmer, or I finish and fill up the page.

That's all there is to it.  When I finish, sometimes my drawings look very complex and impressive.  While I like the results, I find the process most helpful.

What do you do to meditate?  How do you take a "stress break?"


Thursday, 21 February 2013

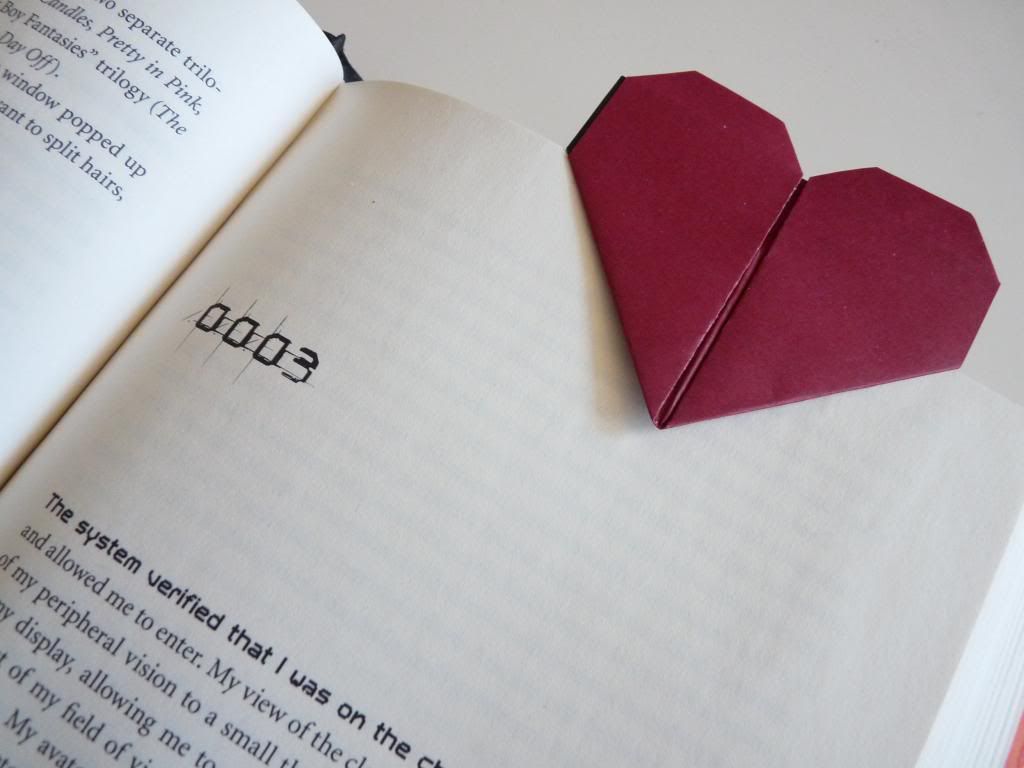
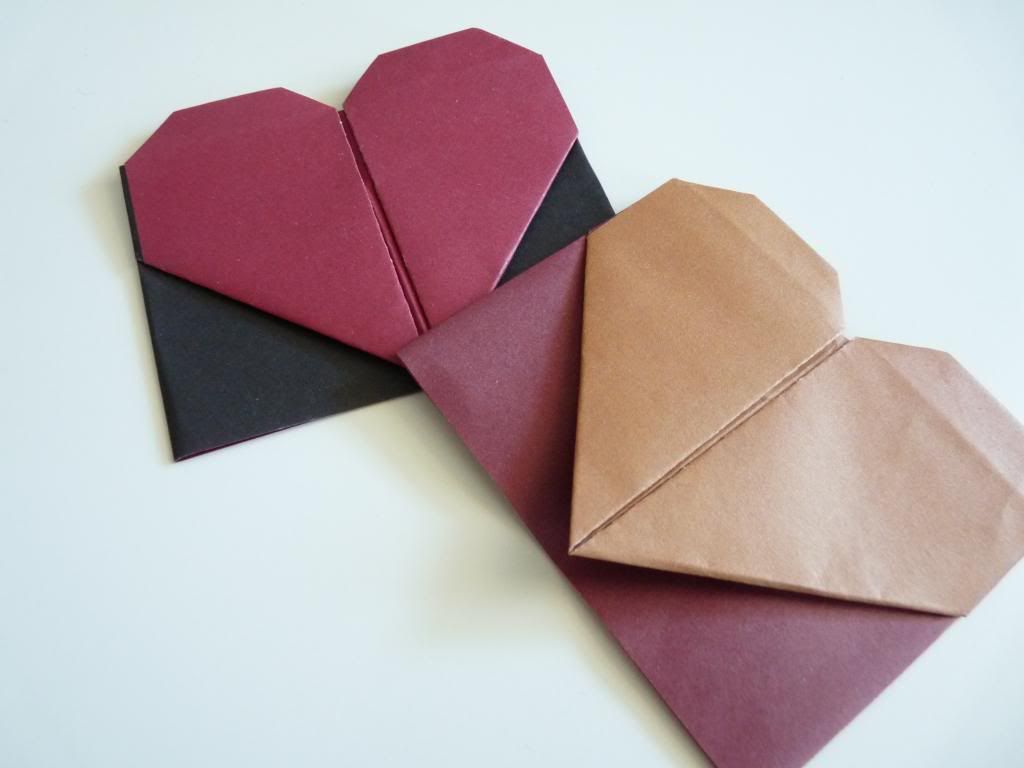
Origami Heart Bookmarks (Not in time for Valentine's Day at all.)


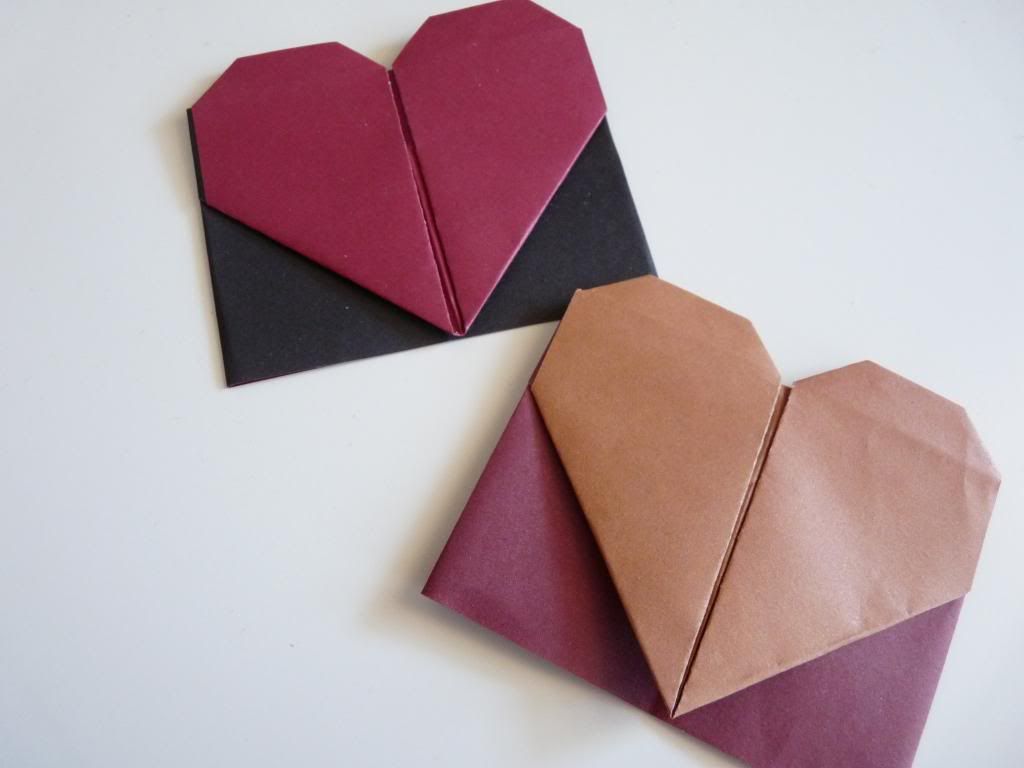
So I came across this tutorial on how to make this cute little bookmark!  I often read several books at a time, and so, I am always in need of bookmarks.  I used to buy them, but that got expensive and unoriginal-- I mean how many Twilight bookmarks does one person need?!


ANYWAYS, enter this sweet little bookmarker. It is easy to make, and its cute.  To make my book marks, I use two-sided origami paper since both sides of the paper are shown.  If you only have one-sided paper, that's cool too just remember that the side facing down when you start is the color of your heart. (If you want the patterned side of your paper to be the heart, it must face down when starting the tutorial.)

There you are, a poem to help you fold one.


Sunday, 10 February 2013

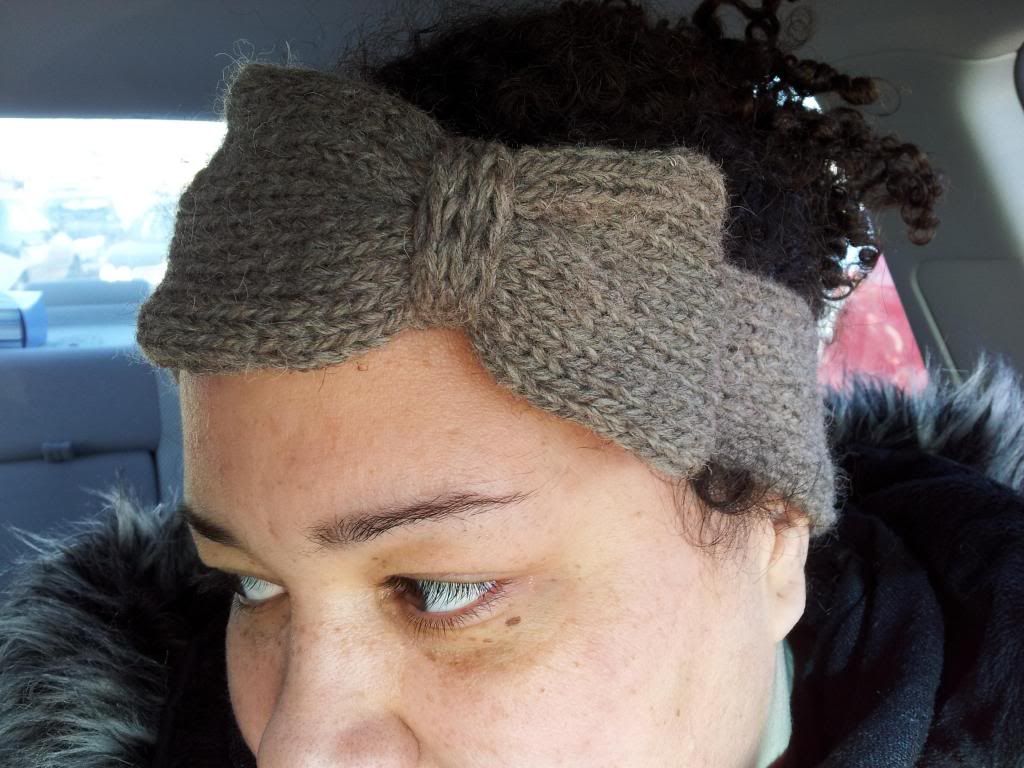
Made: DIY Bow Headband

 
Its finally been cold here!  So, it was time for me to get my knitting needles out and whip up a headband for my ears!  I don't like wearing hats at school because I don't want to mess up my already frizzy hair.  And, its really difficult to find hats that a) fit over my afro; and b) don't cause my hair to become a frizzy mess after I take it off.  So, headbands are a total lifesaver for me here.  

I looked around for a pattern that I liked, and none of them were exactly what I liked.  So, I used this headband pattern, and made up my own bow pattern.  Which I will share with you right now:

 
Knitted bow pattern:

Materials:
Less than 100 yds of worsted weight yarn ( I used some alpaca/wool I got from a farm around here)
US size 8 (5 mm) knitting needles
Yarn needle for putting it all together 

Part 1: The Bow
CO 17 sts.
Knit in st st for 7 inches (18 cm) then cast off.  You will have a rectangle, with the sides curling inwards.  You totally want this.

Part 2: The tie
CO 6 sts.  This is the middle part of the bow.
Row 1: K1, P1, K1, P1, K1 P1.
Row 2: Same as row 1.
Continue in pattern until you have completed 8 rows.  
Cast off. This will be a tiny ribbed rectangle.

Putting it together:
Take the bow (part 1) and sew the ends together into a tube.  Fold the tube in half with the seam in the back center.

Pinch the middle of the tube into a bow shape, and wrap the tiny ribbed rectangle (part 2) around the middle of your bow.  Sew the tie in place, and secure with a couple stitches into the bow.  

Attach to your headband, and style that thing!


Monday, 3 December 2012

12 posts of Christmas: Handmade Gifts


Dude.  I love Christmas.  I'm not talking about the religious aspect of the holiday, I'm not into that part.  I'm into the gift-giving, meal-making, goodie-baking, fun-spirited aspect of the holiday.  So, in honor of the holiday season, I'm going to have 12 posts dedicated to the things I love about Christmas.  

*****************************

Isn't giving presents the best?  I love giving my friends and fam pressies, but often people are weird about it if there's no special occasion.  Every once and a while I will find something that I HAVE to buy for a friend, and they would give me a hard time about getting them something.  With some friends its goes so far as I wait for their birthdays, and then give them all the things I found along the way.   What happened to us as a society, where a friend can't give another friend something to perk up their day without bringing on the Inquisition?

ANYWAYS, one of my favorite things about Christmas, is that I can give gifts, and no one gives me the third degree about it.  One of the things I love to do is make the gifts I give to people.

I've always been crafty, but I never really gave handmade gifts at first.  I didn't have many people in my life who appreciated all the effort and time that went into making something.  So I kept most of the early things I made.  But I'm a knitter, and you can have entirely too many hats, scarves, mitts and sweaters so, one Christmas I gave away something I made.  And it was a hit!


There is a practical side to handmaking your gifts too.  A few of our Christmases were heavily budgeted for me and D as I was unemployed, then underemployed for a couple of years.  I made almost every present I gave that year.  Not only were they not costly, they were deeply personal to each person who received a gift.

Of course, pulling off a handmade Christmas takes a lot of planning.  I started thinking about Christmas gifts I wanted to make in August.  I searched for patterns, and started making gifts even if I didn't know exactly who they would go to.  And, if I made something and liked it too much to give away, there was time to find something else to make, or to make another one.  Not that I have ever done that, or anything.

For gift giving, I tend to stick to small things- hats or mitts and the like.  This way I don't have to worry about sizing, and you can never really have too many of either of these living up here in the "great white north."

Here is one of the gifts I made for a friend this year (Oh I hope she doesn't read this blog...):


I didn't knit this.  I was on a weaving kick for a while, and this is one of the scarves I made.  A friend commented on how much she loved it, so she's getting it for Christmas!

Another gift I've made for this year:


A Sunflower Tam!  I love this hat, and I have one for myself.  A great thing about being a knitter is that knitted gifts are in high demand usually.  But I have given other types of crafty gifts too.  A few years ago, I made some quilts for my grandmother, my mother and my mother-in-law; and I have made quilted makeup bags in the past.

But it really doesn't matter what kind of handmade gift you give; its really just the fact that you took some time, and thought about someone enough to give them not only a present, but you time too. And this is how I know that handmade presents best represent what I am trying to give to my friend and family; because I am always grateful when someone will spend their time on me.

What handmade gifts have you given? Why did you give it?


Saturday, 1 December 2012

12 posts of Christmas: DIY Star Ornaments


Dude.  I love Christmas.  I'm not talking about the religious aspect of the holiday, I'm not into that part.  I'm into the gift-giving, meal-making, goodie-baking, fun-spirited aspect of the holiday.  So, in honor of the holiday season, I'm going to have 12 posts dedicated to the things I love about Christmas. 
 

I love my tree.  Every year, D and I have an argument about what colors we are going to decorate the tree in.  He likes multi-colored lights and tinsel; essentially he likes it if the tree looks like a carnival threw up on it.  Each year I lobby for something a little classier.  Up until this year, I lost the battle.  It was fine though, I like decorating the tree and having it up, so it didn't really matter what it looked like to me.

But this year... D reminded me that we made a deal; if we did the tree how he liked it last year, he would let me choose the colors this year.  So I went for the classy white-lighted, red and gold decorated tree.  And it looks so nice!  There was one small problem, we didn't have that many red and gold ornaments.  We had tons of balls, but not anything else.

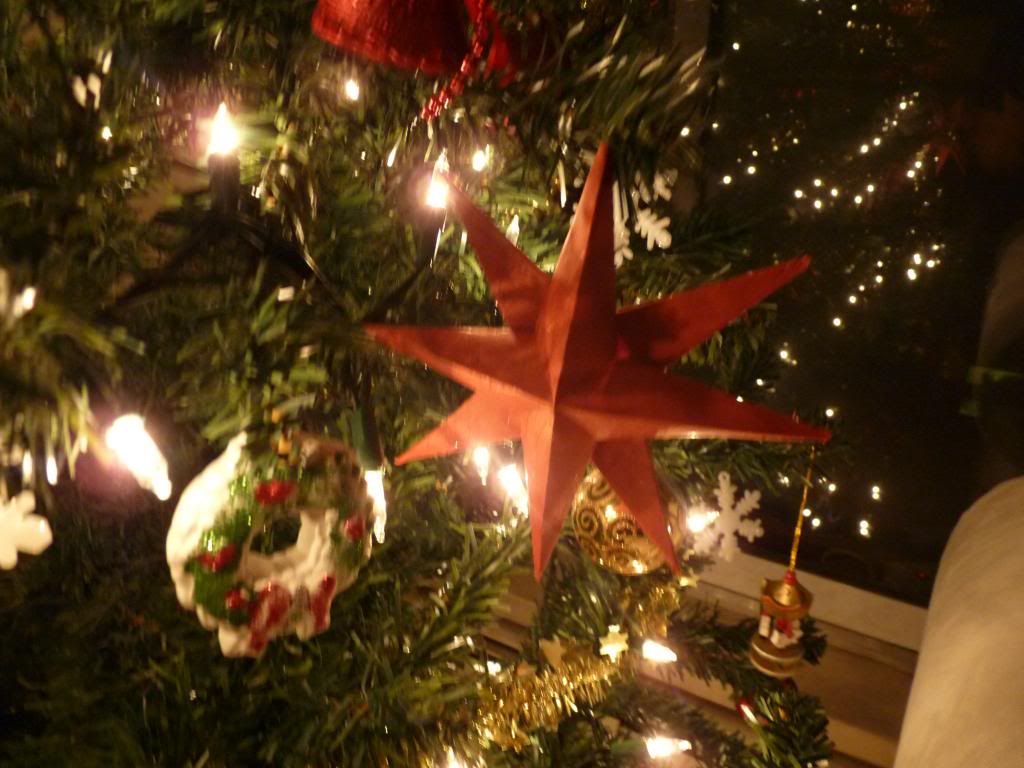
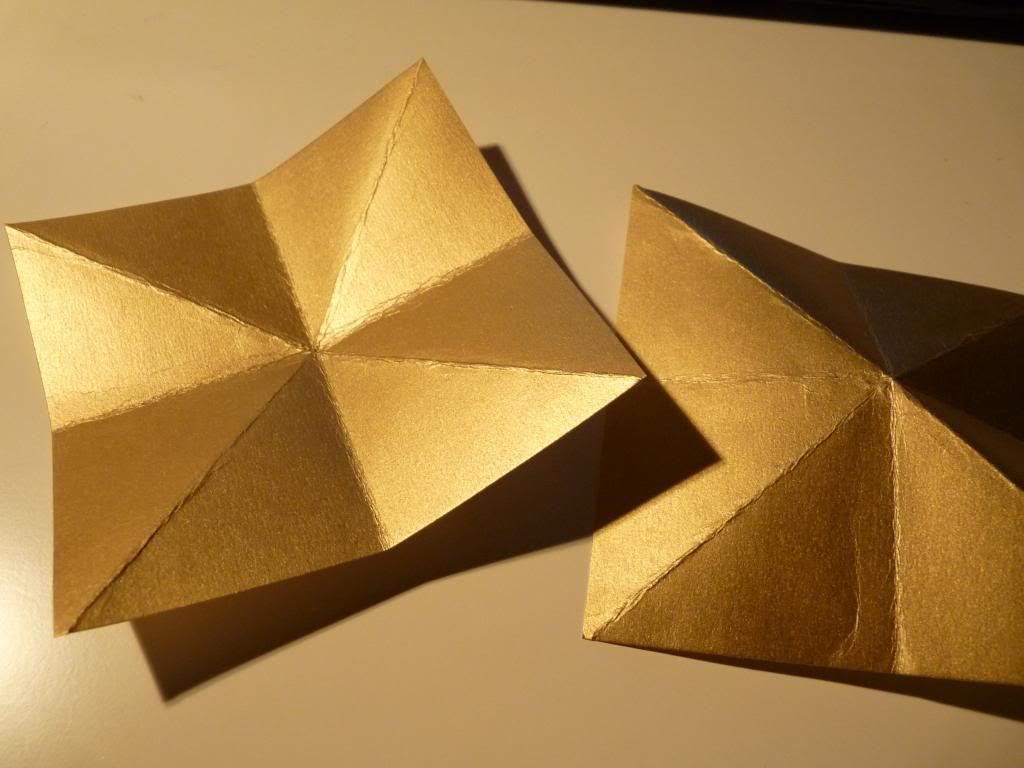
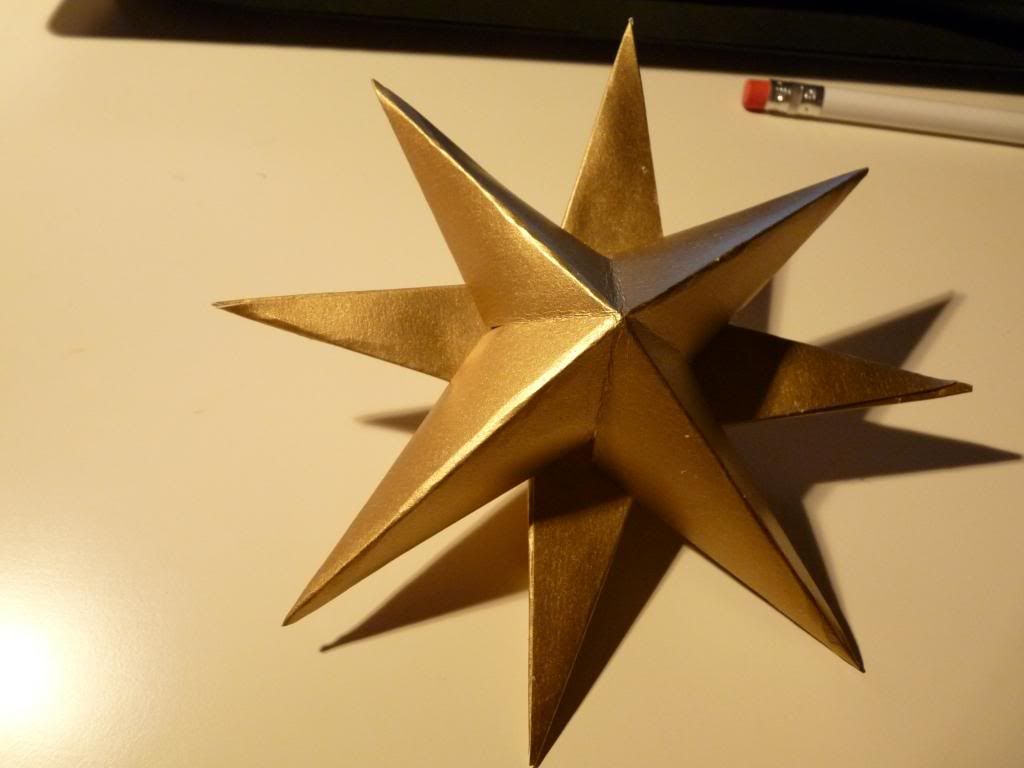
Well, thank goodness I'm crafty y'all.  I made most of the ornaments on the tree.  These ones are my favorites though.  They are fast, cheap and you can make them in any size and color you want.

And who doesn't love a tree full of stars?
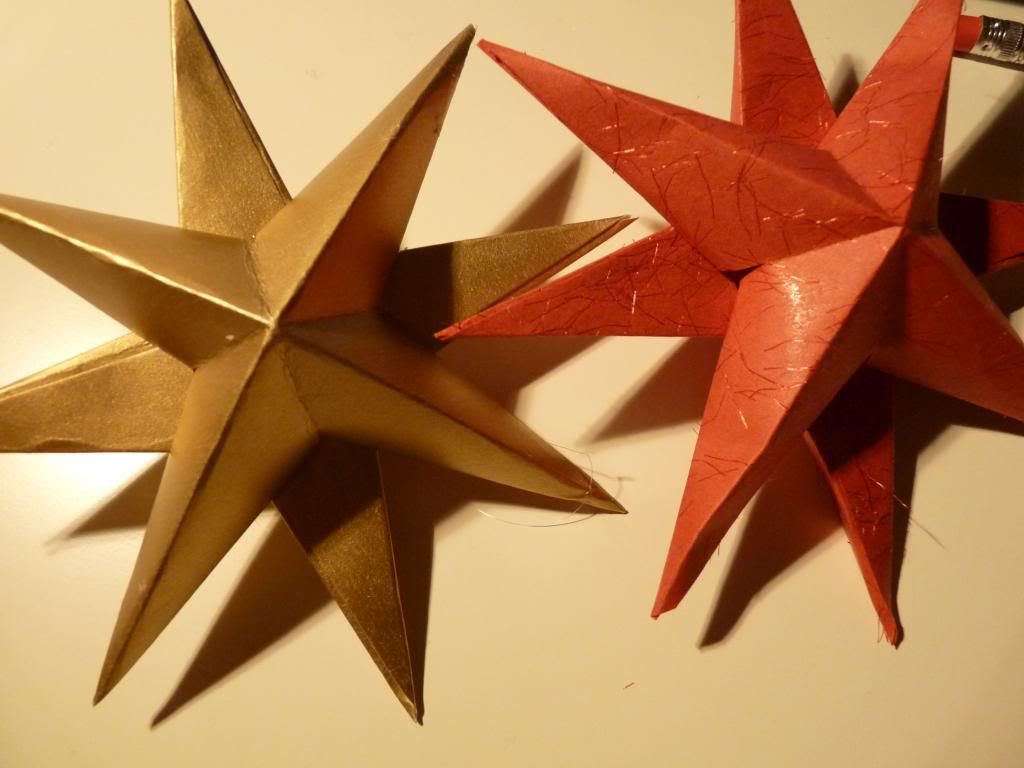

These paper stars are great.  They are light, and pretty easy to make.  They are really fast too, so you can make 10 of them in no time. 

Materials:

Fancy paper (one sided is fine)- cut into 4 inches square. 
Scissors
Glue, I used white glue
Ruler
Pencil
Folder if you are using card stock

How to:


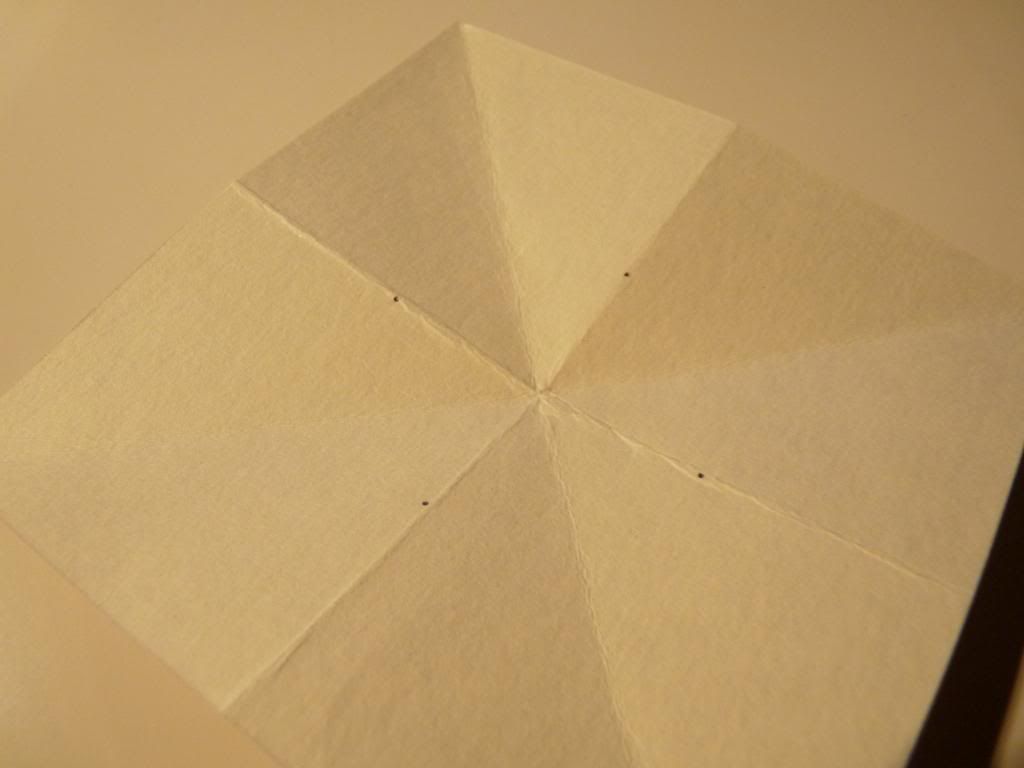
Turn your paper over (right side down) and fold your paper in half diagonally.  With the decorated side of the paper facing up, fold in half length-wise and width-wise. 


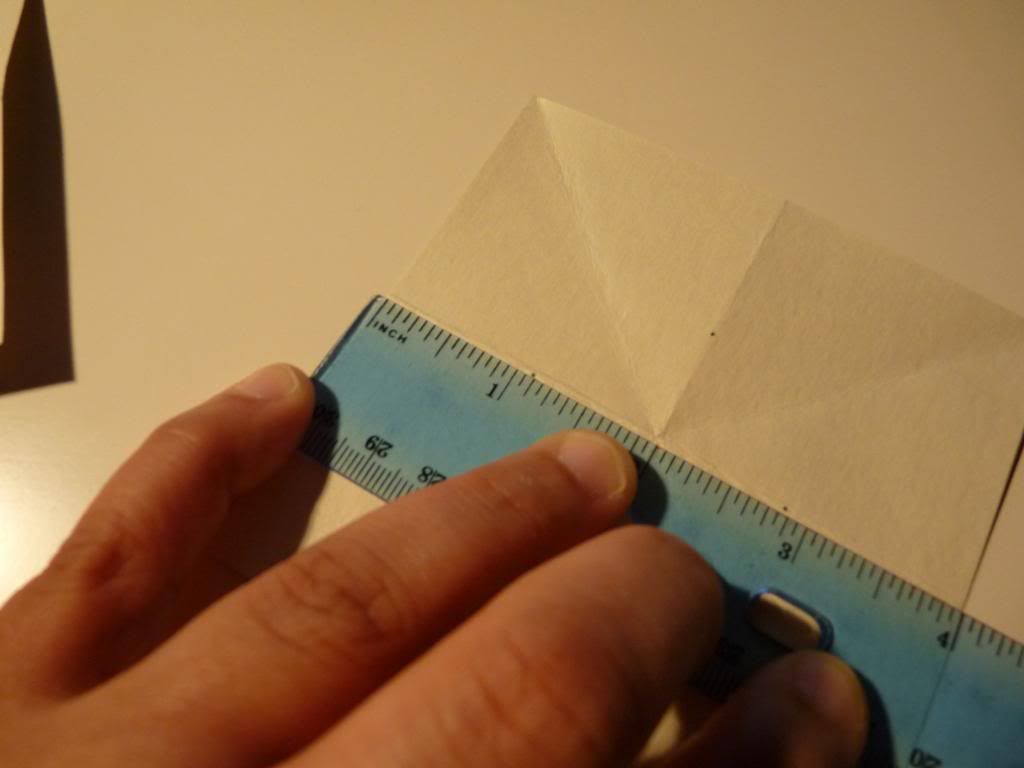
Turn the paper over again (right-side down) and mark just over an inch on the non diagonal seams that you folded.


Mark the same distance from the edge, all around your paper.


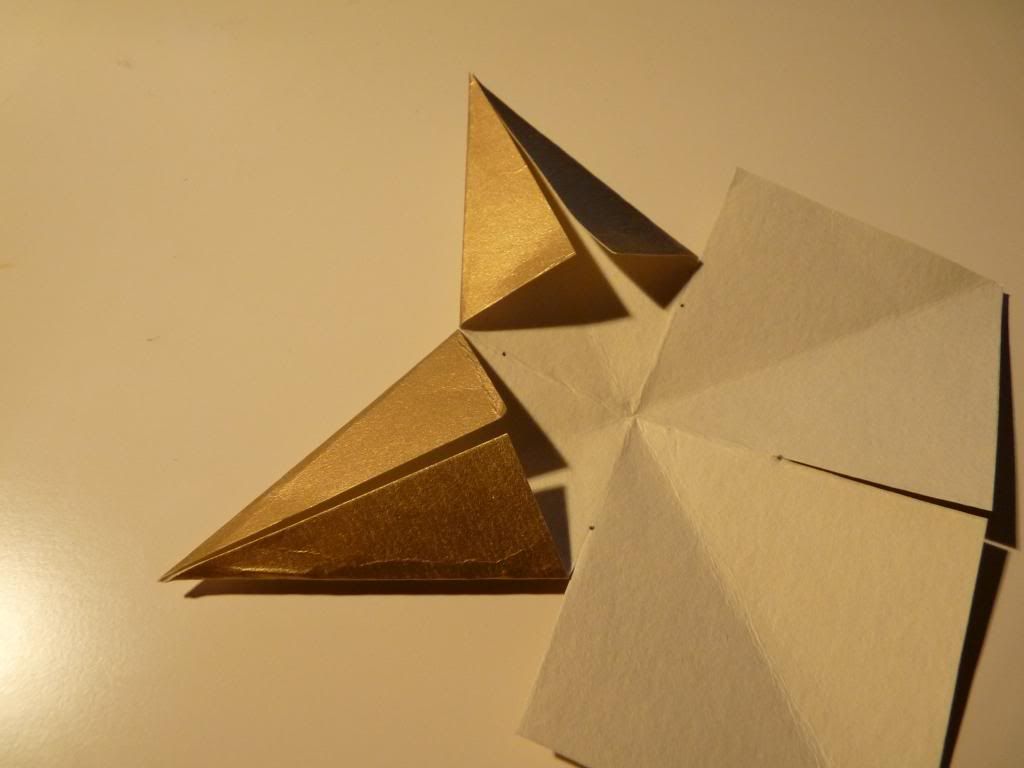
Cut along the seams to the point you marked.  You should have four cuts in your paper.  Fold the corners in towards the diagonal folds.  Do this for all four corners.  On ever other triangle, put some glue on, and over lap the triangles to create the points.  While you are waiting for it to dry, repeat these steps again to make the other half.


 Glue the halves together back-to-back to create an 8 pointed star!  Let it dry.

To hang the stars, I used a needle and some invisible thread and poked a hole in one of the points.  Ready to hang, and perfectly matched for my tree. 

I also made a bunch to hang off of gifts and stuff.  I've made these before, but larger and hung them from a window.  They are a pretty handy craft!

I'm thinking or crocheting some snowflakes or something...  What kind of ornaments have you made for your tree?


Saturday, 24 November 2012

Dirty Hippie DIY: Cure for the Common Cold


'Tis the season for coughs due to colds.  And a doozy of a cold has been going around my workplace.  I think I've caught it (or a mutated version of it) 3 times.  I think I'm starting on number four now.

But I don't like taking all sorts of chemically stuff when I'm at home and I can rest away my illness.  So I go the good old fashioned route and sleep and drink gallons of tea.  I have a special recipe for a mixture I drink in hot water-- it always makes my stomach feel better, and it usually soothes my throat.  And the hot water helps my stuffy nose.  And, it tastes good.  AND, there are no chemicals in it. 

There is no name for it.  I call it the "tea jar" in our house.  There are a few different versions that I've used, but this is my favorite.  You can make your own "tea jar" with 3 ingredients:

1/2 cup of honey
2 inch piece of ginger root
1 lemon

That's all you need for some soothing tea.


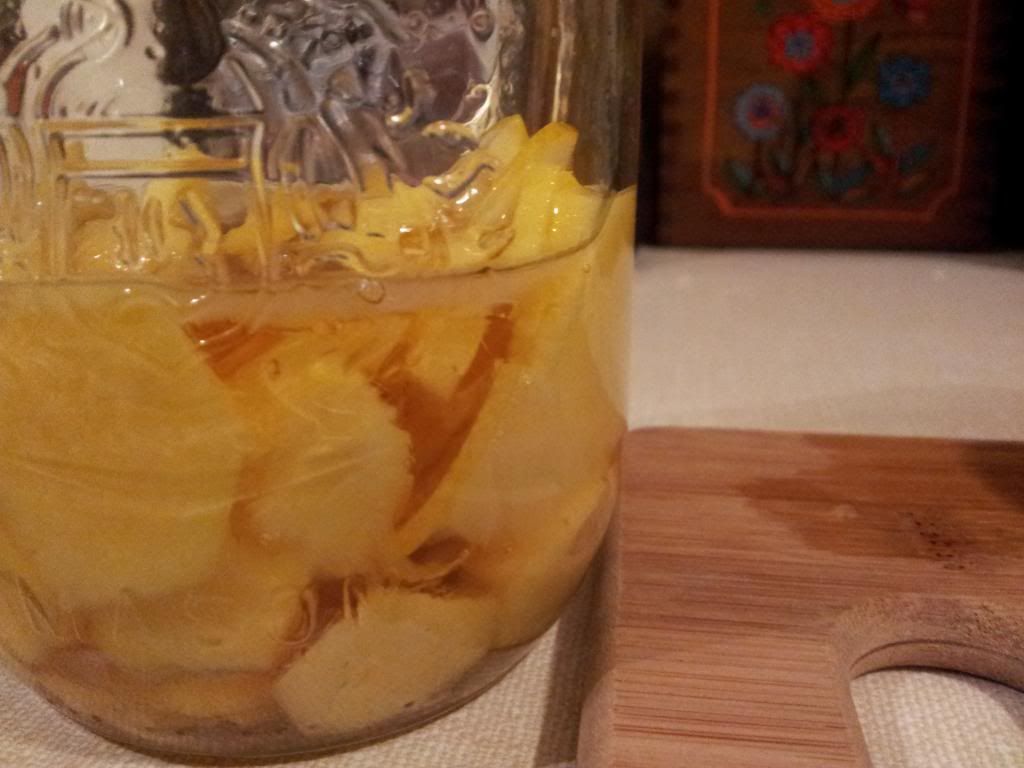
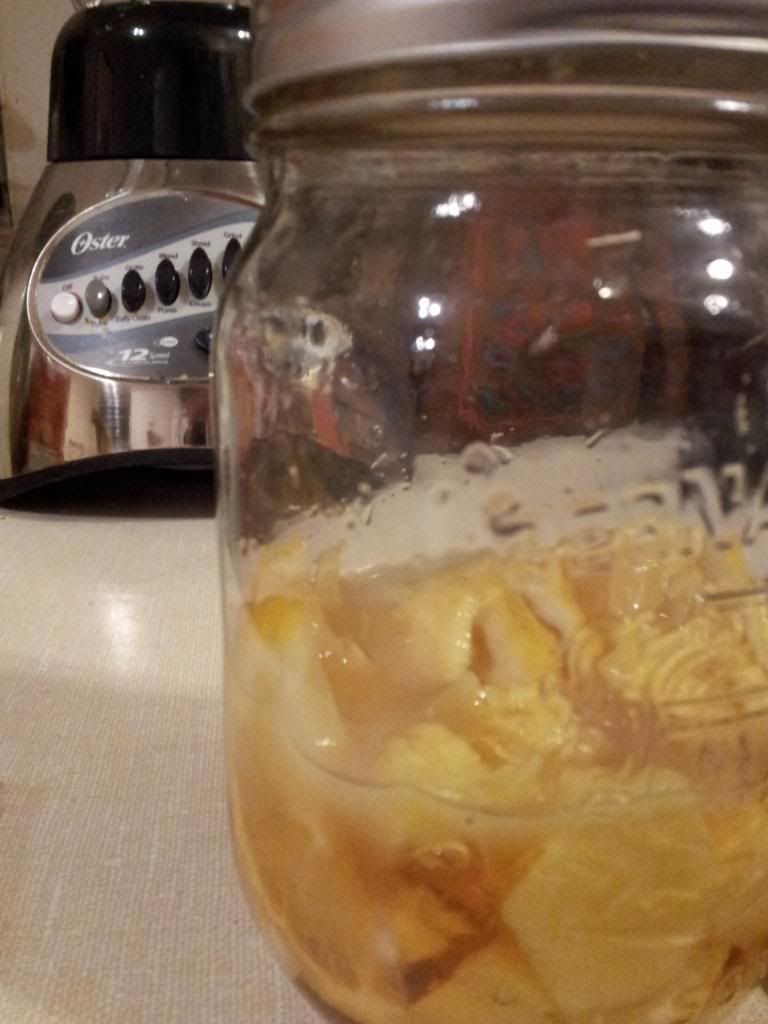
Peel the ginger root and slice it really thin.  Wash the lemon, squeeze some of the juice from the lemon into the jar and then slice it really thin.  Put the lemon and ginger in a mason jar, and shake it to distribute it in the jar evenly.  Pour the honey over the whole thing, and seal the jar.  Store it in the fridge.

You could probably use it right away, but it is better if you wait.  I usually wait over night, but a couple of hours is okay too. 


To use it, boil some water, and put a heaping teaspoon of the honey in your mug.  Pour the hot water over it, and sip. 

I think I'll go make some now, I feel an itch in my throat...