Showing posts with label knitting. Show all posts

Monday, 27 January 2014

Warm Knitted Mittens on a Snow Day


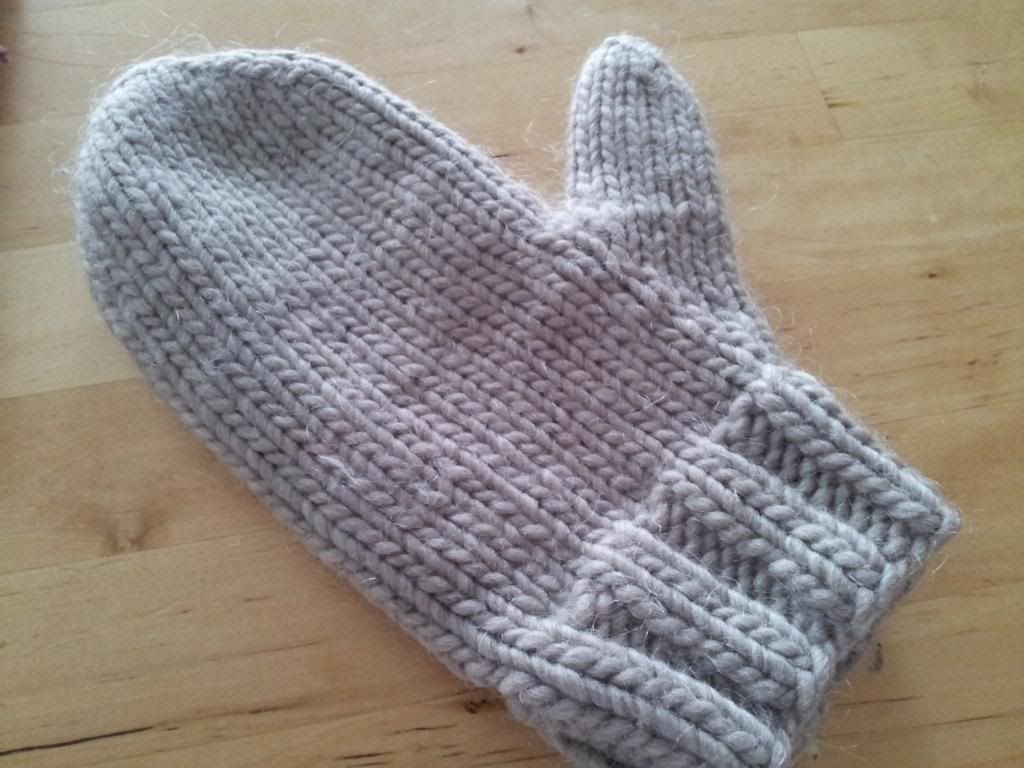
Today was a snow day.  So I sat with some coffee, and knit.  Mittens of course!  There's nothing I love more in the winter than my hand knitted mittens.  They are the only things I wear.  I have even managed to get D on the knitted mitten train.  I made him a pair a few years ago and he loved them.  But this year, he managed to get a hole in the thumb.  So he asked me to make him a new pair.  I've been making these mitts for so long, I don't know where I got the pattern originally.  I thought this time, I would write down the pattern I use so that I had it, and to share with you!  (If you knit that is..)


This pattern uses a bulky yarn.  I usually use Lamb's Pride Bulky for my mittens.  Its soft and dense, and my mitts always turn out perfectly when I make them.  The red and purple mittens above are made with a lighter weight of yarn (Manos de Uruguay Classica) held 2 strands together. 

This pattern makes a nice thick mitten.  Like the kind you would need in Canada (which is where I live.)  Here's what you need:

Materials:
1 skein Lamb's Pride Bulky, or other bulky weight yarn
1 set of 5 Double Point needles US size 9
2 stitch markers in different colors
yarn needle for weaving in the ends

Gauge:
4 sts/ 1 inch

Instructions:
Cast on 32 stitches onto 4 double-pointed needles. Join to work in the round. Mark the beginning of the round with one of the stitch markers.  Begin knitting in 2x2 rib. Continue 2x2 rib for 10 rounds or 2 inches.

Decrease round: begin stockinette stitch and K2tog, K to end of needle, on next needle K to last 2 stitches, SSK, on third needle, K2tog, K to end of needle, on fourth needle, K to last 2 stitches, SSK. You should have 28 sts on your needles.

Increase for thumb gusset: K14, M1, place marker (NOTE: not really necessary, I put one here because it helps me remember the number of increases,) K1, M1, K to end of round. Increase one stitch before the first increased stitch and after the last increased stitch every 3rd row, 4 more times. By the end of this round, you should have 38 sts.

Next row: K14, place next 12 stitches on scrap piece of yarn or a stitch holder. Cast on two new stitches over gap (I use backward loop method) and continue to knit to end of round.You should have 30 sts in the round.

Continue knitting hand portion of mitten until it reaches tip of little finger.

Start decreasing for the top of the mitten: 
First round: K2tog, knit to the end of the needle, on the next needle K to the last 2 stitches and SSK, on the thirds needle K2tog, k to the end of the needle, on the last needle, K to the last 2 stitches, SSK.  
Knit one round even.  Repeat the last 2 rounds until there are 2 stitches on each needle.  Take the yarn needle and pull yarn through the remaining stitches.  Weave in ends.

Thumb:
Pick up the 12 stitches for the thumb and put them on 3 needles, 4 stitches on each needle.  K one round and at the end of the round pick up 1 or 2 stitches over the gap.  Close the gap to complete the round.  K in the round until long enough for your thumb to just poke out the top.  K2tog, K1 to the end of the round.  K one round even.  K2tog to the end of the round.  Pull yarn through the remaining stitches.  Weave in ends.


These mitts are really quick to make up.  I finished the first one in about 2 hours.  I like them because they are quick and really warm.  If you make a pair, will you let me know?  I would love to see your mittens.


Tuesday, 16 July 2013

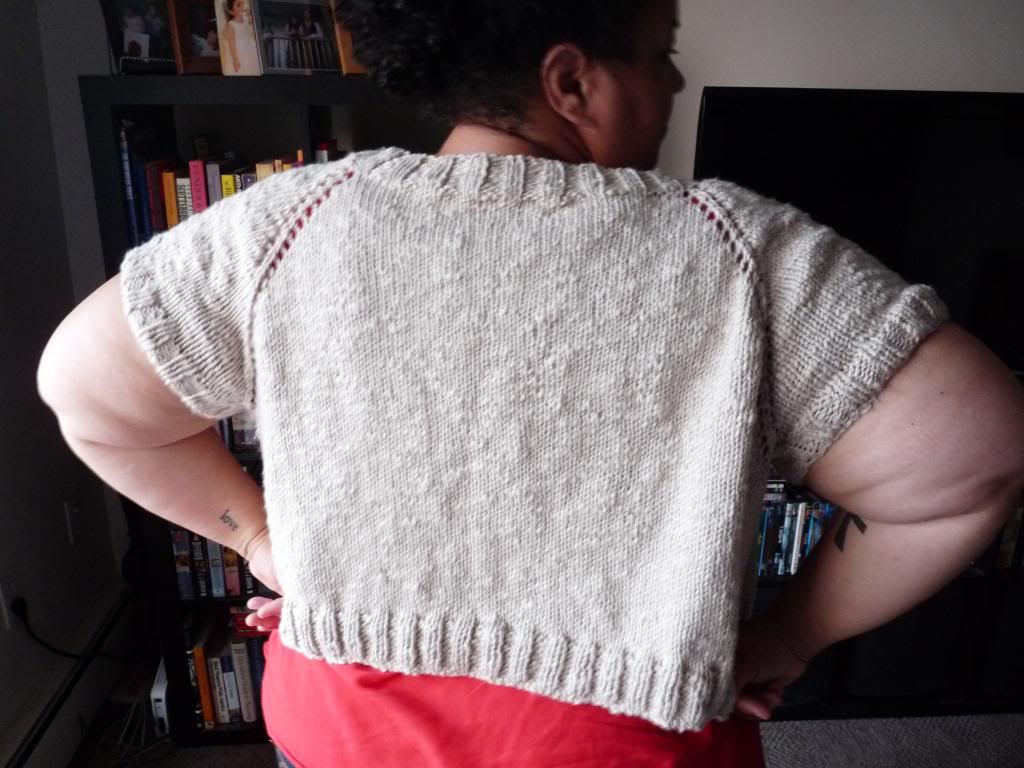
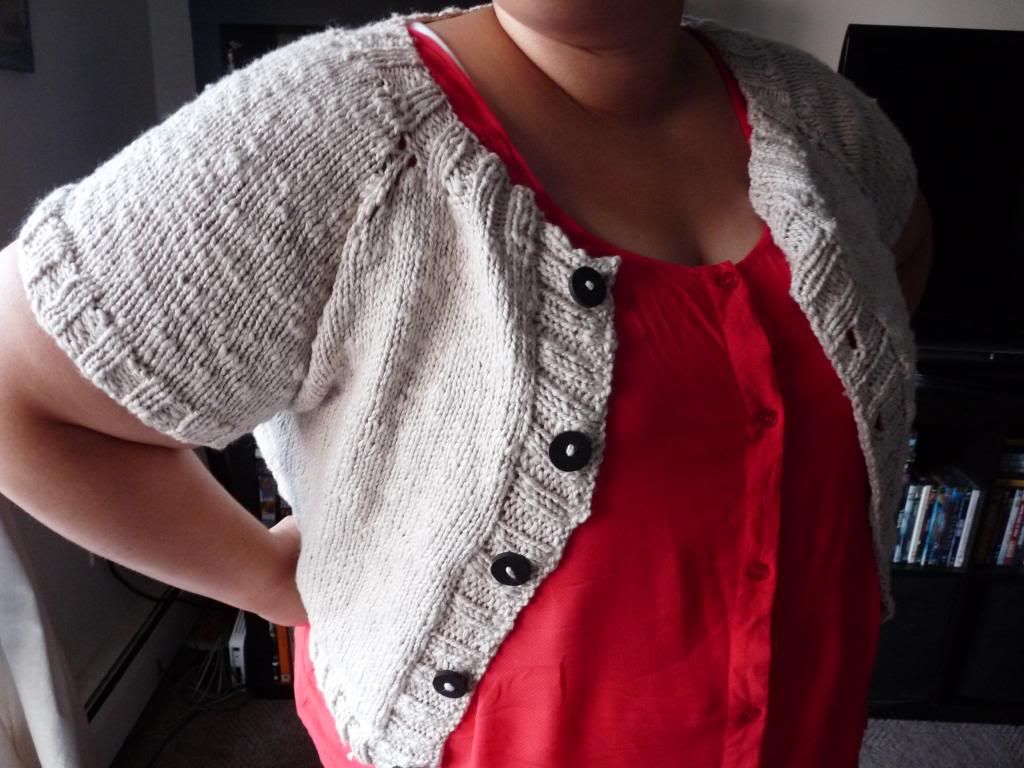
Made: Cotton Cropped Cardigan (Try and say that 3 times fast)


Even though I have been a somewhat absent blogger, I have been doing other things.  I've been having a crisis about my blog lately (more on that later), but I'm pretty proud of the sweater I just made, so I thought I would share.

I stopped knitting for a while, and then my friend opened a yarn boutique.  With her shop came more incentive to knit on!  The yarn for this project was one of the first things I bought there.  I finished it in under 2 months, which is pretty fast for me.  I wanted something light, that I could throw on at night in the summer.  So I decided to make something in cotton, and voila!


Its pretty warm, even though it is cotton.  I couldn't wear it around here right now since its so hot.  It figures that as soon as I finish a summer cover-up, it swelters.  It will cool down, I hope, so that I can wear it.


For those of you interested in such things, here are the specifications:

Pattern:  I made it up, but here is one that is similar for free at the Lion Brand Yarn website
Size: My size.  I tried it on as I went, so no measurement or numbers were needed.
Yarn: Mirasol Hap'i cotton (discontinued), 5 skeins in color "Natural"
Needles: US 9 circs
Time to Complete: About 1 1/2 months, but I only worked on it once a week.


P.S.  I have been thinking about the Trayvon Martin case, and I will have something to post on that coming up.  Right now, I'm still really sad about the whole deal. 

Friday, 3 May 2013

Made: Knitted Baby-Cardis


Did you know that I liked to knit?  I totally do!  I used to have a knitting blog, but I always felt bad that I was posting other things and not enough knitting, so I often felt guilty about the blog-- you know how blog-guilt is.  So I gave it up, and started this blog about all kinds of things.

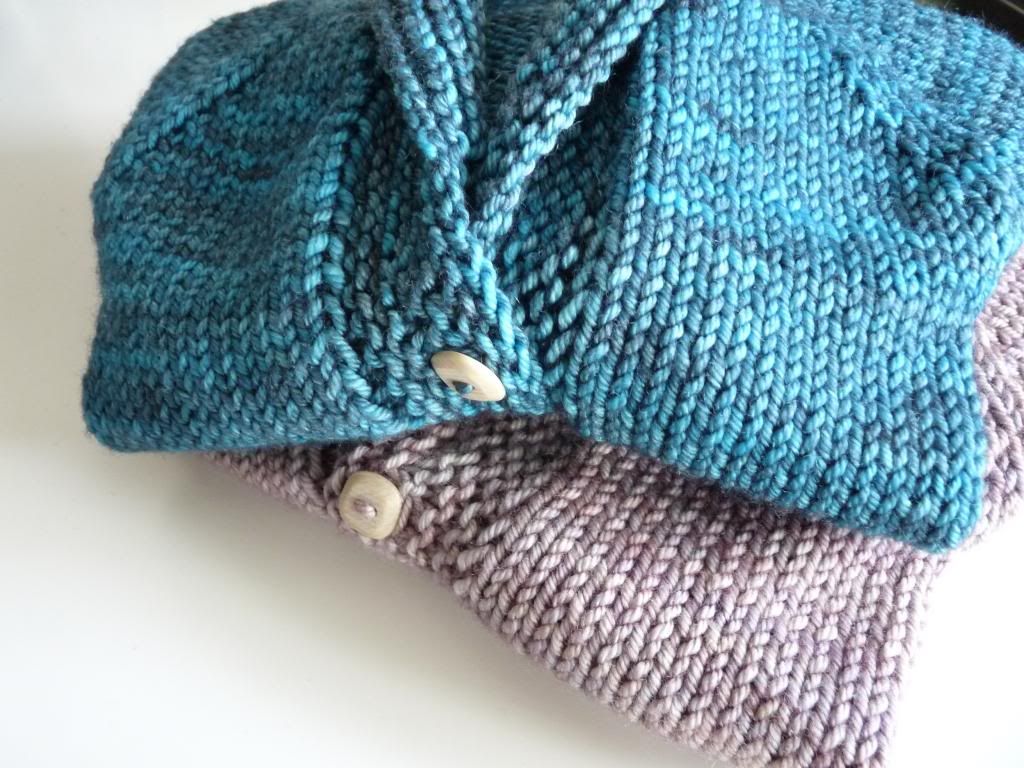
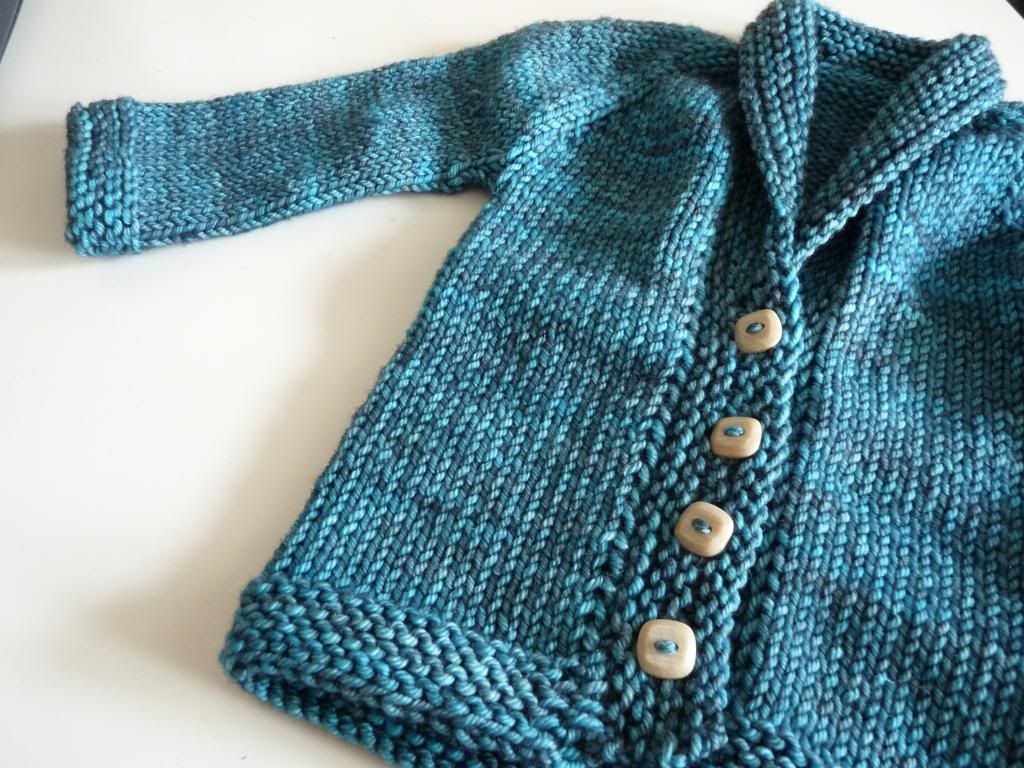
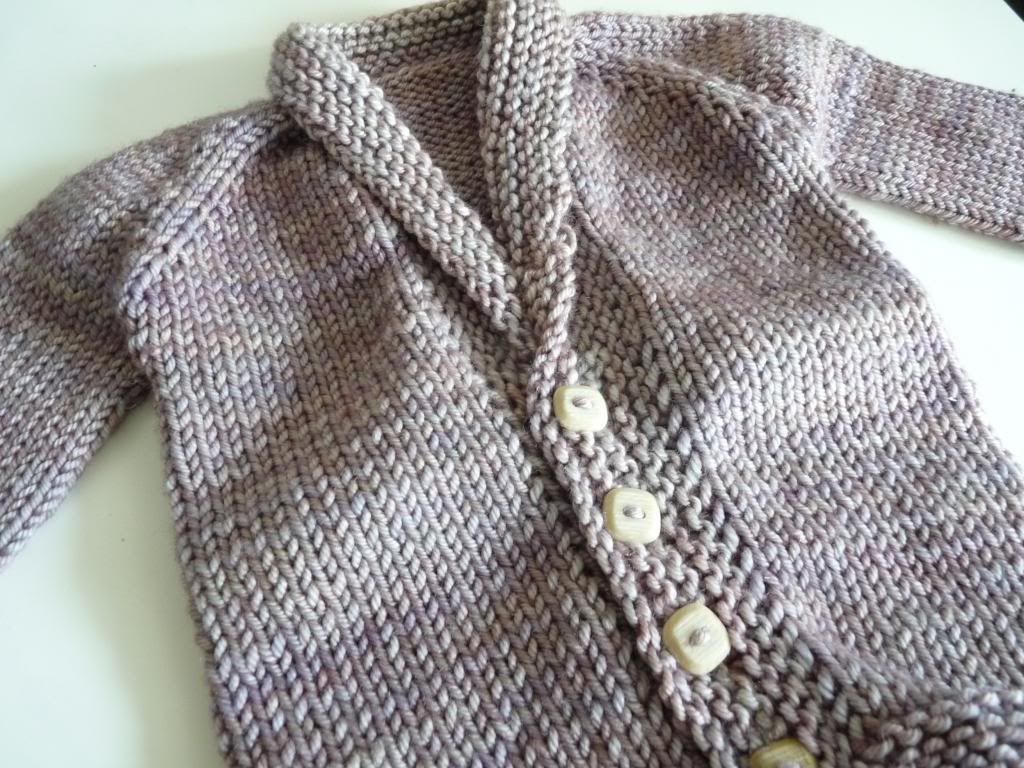
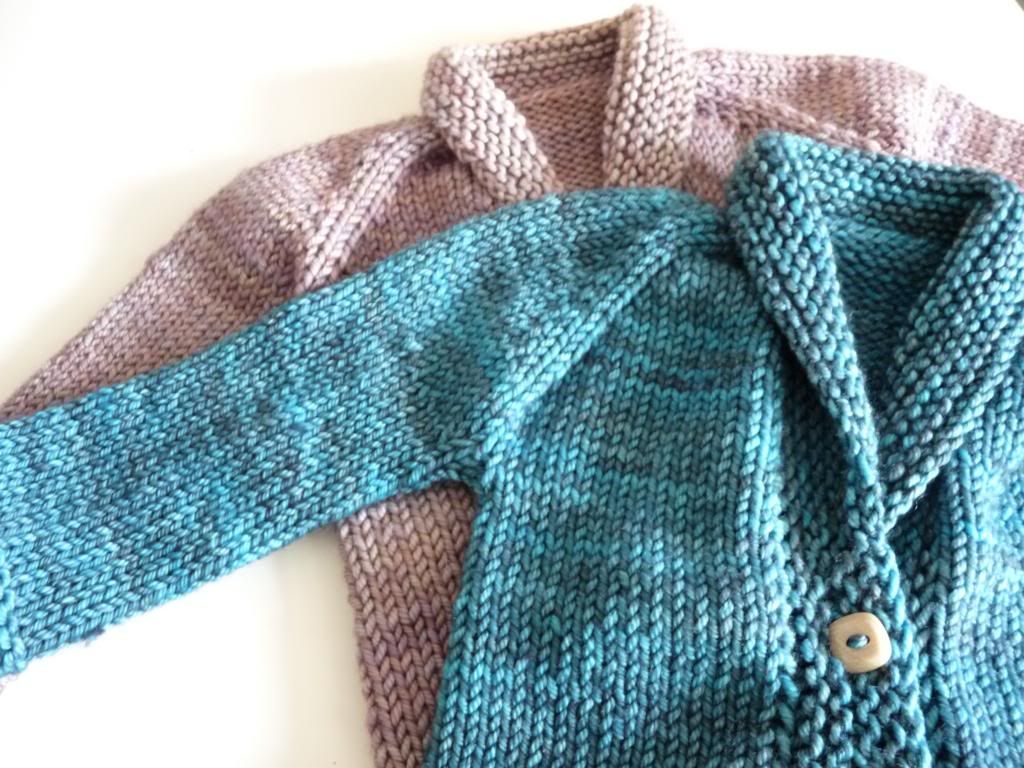
ANYWAYS, I still knit sometimes.  Especially when I find out my friends are having babies!  Lots of babies seems to be showing up in my friends bellies.  So I made these cute sweaters.


So I knit this pattern, and it was really easy!  Its "top-down," so no seaming.  And I really like how they turned out.  I think that they are classy; something a baby can read while reading a good novel, and sipping some single-malt scotch.

Obviously, I don't know much about raising a child.

But I do know that they need to be warm.  And these wool sweaters will do the trick.


I chose these colors because I don't know if the babes are going to be boys or girls.  Not that it matters, these sweater are cute enough for either.  The yarn I used is Madeline Tosh Vintage, in Opaline (grey) and Turquoise.   Each sweater took just over one skein of yarn.  It was also a little pricey-- but you only have one firstborn, right?  And I think every baby should have something handmade.


I love the buttons.  I "inheirited" some old buttons from a friend who's mom was one crafty lady.  I love using them on my projects.  I like that they are used on a project that is so special.

Overall, I'm pretty excited and a little impressed with these sweaters.  I hope that the moms-to-be that I give them to enjoy them.  And I hope that they keep the little babies warm.

If you are a knitter, here are the details of this project:

Pattern: Baby Sophisticate (Ravelry Pattern)
Size: 6-12 months
Yarn: Madeline Tosh Vintage, 1 1/2 skeins per sweater; colors Opaline and Turquoise
Needles: US Size 8, 20" circulars and DPNs
Time to complete: About 9-10 hours each


Sunday, 10 February 2013

Made: DIY Bow Headband

 
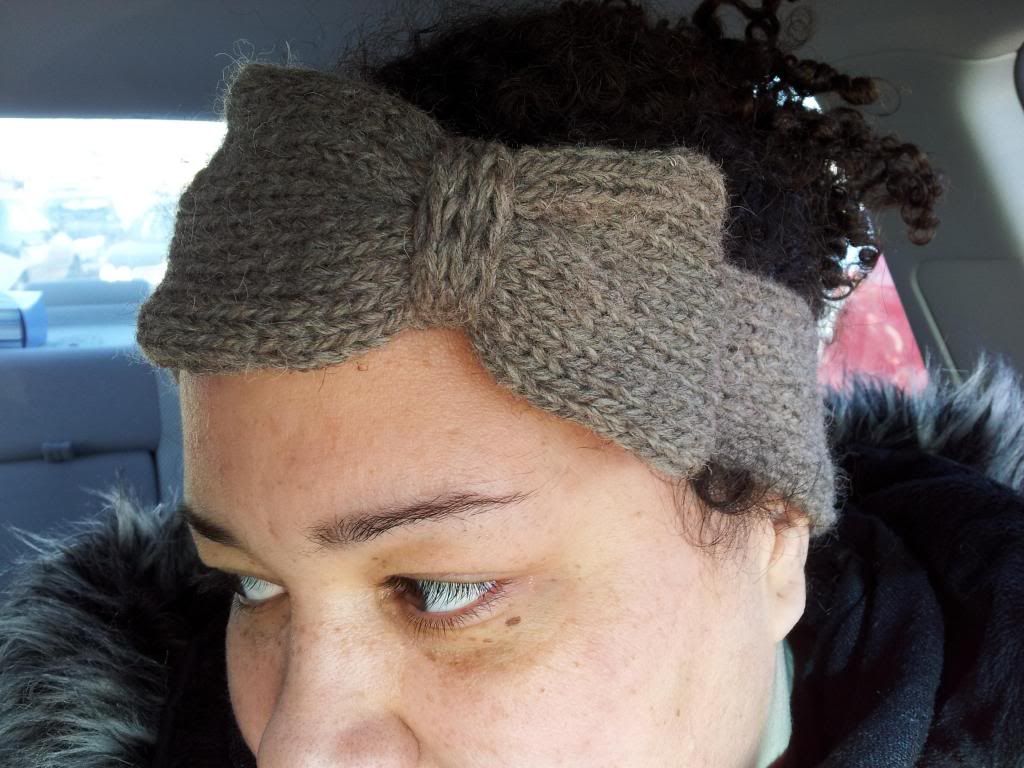
Its finally been cold here!  So, it was time for me to get my knitting needles out and whip up a headband for my ears!  I don't like wearing hats at school because I don't want to mess up my already frizzy hair.  And, its really difficult to find hats that a) fit over my afro; and b) don't cause my hair to become a frizzy mess after I take it off.  So, headbands are a total lifesaver for me here.  

I looked around for a pattern that I liked, and none of them were exactly what I liked.  So, I used this headband pattern, and made up my own bow pattern.  Which I will share with you right now:

 
Knitted bow pattern:

Materials:
Less than 100 yds of worsted weight yarn ( I used some alpaca/wool I got from a farm around here)
US size 8 (5 mm) knitting needles
Yarn needle for putting it all together 

Part 1: The Bow
CO 17 sts.
Knit in st st for 7 inches (18 cm) then cast off.  You will have a rectangle, with the sides curling inwards.  You totally want this.

Part 2: The tie
CO 6 sts.  This is the middle part of the bow.
Row 1: K1, P1, K1, P1, K1 P1.
Row 2: Same as row 1.
Continue in pattern until you have completed 8 rows.  
Cast off. This will be a tiny ribbed rectangle.

Putting it together:
Take the bow (part 1) and sew the ends together into a tube.  Fold the tube in half with the seam in the back center.

Pinch the middle of the tube into a bow shape, and wrap the tiny ribbed rectangle (part 2) around the middle of your bow.  Sew the tie in place, and secure with a couple stitches into the bow.  

Attach to your headband, and style that thing!


Monday, 3 December 2012

12 posts of Christmas: Handmade Gifts


Dude.  I love Christmas.  I'm not talking about the religious aspect of the holiday, I'm not into that part.  I'm into the gift-giving, meal-making, goodie-baking, fun-spirited aspect of the holiday.  So, in honor of the holiday season, I'm going to have 12 posts dedicated to the things I love about Christmas.  

*****************************

Isn't giving presents the best?  I love giving my friends and fam pressies, but often people are weird about it if there's no special occasion.  Every once and a while I will find something that I HAVE to buy for a friend, and they would give me a hard time about getting them something.  With some friends its goes so far as I wait for their birthdays, and then give them all the things I found along the way.   What happened to us as a society, where a friend can't give another friend something to perk up their day without bringing on the Inquisition?

ANYWAYS, one of my favorite things about Christmas, is that I can give gifts, and no one gives me the third degree about it.  One of the things I love to do is make the gifts I give to people.

I've always been crafty, but I never really gave handmade gifts at first.  I didn't have many people in my life who appreciated all the effort and time that went into making something.  So I kept most of the early things I made.  But I'm a knitter, and you can have entirely too many hats, scarves, mitts and sweaters so, one Christmas I gave away something I made.  And it was a hit!


There is a practical side to handmaking your gifts too.  A few of our Christmases were heavily budgeted for me and D as I was unemployed, then underemployed for a couple of years.  I made almost every present I gave that year.  Not only were they not costly, they were deeply personal to each person who received a gift.

Of course, pulling off a handmade Christmas takes a lot of planning.  I started thinking about Christmas gifts I wanted to make in August.  I searched for patterns, and started making gifts even if I didn't know exactly who they would go to.  And, if I made something and liked it too much to give away, there was time to find something else to make, or to make another one.  Not that I have ever done that, or anything.

For gift giving, I tend to stick to small things- hats or mitts and the like.  This way I don't have to worry about sizing, and you can never really have too many of either of these living up here in the "great white north."

Here is one of the gifts I made for a friend this year (Oh I hope she doesn't read this blog...):


I didn't knit this.  I was on a weaving kick for a while, and this is one of the scarves I made.  A friend commented on how much she loved it, so she's getting it for Christmas!

Another gift I've made for this year:


A Sunflower Tam!  I love this hat, and I have one for myself.  A great thing about being a knitter is that knitted gifts are in high demand usually.  But I have given other types of crafty gifts too.  A few years ago, I made some quilts for my grandmother, my mother and my mother-in-law; and I have made quilted makeup bags in the past.

But it really doesn't matter what kind of handmade gift you give; its really just the fact that you took some time, and thought about someone enough to give them not only a present, but you time too. And this is how I know that handmade presents best represent what I am trying to give to my friend and family; because I am always grateful when someone will spend their time on me.

What handmade gifts have you given? Why did you give it?


Monday, 2 April 2012

Signs of Spring


Aren't these flowers beautiful?  D got them for me for the opening night of my play.  I love them.  He must have some some research, because these flowers don't cause my to sneeze or itch or anything that flowers usually cause me to do.  And they are my favorite color orange.  They make the living room so cheerful.

I love the power that plants and flowers have to change a space and make it more colorful, and happy.


Just looking at them makes me happy.  I will have to make sure that when I get myself flowers every once and a while, I will have to get some gerbera daisies.  Oh, I can see all the colors I can get!  I love bringing a little piece of spring inside. 


Continuing on with spring things, I made a business card holder using some leftover sock yarn that I had.  The yarn is Socks That Rock, and the color is Waterlilies.  I love this yarn!  It is hard wearing, and the colors are so bright.  If you would like a card holder for yourself; or you can use this pattern for a gift card holder.  I thought it looked nice than the elastic band I was using to hold my cards together.

Here's a pattern:

Card Holder

Yarn: Sock That Rocks, less than one skein
Knitting needle: 3.25mm

CO 24 Sts.

Knit 6 rows in rev st st
Knit 15 rows
Knit 12 rows in rev st st
Knit 15 rows more
Knit 6 rows in rev st st then Cast off loosely.

Finishing: Fold holder in half inside out and whip stitch the sides.  The rev st st section is the gusset of the holder.  Turn right side in and add a crochet chain measuring about 3 inches.  Attach to the back of holder, and a button to the front.  Put some cards inside of it!


 The return of the warm weather means the return of ice cream for me!  I can't eat a lot of it because I'm lactose intolerant.  But every once and a while, I like a little treat, so I made a banana milkshake.  Want one? 

Ingredients:

1 banana
1/3 cup of vanilla ice cream
1 cup of milk

Blend. Drink. Yum.

Wednesday, 21 March 2012

Made: Striped Baby Sweater


I finished it!  I have been working on a sweater for a friends first baby.  They don't know if they are having a boy or a girl, so I chose some neutral colors, ecru and a brown color.  I think it is cute, and its even cuter with the buttons I found:


They are wooden leaves!  I thought they would go with the sweater, and I'm glad they do!


I went back to the store I bought these, and I couldn't find anymore of them.  When I asked the lady if they would be getting any more, she said that they never had buttons like this in the store.  Strange? Or serendipitous?


I hope that he and his partner like it.  I used sock yarn which is wool and nylon.  It is a little itchy, but I think that a baby would have one of those undershirt thingies on, so I hope its okay.  I'm going to rinse it in some Soak (link) and see if that reduces some of the itchiness.

Also, the sock yarn is washable so they can throw it in the machine and its wont shrink on them.  I like to make things for people's first babies.  Everyone should have something handmade for new babies! 

Now that I finished it, I wonder what I should knit next?