Showing posts with label tutorial. Show all posts

Monday, 27 April 2020

Made: 3D Shadowbox Cards


Time for another tutorial!  For some reason, the sound in this one is not... great.  I'm not sure why; I used the same microphone.  Ah, technology.  So awesome, and so annoying at the same time.

Just like Quarantine (nice segue?), I made some Happy Mail for people since we're still in Quarantine, and found out that schools will be closed until May 31st 2020 now.  However, today there is supposed to be an announcement About the plan to "open up society" again.  I have no plans in going out until its safe again.  So, there's that.

ANYWAYS, tutorial!  I filmed a tutorial on how to make these cards.  They are fun to make, and I made a couple of them with some of my paper stash.


Heh, "I don't need therapy, I talk to my plants."  Would be funny if it weren't very true of me and my quarantine experience.  I even named my plants.  When they droop and need water, I call them drama queens.  Ah, I have fun.

Here are the materials you will need to make your own Shadowbox cards:

  • 1 piece of card stock cut to 8.5" x 11"
  • Glue
  • Scissors
  • Paper trimmer (not necessary but nice to have)
  • Scoring board (again, not necessary but nice to have)
  • Bone folder
  • Die cuts or stickers to decorate your card
  • Foam tape
Measurements:
  • Cut Card stock into 2 pieces, 1- 8.5" x 8.5" and 1- 2.5" x 8.5"
  • On the 8.5" x 8.5" piece, score on each side at 0.5", 1", 1.5", 2" 
  • Score on 2 opposite side at 2.5" and 6" (these are a cutting guide)
  • On the 2.5" x 8.5" piece, score at 1", 2" 5" and 8"
  • Liner pieces for the inside of the card measure 3" x 3" and 3.25" x 3.25"
Template- Cut away the pieces in grey.


And the video tutorial:


Tuesday, 14 April 2020

Made: 3x3 Card and Card Holder


Sometimes you just want to make a bunch of little gifts to give to people so that they can have a bright spot in their day. Since its week 4 of Quarantine for me, I decided to make little things to give to the people that help me get food, and deliver medicine to me just so that they have one little nice thing in this dreary time.

So I made a tutorial, just in case you want something quick and cute to make to give to someone who could use a pick-me-up.

Materials:


1 12" x 12" sheet of 3" x 3" cut aparts (I used the Craft Smart Llama Love)
1- 6 1/2" x 7 1/2" solid coloured cardstock
1- design paper cut to 3 1/4" x 4"
1- design paper cut to 3 1/4" x 1 1/2"
5- kraft card stock (or any colour for card bases) cut to 6" x 3"
5 3x3 envelopes
Ribbon to decorate (optional)
Glue
Scissors
Paper Trimmer (optional)


Method:


Who are some people that you can make these for?


Monday, 30 March 2020

Made: Magazine file-style box


Let's make something!  I'm stuck at my place, self-isolating and wanted to do some organizing.  Can't go out to buy containers, so, like any good crafter I made one!  This one is much better than what I would buy; where would I find a taco box anyways?

I recorded a video for the method I used to make this box, but I zoomed past the materials and measurements, so here they are:

Materials needed:

(A kit for this project is available at www.thecraftershub.ca)
  • 2 pieces of 12 x 12" medium-to-heavyweight chipboard or 4 pieces 8.5 x 11" to make the same size box I made in the video (you can use cereal boxes in a double layer, or cardboard, or if you are in the GTA you can order from here )
  • 2 12 x 12" pieces of solid coloured card stock (any paper will work though-  If its thin, you will need some tape to help strengthen your corners)
  • 1 sheet 12 x 12" design paper (You can use anything here too: wrapping paper, construction paper, paint, a gift bag- something you like the look of)
  • Scissors, craft knife or paper trimmer (something to cut with)
  • Thick glue (any white glue should work, I use Tacky glue from the Dollar Tree)
  • A ruler
  • A pencil

Measurements:


From the chipboard:

  • 2 pieces cut 9" x 7" (22.9 cm x 17.8 cm) for the front and back (to cut the slope: measure 2 inches or 5 cm in from the top left corner and mark with pencil.  Measure 4" or 10 cm from the bottom right of the panel and mark it.  Connect the dots with a diagonal line and cut on that line.
  • 1 piece cut 9" x 2"22.9 cm x 5 cm) for the spine of the box
  • 1 piece cut 7" x 2" (17.8 cm x 5 cm) for the bottom of the box 
  • 1 piece cut 4" x 2" (10 cm x 5 cm) for the front of the box

From the solid paper (for the gussets):

  • 2 strips of card stock or paper 9" x 2" (22.9 cm x 5 cm)
  • 2 strips of card stock or paper 7" x 2" (17.8 cm x 5 cm)
  • 2 strips of card stock or paper 4" x 2" (10 cm x 5 cm)
  • 2 strips of card stock or paper 2" x 2" (5 cm x 5 cm)

From the designer paper (what ever you are using to decorate the box with):

  • 2 pieces cut 9" x 7" (22.9 cm x 17.8 cm) or if you want a border you can substrate 1/2" (1.3 cm from all measurements) )for the front and back (to cut the slope: measure 2 inches or 5 cm in from the top left corner and mark with pencil.  Measure 4" or 10 cm from the bottom right of the panel and mark it.  Connect the dots with a diagonal line and cut on that line.
  • 1 piece cut 9" x 2"22.9 cm x 5 cm) for the spine of the box
  • 1 piece cut 7" x 2" (17.8 cm x 5 cm) for the bottom of the box 
  • 1 piece cut 4" x 2" (10 cm x 5 cm) for the front of the box


And to put it all together, here's the video!


I would love to know how yours turned out!  Let me know in the comments below!


Wednesday, 13 August 2014

My Favorite Iced Tea


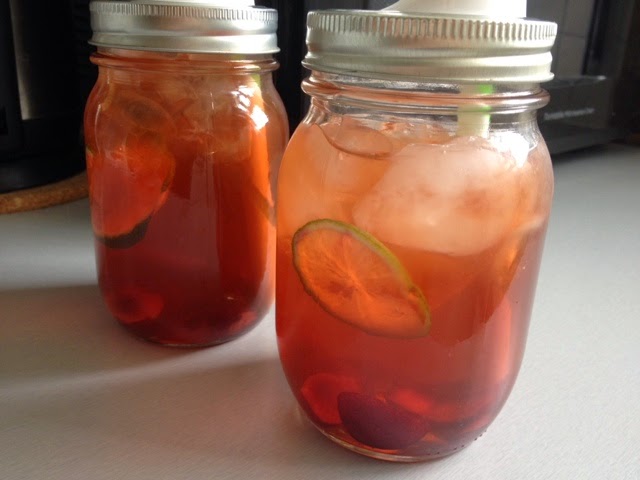
Oh summer- the time when all I drink it seems is water, iced coffee and iced tea.  But I'm picky about my iced tea; I don't like that stuff that comes in a can, or a bottle.  Nope.  Only the home made stuff for me.  And its so easy to make, why wouldn't you make some homemade iced tea.  There are endless ways to make it your own!  I especially like using herbal tea bag, usually fruity.  I find them refreshing.  But I have used regular ol' black tea and its turned out nice too.  This formula, I guess, is for my current favorite iced tea.  Its refreshing, not too sweet, and caffine-free so you can sip it into those hot summer nights.


You need the basic iced tea materials: A kettle (or a pot and stove), a heat-proof pitcher (I got this Le Crueset one from Winners for 15 bucks!) and some tea bags.  I'm into the herbal berry teas byCelestial  Seasonings, but my absolute favorite is the Very Berry tea from Clipper Teas.  I just ran out when I was making this pitcher.  It turned out really nice too.  Not pictured it the sweetener you want to use.  I use honey most of the time.  You can use a wet or dry sweetener, it doesn't matter.  

Ingredients:

4 tea bags, any kind
3 cups boiling water
2 tbsp sweetener (or more or less according to your own taste)
4-5 cups cold water
Ice to serve
Any garnishes that you want, I used limes and cherries

Method:

1) Boil your water in a kettle or on the stove. 

2) In your pitcher or another heatproof container, steep your tea bags in the water for 15-20 minutes.

3) After you have steeped the tea, you will have a concentrated tea base for your iced tea.  While the tea is still hot, add you sweetener, and stir well.  Make sure that your sweetener is melted, dissolved and incorporated into the base.  

4) Taste.  You want it to be sweeter than you want the finished tea to be because you will be dilouting the tea with water and ice.

5) Add cold water to the tea.  Start with 4 cups and keep increasing until you have the strength of tea desired.  I like pretty strong tea, so I don't add the full 5 cups.  

6) Stir well, and that's it!  Serve in glasses filled with ice and any garnish!  Sip and feel Southern!


We like to sit outside and read and talk while sipping iced tea.  Its a pretty Southern thing to do.  Can we take a minute to look at the cool lids I found for mason jars??!:


They are made by Ball, and they were super cheap.  I got 4 lids and 4 reusable plastic straws for 2 bucks!  They were great for keeping the bees and wasps away.  If you don't have the time to make your own, these are a great buy.  You can use them without the straws, that is my favorite part about these lids.  

Enjoy!  


Friday, 2 August 2013

Made: Bow Clutch (that I will probably use as a make-up case)


I used to be way into quilting.  But then I got the new career, and starting spending all my time on that.  I did use my sewing machine, but mostly for alterations for our clothing.  Not so much for fun.  When my old sewing machine broke, I didn't rush to replace it.  I missed sewing, but it was something I didn't have the time for.  Since I do all my sewing on our dining room table, it wasn't something I could start and leave for an undetermined amount of time.  I guess what I'm saying is I got lazy.  So once I finished my last quilt (for my gramma,) I didn't really do it so much.

For Christmas, D bought me a new sewing machine.  

And this summer, I finally found the time to learn how to use it.  There are a few differences with my machine.  I have come to know my old machine as a training machine.  Thats why it was so easy to use.  This new machine has a bobbin case and stuff, which I have to tread and such.  Its a little harder than the old one.  But, this one has great tension, and metal parts!  Like a grown-up machine should!

So to learn how to use my machine, I made a little pouch for my small knitting projects.  It turned out cute.  I was quite proud of it.  But it was not impressive.

So I tried something a little harder.

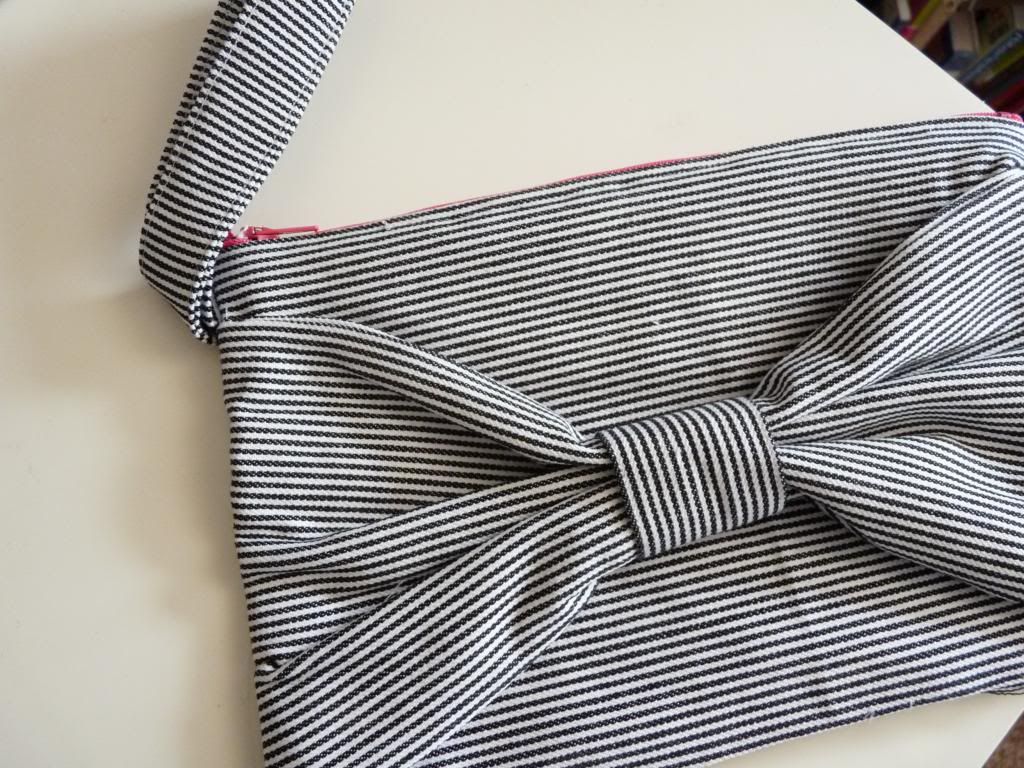
And I made this bow clutch:


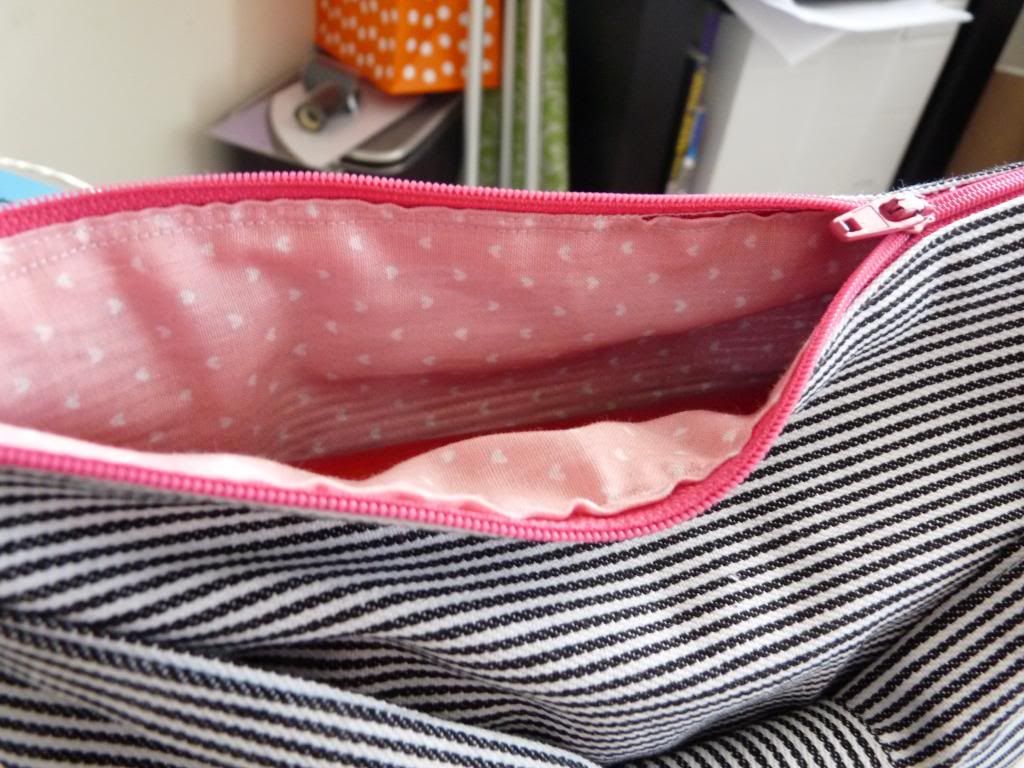
I love how it turned out.  I just used some fabric that I had laying around from the last time I was really into sewing.  I think it turned out really cute!  

But, I am not a clutch kind of girl.  I need to have my wallet and stuff strapped to my body, or else I will probably lose it.  At the very least, misplace it for a while.  So this clutch will probably turn into some sort of make-up case.  One that I carry around everyday, but in a bigger purse that I can strap to my body.  You know how it is.


If you happen to be a crafty-type and want to make one for yourself,  I used this tutorial from Elm Street Life's blog.  It was so clear, and very helpful.  She outlines every step of making the clutch, with pictures!  Having written my own sewing tutorial, I know how time consuming it is to write one that is helpful.  So if you use it, make sure you tell her how awesome her tutorial is.  

Have you tried sewing anything lately?  Do you sew?  
 

Thursday, 21 February 2013

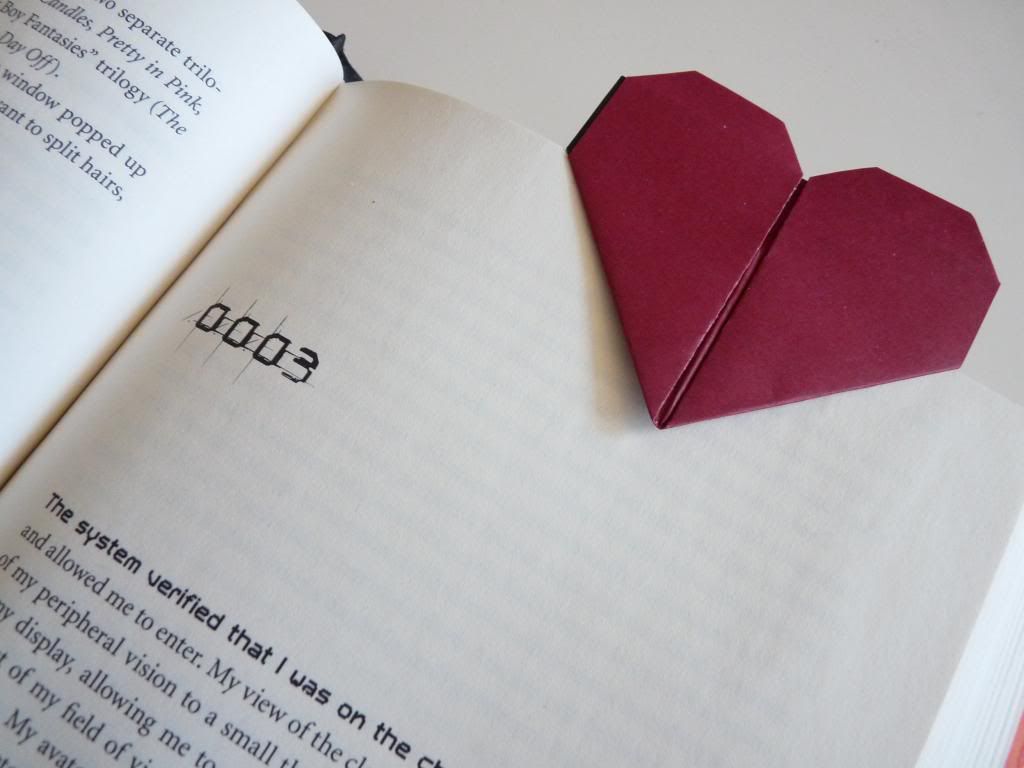
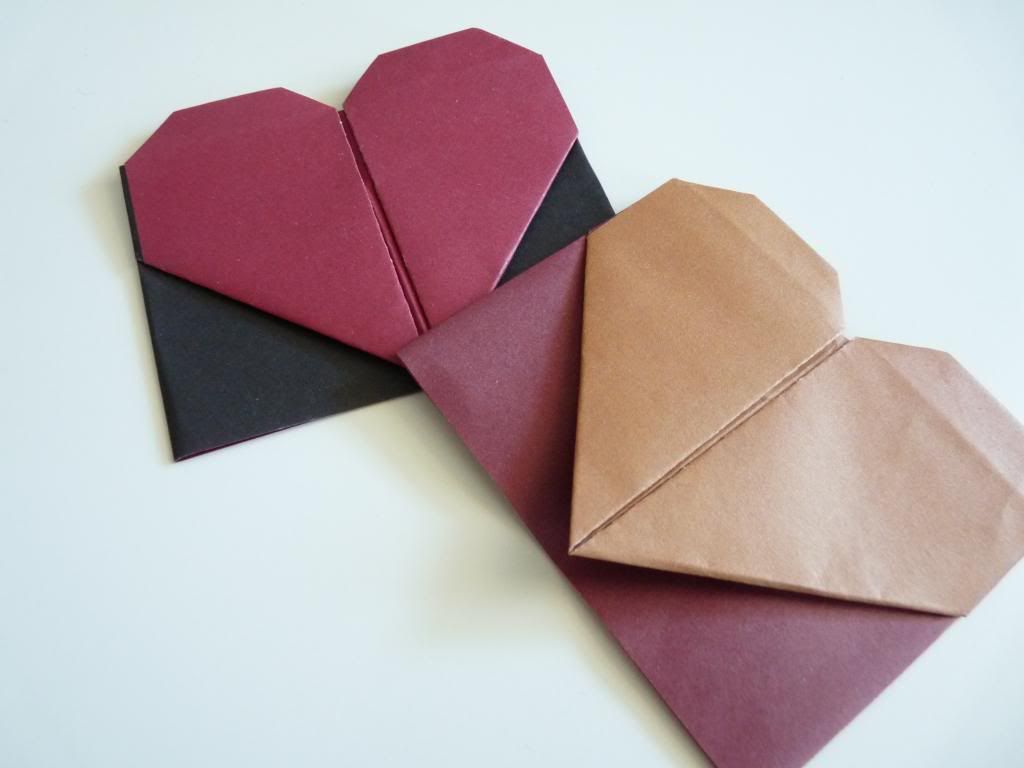
Origami Heart Bookmarks (Not in time for Valentine's Day at all.)


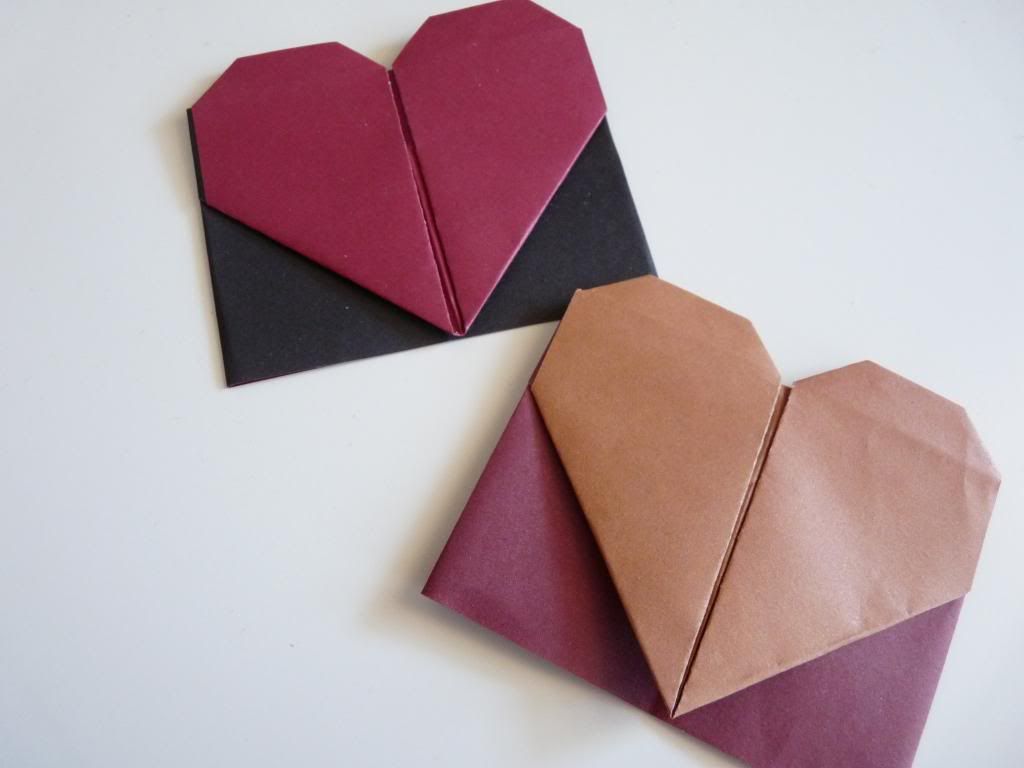
So I came across this tutorial on how to make this cute little bookmark!  I often read several books at a time, and so, I am always in need of bookmarks.  I used to buy them, but that got expensive and unoriginal-- I mean how many Twilight bookmarks does one person need?!


ANYWAYS, enter this sweet little bookmarker. It is easy to make, and its cute.  To make my book marks, I use two-sided origami paper since both sides of the paper are shown.  If you only have one-sided paper, that's cool too just remember that the side facing down when you start is the color of your heart. (If you want the patterned side of your paper to be the heart, it must face down when starting the tutorial.)

There you are, a poem to help you fold one.


Friday, 3 August 2012

DIY Fake Washi Tape


That washi tape stuff is EVERYWHERE.   I really think that it is cute, and I love to use it in my mixed media stuff and in my art journal.  The down side for me, is its a bit pricey for my budget these days.  If I could afford it, I would buy all the tape! 

So I had the bright idea to make "Fake Washi Tape."  Its not the real thing, but I still like it.  This is not an original idea by any means; but I did it by using what I had already.  Many crafty-types have this stuff around the house anyways, so instead of going out and buying some contact paper, check and see if you have these materials and make a little batch of " washi-style" tape for yourself.


Materials:

  • Colored papers, I used scrapbooking papers and some Christmas wrapping paper I had hoarded left over.
  • Double sided tape; I got 3 rolls for a dollar at the dollar store.  For the four kinds I made, I used under a roll, and I had 8 feet of "washi" tape.
  • Ruler; or any straight edge.
  • Rotary cutter or scissors; the rotary cutter is super easy and fast.  I use an old quilting rotary cutter for paper.
  • Cutting mat; totes optional.  I happen to like my table.
This is so easy, I'm a little embarrassed to call it a tutorial.   I took some paper, I stuck it to one side of the double sided tape, then I rolled it up to be used later.  That's pretty much it. 


Rolling and cutting was pretty zen.  It got frustrating when the paper didn't line up to the edge (use that ruler!) but it usually sorted itself out.


When you need it, just rip of a piece, and peel the backing and stick it like tape.  I just think its prettier.


Friday, 6 July 2012

Blogging Tutorial: How to Make an "About" Graphic


You like blogs?  I put a blog in my blog.  Inception.

I got an email about how bloggers made those "About" graphics for the sidebar in their blogs.  I am not a graphic designer, nor do I play one on TV.  But I thought I would out together a tutorial for people who want to add one of these pics to their blog.  To make mine, I used a graphic imaging software called GIMP.  If you have some time and want a new hobby, I would learn how to use it (or Photoshop if you can afford it ;-))  This tutorial will show you how to use two free programs to make a graphic like the one on my blog.

For this tutorial, you will need access to a graphic editing software, we'll use Pic Monkey because its free and easy to use.  The other program you will need is MS Paint or a similar program.  Paint come with Windows an is in the accessories part of your programs menu.

Step 1: Go to the Pic Monkey website, and upload your image for editing.

This is the image I started with. You will want to crop and change your image to suit your graphic.  All the tools to edit your photo are in the sidebar of the Pic Monkey program.  Have fun with it!

I have a thing for Polaroids, so I added a frame to my pic.

You can use Pic Monkey to add graphics to your photo.  I added an arrow.


You can add some text to the picture at this point.  When you are finished editing, save the image to your computer.  I always save images for internet use as .PNG

Resize the image to fit in your sidebar.

When you finish editing, this is what will be saved to your computer.


Step 2: Open MS Paint to ad text.

Step 3: Write your text

You can change the size and color of your text by using the text toolbar.

Once you have finished your text, and you like the look of your graphic, save it!


Now you should have a picture that looks like this:
Depending on what blogging platform you use, the next steps will be different.  To add your graphic, you will be adding a picture to your sidebar.  In blogger that looks like this:

In the Blogger bar click on design, and choose layout.  your layout should look like this.   You will add a gadget to the sidebar where you want your graphic.

Because you saved your "About" graphic and text as a picture, you only need to add a picture box.

Upload your graphic.  The Blogger platform will do the rest. Note: To have a title for your graphic, you can add a title to the title box.  I called mine "About" because I'm completely original.  Also, because you already resized your graphic, make sure that the box marked "shrink image to size" is unchecked.  Otherwise it will make you graphic smaller than you want.  *Groan, did I spell "will" wrong in the picture?  Do me a favor and ignore that, ok?
When you view your blog, your "About" picture should be in your sidebar, just like it should!  Take a break and marvel at your new graphik dezign skillz (I meant to spell that wrong.)

I hope you find this tutorial helpful!  If you use it to make a graphic, link it up so that I can see it, and ooh and ahh over how pretty it is. 


Wednesday, 13 June 2012

Tutorial: Punny Dad's Day Cards


I don't know about you, but I can never find the perfect gift.  That's why I started making things.  I can make exactly what I want to give as a gift.  And this year, I wanted to give my dad a pun.  (Stay with me here...)

I love making cards, and since I usually get my dad a coin for his collection, or a gift card, I always need a card to put it in.  My father and I have the same sense of humor, so who better to write a card that he would enjoy?

I wanted to make something that was cute, but had my personality. So I made these origami shirt cards.  They are pretty fast, and cute.  And you can personalize them with puns (if you so desire.)

So here is a tutorial, step-by-step folding to create your own pun-backdrop.

First, cut your paper to a rectangle measuring 14cm x 7cm


Fold in half lengthwise to crease the paper down the center.  Open it flat again.


Fold the edges of the rectangle in towards the center crease.


Do this for the other side.


Now you should have a thinner rectangle.  Fold in the corners of one side like in the picture:


And fold over the point.  Crease these fold well, as they help you with the valley fold coming up.


Open the folds again. If it is not creased well, fold it again so that the crease is well-folded.


This is the trickiest part; pinch the corners of each side so that  they meet.


Then flatten out that section.  These are the sleeves.

 
Turn over to the front side.  Fold up a 1 cm flap from the bottom on the right side.  Turn over to the back side again.


Fold in one corner of the bottom of the shirt and fold on a diagonal to the sleeves. 


Repeat for the other edge of the bottom.  This will be the collar, so its not important that they meet in the middle.


Next, you are going to fold it in half.   Bend the whole thing in half and adjust so that the collar is above the "shoulders" of the shirt.


Then crease it well.


Voila!  An Origami shirt!


You can do all sorts of things with these to make little gifts.  I made a little plaque using some leftover matte from a framing shop:


I turned another one into a magnet by attaching some magnetic strip to the back:


Or you can make a card with a terrific pun on it:


I love a good pun. I know what you are thinking; "But Steph, won't your dad see his card before you give it to him?  Wouldn't that spoil the surprise?"

Not really.  My dad couldn't find the internet if you drew him a map.  I asked him to shut down my computer once, and he unplugged it from the wall.


Enjoy!  If you make one, link up so I can see!