Showing posts with label recipes. Show all posts

Thursday, 16 April 2020

Quarantine Food Diary: Homemade Granola Formula


The food situation during this Quarantine is not ideal for me... I'm unable to go into grocery stores due to being so high risk for complications if I get COVID-19 so I have to depend on the pick-up service and that hasn't gone... smoothly.  No shade to the workers who are doing their best; its just we've had to get creative with meals since we can only get food every 2 and a half weeks.

So naturally, things are going to run out.  Like my favourite granola.  And it's out of stock because the company is having difficulty sourcing ingredients.  So... I made my own.  And its pretty good.

I thought I would share the formula- not a recipe per se as you control everything about this granola.  Don't like it sweet?  You adjust the sweetener. Don't have any almonds?  that's cool, I've made it with every nut on hand- even salted peanuts and it was pretty good.  This is a Choose-Your-Own-Adventure recipe, hence me calling it a formula.

This granola is everything you store bought granola is.  You can eat it with yogurt, milk, other milks... I think you will really like it.  And it's easy to make.


Stephanie's Granola Formula


Ingredients:


  • 3 cups oats (for gluten-free use GF oats, or popped rice cereal, or puffed quinoa.  Most grains will work here)
  • 1/2 cup sliced almonds (or pecans pieces; walnuts [but only a 1/4 cup they can be bitter]; peanuts, any nut you have on hand.  I use salted nuts once, just use 1/4 cup and increase the sweetener to compliment the salty.  It good if you like the salty/sweet combo.)
  • 1 cup mixed seeds (I used 1/4 cup flax, 1/4 cup chia, 1/4 cup pepitas/ green pumpkin seeds and 1/4 cup sunflower.  You can use any combination that you have, but I would go too heavy on the flax seeds.)
  • 1/4 to 1/2 cup dry sweetener (Your choice.  Brown sugar, white sugar, stevia, What ever.  You can even use liquid sweetener like Maple Syrup, or honey-- just note that your granola will be stickier than if you use a dry sweetener.  Use the amount to your taste.  Or go hardcore and have no sweetener at all!)
  • 1/2 oil (I used coconut oil that I melted in the microwave, but you can use vegetable oil, melted butter/ margarine, flax oil, corn oil, even olive oil but it will have a distinct taste of the oil if you use a heavy oil like that- not bad, just noticeable.)
  • 1 tsp of cinnamon (optional, but nice)
  • 1 cup of any after baking add-ins you might like (raisins, dried fruit, coconut flakes (if using sweetened cut sugar to 1/4 cup) 

Instructions:


  • Heat oven to 350F and line a lasagna pan or 2 cookie sheets with parchment paper.  Or don't line it if you like washing dishes.
  • In a large bowl, add the oats, nuts, seed, sweetener, spices and oil and mix so that the oil coats everything.
  • Spread on the pan(s) and bake for 15-20 mins, then flip and mix with a spatula, and put back in the oven to bak for 10-15 mins more.
  • Take out of the oven, and let cool, stir while cooling to avoid clumps- unless you like clumps, then rock on.
  • Store in air-tight container for up to 3 weeks. 


I really like it and its not too labour intensive so I make it a lot now.  My granola bill has significantly reduced too.  Not like I had a huge granola budget before... ANYWAYS, you should try it.  Its great!

I like my granola with yogurt and bananas.  How do you eat your granola? 


Wednesday, 13 August 2014

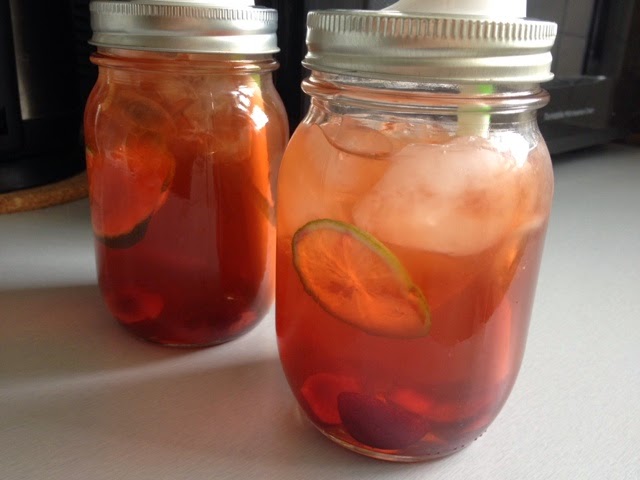
My Favorite Iced Tea


Oh summer- the time when all I drink it seems is water, iced coffee and iced tea.  But I'm picky about my iced tea; I don't like that stuff that comes in a can, or a bottle.  Nope.  Only the home made stuff for me.  And its so easy to make, why wouldn't you make some homemade iced tea.  There are endless ways to make it your own!  I especially like using herbal tea bag, usually fruity.  I find them refreshing.  But I have used regular ol' black tea and its turned out nice too.  This formula, I guess, is for my current favorite iced tea.  Its refreshing, not too sweet, and caffine-free so you can sip it into those hot summer nights.


You need the basic iced tea materials: A kettle (or a pot and stove), a heat-proof pitcher (I got this Le Crueset one from Winners for 15 bucks!) and some tea bags.  I'm into the herbal berry teas byCelestial  Seasonings, but my absolute favorite is the Very Berry tea from Clipper Teas.  I just ran out when I was making this pitcher.  It turned out really nice too.  Not pictured it the sweetener you want to use.  I use honey most of the time.  You can use a wet or dry sweetener, it doesn't matter.  

Ingredients:

4 tea bags, any kind
3 cups boiling water
2 tbsp sweetener (or more or less according to your own taste)
4-5 cups cold water
Ice to serve
Any garnishes that you want, I used limes and cherries

Method:

1) Boil your water in a kettle or on the stove. 

2) In your pitcher or another heatproof container, steep your tea bags in the water for 15-20 minutes.

3) After you have steeped the tea, you will have a concentrated tea base for your iced tea.  While the tea is still hot, add you sweetener, and stir well.  Make sure that your sweetener is melted, dissolved and incorporated into the base.  

4) Taste.  You want it to be sweeter than you want the finished tea to be because you will be dilouting the tea with water and ice.

5) Add cold water to the tea.  Start with 4 cups and keep increasing until you have the strength of tea desired.  I like pretty strong tea, so I don't add the full 5 cups.  

6) Stir well, and that's it!  Serve in glasses filled with ice and any garnish!  Sip and feel Southern!


We like to sit outside and read and talk while sipping iced tea.  Its a pretty Southern thing to do.  Can we take a minute to look at the cool lids I found for mason jars??!:


They are made by Ball, and they were super cheap.  I got 4 lids and 4 reusable plastic straws for 2 bucks!  They were great for keeping the bees and wasps away.  If you don't have the time to make your own, these are a great buy.  You can use them without the straws, that is my favorite part about these lids.  

Enjoy!  


Monday, 3 June 2013

Foodie: My famous potato salad


Welp, the summer is here.  It was so hot this weekend, and I got a taste of the summer by having a lovely 3-day weekend!  I love having a day to myself, I get to go and do things that make me happy, and that's what I did today.  This morning, I went and had a coffee, and read a book and knit (all at the same time!).  I visited a friends new place, and then went to see my momma.  After, I decided to go to the store and get the ingredients for my famous potato salad.  My brother once said that it was so good "you'd slap your momma."  Which my mom did not like; but that's another story.

I am not one of those people who like to keep their recipes secret.  What good is that?  So I am going to show you how to make the best, most perfect potato salad.  It will work every time.  Scout's honor.


Stephanie's Potato Salad
(Serves 6-8)

Ingredients:

2 pounds red potatoes (about 5 medium large potatoes)
2-3 ribs celery
1/4 to 1/2 cup chopped parsley
1/2 large red onion, minced
3 hard boiled eggs
3-4 pieced of bacon, cooked and chopped into pieces
3/4 to 1 cup of mayonnaise (not mayonnaise-style dressing.  Never that.)
2 tablespoons red wine vinegar
1 tablespoon dijon mustard
1 tablespoon green relish (or chopped sweet pickles)
salt and pepper.

Method:
Wash the potatoes, and boil them whole without skinning them.  This will take about 25 minutes.  Cook them until they are cooked.  This is very important-- cool them before making the salad.  I put mine in the fridge to cool them faster. 

Once the potatoes are cooled, put them into the bowl with the eggs, and cut or mash them into bite sized pieces.  I don't peel mine, but if you are so inclined go for it.

Toss in the onion, parsley, celery, and bacon pieces into the potatoes.

In a small side bowl, mix the mayo, vinegar, mustard, relish into a dressing.  Pour over the salad and toss to coat evenly. 

Chill it for a 1/2 hour before serving.

Make this and you will be the hit of the barbecue or whatever summer gathering you are invited to.  Promise.


Sunday, 10 March 2013

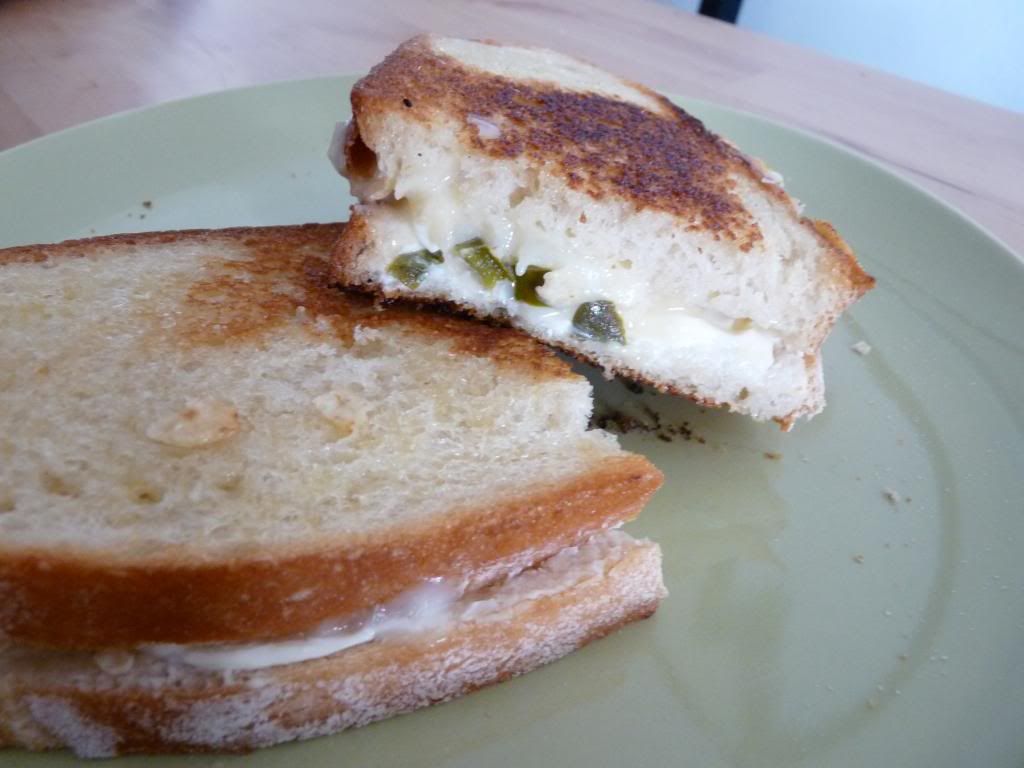
Foodie: Gourmet Grilled Cheese


I love a good grilled cheese sandwich.  Love it.  If I want a not-so-healthy sandwich, then I fry one of these babies right up.  Lately, there has been a food-truck renaissance in Hamilton and one of the most popular is the Gorilla Cheese truck.  I have never had one of their sandwiches.  I don't wait in line for hours for foods.  I've never done it.  Especially when I'm a capable cook myself. 

ANYWAYS, we walked by this truck, and I wanted a grilled cheese.  But there was like an hour wait.  So I said, "No thanks," and went home to make one of these babies.

I did not make up this recipe.  The idea comes from a great blog called Closet Cooking, which is about cooking in small kitchens.  I have a tiny kitchen, so I like that this guy can make the most amazing food with the basic kitchen set up. 

I did adjust the recipe.  The original recipe takes a while, and well, I wanted my grilled cheese NOW.  So, I changed some of the ingredients, and this sandwich still turned out awesome.  D says its like his favorite grilled cheese.  And because he is such a connoisseur of all things grilled cheese, I take his praise to mean that this is a pretty great sammie.

Jalapeno Popper Grilled Cheese Sandwich 
(Adapted from Closet Cooking)

Ingredients:
2 slices of bread (I used French bread for the sandwich pictured)
1-2 tablespoons butter, room temperature (or spreadable margarine)
2-3 tablespoons of spreadable cream cheese
1/2 cup or less of shredded sharp cheddar and Monterrey jack cheese
8-12 slices of pickled jalapeno peppers, drained and chopped.

Directions:
Butter the bread, put buttered sides of the bread together to assemble your sandwich. 

Spread cream cheese, sprinkle with peppers and cheddar and jack cheeses.

Grill in a dry frying pan until outsides are nicely toasted and insides are melted.

We eat these with some guacamole and tortilla chips.


Saturday, 9 February 2013

Foodie: Nutella Brownies

 
What more do you need for a title when each of those words make my tummy happy?

Being stuck at home during Snowmageddon had its perks.  One was that D and I cooked a huge meal from scratch.  We made a chicken pot pie, but instead of using pie crust, I made a cornbread crust.  It was so good.  Naturally we needed a dessert that would go with that, so I whipped up some Nutella Brownies.

Nutella was something that I knew about as a kid, but my mother would never let me have it.  Kids at school got mutella sandwiches for lunch, and I sometimes had some of those, but not until I was an adult did I get to enjoy this delightful spread on almost EVERYTHING!

My favorite thing to do is to dip pretzels into Nutella-- but I'm not allowed anymore because one time, I ate so many that I was sick.  So now we are only allowed to get the small container, and only if there are no pretzels.  D thinks that if we don't buy them at the same time, I won't eat it and be sick.  I don't know why he wants to keep us apart.  I'm a grown woman, if I want a Nutella stomach-ache, I can darn-well have one!

ANYWAYS, we made Brownies.  And they are good.  They are a little chocolatey, and a little hazelnutty.  Want a recipe?  Here you go:


Nutella Brownies (make one 8x8 inch pan) Adapted from Mother Thyme.com


Ingredients
  • 3/4 cup all-purpose flour
  • 1/3 cup butter, softened
  • 1 cup sugar
  • 2 large eggs
  • 1 teaspoon vanilla extract
  • 1 cup Nutella
Instructions
  1. Preheat oven to 350.
  2. Using an electric mixer or hand mixer, blend butter sugar, eggs, and vanilla until light and fluffy. Add Nutella and stir until mixture is creamy. Stir in flour.
  3. Pour into a greased and lined 8-inch square pan and bake for 30-35 minutes. Don't over bake! Cool before cutting.
There are variations you make on these too.  I want to try peanut butter instead of Nutella, for a peanut butter blondie type bar.  Or you could add some cocoa for more chocolate flavor.  And when I try these variations out, you will be the first to know blog.

Now I'm off to have a brownie for breakfast.  Don't judge me.  You would too.


Wednesday, 25 July 2012

DIY Crackers


This is turing into a mini Foodie week... So I'm going to go with it.

Why haven't I made my own crackers sooner? 

Because its really hard, that's why.  I got the genius idea to bake some crackers yesterday.  They turned out alright.  They look kinda rough.  Let's call them rustic.  I made some rustic-looking crackers yesterday.

They taste really good.  So that's one thing.  They should taste good, they are half butter.  And they didn't take that long to make.  But dude, they are labor-intensive.  

Want to make your own?  Ok, but don't say I didn't warn you.  You won't have to go the the gym today, at least...

 
Stephanie's Rustic Cheese Crackers- delicious, but time consuming

Ingredients:
2 cups of unbleached flour
1 tsp of sea salt
1/4 tsp of fresh ground black pepper
1/4 tsp dry mustard
3/4 cup of cold butter
1/2 cup of extra old cheddar cheese
8 tbsp ice water

Instructions:

In a bowl, whisk together the flour, salt, mustard, pepper.  Using a pastry cutter, cut in the cold butter until the mixture is coarse crumbs (it should resemble oatmeal).  Mix in the cheddar cheese.  Add half of the ice water and mix with a spatula or wooden spoon.  Don't use your hands- it will warm up the dough.  You don't want that.  Add the rest of the ice water a little bit at a time, stopping when the dough can hold itself together into a ball.  Take the dough ball, wrap in plastic wrap and put in the fridge for at least an hour.  Go watch an episode of True Blood, that's what I did.

After an hour, preheat the oven to 350 degree F, and oil a baking sheet well with olive oil. 

On a lightly floured surface, roll the dough out until it is 1/8 of an inch thick.  The thinner the better.  This is hard to do, just keep flouring your roller and go to town.  Cut into 1 x 3 inch squares.  I used a biscuit cutter to cut mine, because I like to make things difficult for myself.  Next time, I'm sticking to the squares.  Put them on the oiled baking sheet, and poke each crackers with some holes.  This part was fun, like stabbing my little problems away.  It was like I could punish the crackers for being so hard on my biceps. Baking as Gestalt therapy.

Bake for 10 minutes or until golden brown and crispy.  Cool completely before storing, or you will have soggy crackers.


We like to eat our rustic crackers with my homemade Red Pepper and Garlic Jelly.  They go well together.  They are also really good with fig jam, or any other sweet condiment you eat with cheese. 

They are a pain to make, but they are so good to eat.  They melt in your mouth. 

If you decide to torture yourself make some, let me know!


Saturday, 21 July 2012

DIY Cereal


One thing I always feel silly buying is cereal.  Its so expensive, and full of sugar.  But hey, I'm pressed for time in the mornings, so I buy it and eat it all the same.  But, every once and a while, I get annoyed with myself for going to spend almost 7 dollars (!?) on a box of cereal, especially when there are no brands on sale.  So I think about how lazy I have become and decide that I will make my own cereal.  It can't be that hard. 

It's actually pretty hard and involved.  I made a rice-krispies-like cereal once, and I was kinda disgusted with the process of puffing the rice.  First you have to cook then dry the rice to within an inch of its existence, then you fry the dried rice to get it to puff.  I never realized that puffed rice was really dried-then-fried rice.  Might as well have regular fried rice for breakfast, because at least there would be vegetables in it.

ANYWAYS, one kind of cereal I love to eat is granola.  But good granola is super-expensive.  My favorite locally made granola is only for sale at the shop in the next town over.  They don't even have it on the website.  But its like 7-10 dollars for a bag of it too.  Even the crappy grocery store brand are at least 5 bucks a box, and its loaded with sugar and other things I don't want for breakfast.  Besides, after finding out how puffed rice is made, I'm a little worried about any potential extra oily steps companies are taking with my granola.  Who knows what goes on in the factory.  And I'm just supposed to trust them?  Cereal is important!  Its the most important meal of the day!

ANYWAYS, I decided it was high time for me to make my own granola again.  I did for a while, then as I said I got lazy.  But not anymore.  It is super easy to make, and quick too.  And I'm going to share with you my recipe.  You can customize it by adding less sugar, or adding your favorite dried fruit to it, but this version is just the bare bones.  The sky's the limit with this stuff! 

This yields a small batch.  You could double or triple it if you wanted to, but you have to eat it within the week.  After that it goes a little stale.

Stephanie's No-Nonsense Granola

Ingredients:

1/2 cup of old fashioned oats
1/3 cup of chopped pecans
1/3 cup of chopped walnuts
1/4 cup of sliced almonds
1/4 cup of raw peptias
3 tbsp unsalted sunflower seeds
2 tbsp of flax seeds
1 tbsp ground flax seeds
3-4 tbsp of brown sugar (or more or less)
1/4 cup of canola oil
1 tsp pure vanilla extract
1/4 cup of unsweetened coconut flakes
1/2 cup of dried fruit (raisin, dried cranberries, etc.) optional


Preheat oven to 350 F.  

Take all the oats, nuts and seeds and mix them together in a bowl.  Mix in the brown sugar, so that it is evenly distributed throughout the mix.  Add oil and vanilla, and mix; make sure that everything is coated in oil and sugar.  Pour onto a baking sheet, and put them into the oven for 8-10 minutes.  Make sure to keep an eye, and pull the sheet out of the oven when everything is starting to get nice and brown. 

Use a spatula to flip and mix the granola.  Put in the oven for an additional 3-5 mins. 


When done cooking, put back into the bowl, and mix in you coconut, and any dried fruit you want to use.  Mix to incorporate into the granola.


Return to the baking sheet and let the granola cool.  This will prevent it from clumping and getting soggy.  After it has cooled completely, put in an air-tight container for storage.  I use mason jars.


Enjoy the granola over yogurt with some fruit.  I also eat it like cereal with milk; only this is way, much better than anything I buy in the store.

Want some variation?  I have also made different flavors.  I've used dried apples and maple syrup instead of brown sugar and I've added nutmeg and cinnamon with raisins to the granola instead of vanilla.

Every time I make my own granola, I wonder why I ever bought cereal in the first place.  Then I remember it was because I was lazy, not because it was hard.  

I hope I never buy cereal again.  Until I become lazy again, that is.


Sunday, 15 July 2012

Seasons of Love: Sangria


Ah, summer!  That time when I can drink gallons of Sangria on patios and in backyards around the city.  One thing that I love about summer drinks is the copious amount of fruit that can be put into them.  I love adding fruit to my drinks.

Sangria is a wine punch from Spain and Portugal.  I grew up around a large population of Portuguese immigrants, and one of my best friends is Portuguese, so I was introduced to Sangria really early on in my drinking career.  This drink usually consists of sliced fruits, red wine, orange juice and brandy.

Since I don't really like red wine, I always make Sangria with white wine.  I thought I would post the recipe I made up here.  The batch I made above is for a visit to a friend's house this afternoon.  We are going to sit in the yard and drink it while the men folk labor on the "top secret birthday project."

Stephanie's White Sangria (with substitutions for alcohol-free "sangria")

4 cups of dry white wine, I used a combination of Pinot Grigio and Chardonnay but usually I use Chardonnay (instead of wine, I've used Ginger Beer, and it was really yummy and non alcoholic)
3 cups or more of white grape juice
1-2 peaches sliced
2 plums sliced
1 mango sliced
Fresh Mint Leaves (optional, meaning I didn't have any left)
A bottle of carbonated mineral water for serving, we use San Bennedetto Acqua Gassata
ice

Pour the wine and the grape juice over the sliced fruit.  Chill until very cold, at least one hour.  When serving, pour a half glass of carbonated water over ice.  Top up with the sangria.  Put on some big shades and sit outside sipping this awesome summer drink.  Enjoy!


Monday, 2 July 2012

So Good Lemon Blueberry Bread


For my first days of summer vacation, I have a cold.  I am sick.  When I get sick or have a bad night, I want things that comfort me, so one thing that comforts me is baking.  I made this great loaf (that we ended up eating at breakfast) and I thought I would share it with you.  I got some of the recipe from The Joy of Cooking, and the rest I made up. 

Lemon Blueberry Loaf with Almonds

Ingredients:

1/3 cup melted butter (or margarine for vegan)
1 cup sugar
3 tbsp lemon juice (I've used bottled and fresh, doesn't matter)
2 eggs (or flax eggs for vegan!)
1 1/2 cup flour
1 tsp baking powder
1/2  tsp salt
1/2 cup milk (soy milk and its vegan!)
1/2 cup sliced almonds, and a handful for the top
1 cup fresh or frozen blueberries (I've used both, just thaw the berries and add juice and all if using frozen)

For glaze:
2 tbsp lemon juice
1/4 cup sugar

Preheat oven to 350 F and grease with butter or spray with oil a large loaf pan

In a mixing bowl, beat together the butter, sugar, juice and eggs.  In another bowl, combine the flour, baking powder and salt.  Stir the dry ingredients into the egg mixture alternating with the milk.   After mixed, gently stir in the blueberries and almonds.  I love it when the batter gets all purple! Don't over mix, I poured the batter into the pan like this:


Pour batter into the loaf pan. Sprinkle a handful of sliced almonds on the top of the loaf.

Bake in the oven for an hour, until a cake tester comes out clean when poked in the middle. Cool the loaf in the pan for 10 mins while you prepare the glaze.

Add the lemon juice to the 1/4 cup of sugar.  Spoon the glaze over the bread.  Let cool completely before you cover. 


There you have it!  Delicious blueberry cake to go with your tea.


I got a new pyrex loaf pan from the antique market.  It is perfect!  I've also made this recipe with strawberries, don't be afraid to experiment.  If you make some, let me know!


Wednesday, 27 June 2012

My New Favorite Salad!


Last week it got really hot here.  Like, stupid hot-- and I mean it  'cause I'm from the South y'all.  As a result, I didn't want to be near anything that produced heat; which would normally be a problem for cooking dinner.  But we decided to have sandwiches and salad, so I experimented and made my new favorite salad.  Because I like y'all so much, I thought I would share it with you for a light summer supper or an awesome healthy lunch.

It's really easy:  rip up some kale and lettuce, add some red pepper, blueberries, sunflower seeds, walnuts and chevre (goat cheese) and toss it together.  Here's the best part, my amazing salad dressing (and its even healthy!)

Stephanie's Honey Mustard Salad Dressing:

1/3 cup of plain yogourt
3 tbsp of grainy dijion mustard
3-4 tbsp of honey
1 tbsp of olive oil
1 tbsp of apple cider vinegar

Put all ingredients in a small jar and shake it!  Serve with the kale salad, and watch your partner who once proclaimed that he didn't like vegetables eat almost the whole bowl.

Speaking of bowls, like my new vintage Pyrex?  We found a stall that sold them at reasonable prices!  So I bought two!  And I use them all the time.  How did I live without them?


Tuesday, 29 May 2012

Leftover Tuesday: Super Easy Curried Chicken


I love it when dinner can be fast, easy and really yummy.  I love it more when it can use leftovers.  I love it the most when I can have it on the table in 20 minutes.

Are you interested in a recipe that does all these things?

Well, you are in luck!  Tonight I made a curried chicken, that is a mash of 4 recipes I've seen around town.  I put them together, and voila! this yummy curry.  This dish is a little sweet, and can be spicy, but you would control the heat. 

Every Tuesday is leftover night chez moi, so we try and use all the food in the fridge. This is one of our favorite things to make with leftover roast chicken.

Super Easy Curried Chicken

Ingredients

For the curry paste:
2 tbsp plain yogurt
3 tbsp tomato paste
1-2 cloves garlic, chopped
2 tbsp Major Grey Chutney (or mango chutney if you don't like spicy) [I've also used honey.  Different, but still yummy.]
2 tsp Garam Masala Spice Mix
1 tsp chili powder
1/2 tsp cayenne pepper (omit if you don't like spicy)

For the Curry:
2 onions, diced
2 tbsp olive oil
2 cups cooked chicken, cubed
1 cup frozen (but thawed) or leftover peas
1/2 cup of chicken stock
2 more tbsp of yogurt to finish

Rice and Naan to serve.

Putting it all together:

1. Mix all the ingredients for the paste together in a bowl.  mix them together and you will have the yummy curry paste for the dish. Set aside.

2. In a large covered skillet, heat olive oil, and soften the onions until cooked.  When soft, add the curry paste to the pan and cook for 1 minute, while stirring continuously. 


3. When the paste is heated, add your chicken and peas, and stir to coat in the paste.  When everything is coated in the yummy paste, add 1/2 cup of chicken stock to the pan, and stir.  This will create the sauce for the curry.  Cover and let the whole thing simmer on low while you get your rice ready.

 
4. Just before serving, add the 2 tbsp of yogurt, and stir to incorporate.  Simmer it for 1-2 minutes more, just to make sure its hot.


Serve it over rice, and make sure you have naan to get all of that sauce up.


Curried Chicken in 4 steps and 20 minutes.  I bet this recipe could work with vegetables, or paneer.  If you try it, let me know!

What are your favorite fast dinners?  What do you do with leftovers?