Showing posts with label Made. Show all posts

Thursday, 29 July 2021

How I Make my Pink Lemonade Earrings


For my video this week, I decided to show the process of making some earrings that I sell on my site www.bassmakes.com.  It's not a tutorial per se, but it is how I go about making polymer clay slabs and cutting out earrings.  

I like these earrings for the summer- the bright lemons and the deep pink- they are really happy little dangles!  Super cute!  I didn't show how I made the lemon cane that I use in the slab, but I can do a video about that if anyone wants one.  

I was inspired by some scrapbooking paper I saw- I thought "THOSE HAVE TO BE EARRINGS!"  And that's how these happened.  

ANYWAYS, I hope you enjoy this relaxing video.  You'll hear my voice again next video.

Enjoy!


Thursday, 1 October 2020

Hand Sewn Patches (Iron-On because I did enough sewing)


For the past few weeks, I've been obsessed with embroidering iron-on patches for my jacket.  

You see, I couldn't find my favourite denim jacket when I was changing my closet over to fall and winter clothing (because I have a small closet, I store off-season clothes).  I was really sad, and I knew I'd miss it, so I bought a new one.  But, then I found it-- Of course I did.  So now I have one that I want to sew patches onto.  And since my tastes run, ahem, weird, I wanted to make my own.  And that's how it started.


I still haven't figured out my style.  I like super detailed things, so the patches I've made have a lot of details.  I waver between botanical illustrations, and graffiti.  Extreme. 


This bee was the first one I completed.  It was, ah, a little ambitious for my first one, but I like how it turned out.  


The process is kind of long though.  First I need an idea of a patch I want to make.  Then I sketch it out in a notebook, or on some paper.  Then I ink up the sketch so that I can see the lines to trace it onto the cloth. I trace it onto the cloth (I use cotton broadcloth for the backing).  I put my cotton and my stabilizer fabric onto the hoop, and start sewing.  I mostly stitch at night.  Its pretty calming.  


I've been saying "Dope" a lot since I got this shirt from my aunt:


So, you know... it made its way into my art.  And just because I think it so pretty, here's my organized embroidery floss container:


Sigh.  I love it when things are in rainbow order.  


Monday, 27 April 2020

Made: 3D Shadowbox Cards


Time for another tutorial!  For some reason, the sound in this one is not... great.  I'm not sure why; I used the same microphone.  Ah, technology.  So awesome, and so annoying at the same time.

Just like Quarantine (nice segue?), I made some Happy Mail for people since we're still in Quarantine, and found out that schools will be closed until May 31st 2020 now.  However, today there is supposed to be an announcement About the plan to "open up society" again.  I have no plans in going out until its safe again.  So, there's that.

ANYWAYS, tutorial!  I filmed a tutorial on how to make these cards.  They are fun to make, and I made a couple of them with some of my paper stash.


Heh, "I don't need therapy, I talk to my plants."  Would be funny if it weren't very true of me and my quarantine experience.  I even named my plants.  When they droop and need water, I call them drama queens.  Ah, I have fun.

Here are the materials you will need to make your own Shadowbox cards:

  • 1 piece of card stock cut to 8.5" x 11"
  • Glue
  • Scissors
  • Paper trimmer (not necessary but nice to have)
  • Scoring board (again, not necessary but nice to have)
  • Bone folder
  • Die cuts or stickers to decorate your card
  • Foam tape
Measurements:
  • Cut Card stock into 2 pieces, 1- 8.5" x 8.5" and 1- 2.5" x 8.5"
  • On the 8.5" x 8.5" piece, score on each side at 0.5", 1", 1.5", 2" 
  • Score on 2 opposite side at 2.5" and 6" (these are a cutting guide)
  • On the 2.5" x 8.5" piece, score at 1", 2" 5" and 8"
  • Liner pieces for the inside of the card measure 3" x 3" and 3.25" x 3.25"
Template- Cut away the pieces in grey.


And the video tutorial:


Wednesday, 1 April 2020

Made: DIY Journals


I thought that I would try binding a book, so I made a little journal from scratch.  It was quite the ordeal-- and the video I taped was not helpful.  I should post it purely for entertainment value-- but it would make all actual book diners (bookies? no... that's something else) cringe with anger.  So you will have to settle for pictures of my final (finally!) project.

For materials I used American Crafts "Wildflower" paper collection (which is really hard to find!), some chipboard and plain white paper.


Because I like pockets in my notebooks, I put on in and added some uplifting cards to remind me that this Q-Tine can't last forever.


I used the We R Memory Keepers Bookbinding tool to put it together.  It was pretty easy to use, and it comes with everything you need to bind your first book (Even thread- even though the reviews say it doesn't.).


I used some embroidery thread that I swiped across a beeswax candle for more slide as I sewed the binding.  Sometimes its nice to have a pop of colour where you aren't expecting it.


If you want to make your own journal, here are some tutorials that are way better then what I would have come up with.  I'm going to follow the experts for the next one I make.

Sea Lemon Book Binding Stitches- Jen is a book binder extraordinaire.  She has a whole playlist on book making for every style.

SundayMornings- Journal making 3 Ways- She gives you 3 different styles of journals AND step-by-step instructions on making them using what you have on hand.

DIY Art Journal for Beginners- Johanna uses an old book as the start of her journal-- way to recycle all those books you are clearing out since the big clean you did while being at home!

If you are anything like me- you have many notebooks- but being able to make your own is great.  You can make a notebook that suits your style and needs!  I will be trying this again.

Have you ever made a book?  Are you a book binder?  Any tips to share?


Monday, 30 March 2020

Made: Magazine file-style box


Let's make something!  I'm stuck at my place, self-isolating and wanted to do some organizing.  Can't go out to buy containers, so, like any good crafter I made one!  This one is much better than what I would buy; where would I find a taco box anyways?

I recorded a video for the method I used to make this box, but I zoomed past the materials and measurements, so here they are:

Materials needed:

(A kit for this project is available at www.thecraftershub.ca)
  • 2 pieces of 12 x 12" medium-to-heavyweight chipboard or 4 pieces 8.5 x 11" to make the same size box I made in the video (you can use cereal boxes in a double layer, or cardboard, or if you are in the GTA you can order from here )
  • 2 12 x 12" pieces of solid coloured card stock (any paper will work though-  If its thin, you will need some tape to help strengthen your corners)
  • 1 sheet 12 x 12" design paper (You can use anything here too: wrapping paper, construction paper, paint, a gift bag- something you like the look of)
  • Scissors, craft knife or paper trimmer (something to cut with)
  • Thick glue (any white glue should work, I use Tacky glue from the Dollar Tree)
  • A ruler
  • A pencil

Measurements:


From the chipboard:

  • 2 pieces cut 9" x 7" (22.9 cm x 17.8 cm) for the front and back (to cut the slope: measure 2 inches or 5 cm in from the top left corner and mark with pencil.  Measure 4" or 10 cm from the bottom right of the panel and mark it.  Connect the dots with a diagonal line and cut on that line.
  • 1 piece cut 9" x 2"22.9 cm x 5 cm) for the spine of the box
  • 1 piece cut 7" x 2" (17.8 cm x 5 cm) for the bottom of the box 
  • 1 piece cut 4" x 2" (10 cm x 5 cm) for the front of the box

From the solid paper (for the gussets):

  • 2 strips of card stock or paper 9" x 2" (22.9 cm x 5 cm)
  • 2 strips of card stock or paper 7" x 2" (17.8 cm x 5 cm)
  • 2 strips of card stock or paper 4" x 2" (10 cm x 5 cm)
  • 2 strips of card stock or paper 2" x 2" (5 cm x 5 cm)

From the designer paper (what ever you are using to decorate the box with):

  • 2 pieces cut 9" x 7" (22.9 cm x 17.8 cm) or if you want a border you can substrate 1/2" (1.3 cm from all measurements) )for the front and back (to cut the slope: measure 2 inches or 5 cm in from the top left corner and mark with pencil.  Measure 4" or 10 cm from the bottom right of the panel and mark it.  Connect the dots with a diagonal line and cut on that line.
  • 1 piece cut 9" x 2"22.9 cm x 5 cm) for the spine of the box
  • 1 piece cut 7" x 2" (17.8 cm x 5 cm) for the bottom of the box 
  • 1 piece cut 4" x 2" (10 cm x 5 cm) for the front of the box


And to put it all together, here's the video!


I would love to know how yours turned out!  Let me know in the comments below!


Monday, 19 January 2015

Handmade gifts 2014

Since Christmas is over, and I finally gave out all my gifts, I wanted to post the handmade gifts that I gave out this year.

Every year, I give my friends and family at least one handmade gift.  Last year I knitted cabled head bands and hats for everyone.  The year before I gave personalized gingerbread people.  This year, I left things a little late, and made two quick, but useful gifts for the peeps in my life.


The first gift I made was some beard oil for my D.  I made the labels to and put them onto a recycled bottle.  This is the easiest stuff to make:  3 Tbsp of Sweet Almond Oil; 2 Tbsp of Jojoba oil; 1 tsp of Seabuckthorn Oil;  and 2-3 drops of Tea Tree essential oil and 1 drops of Sandalwood essential oil.  (Note:  This is not a great recipe for people with nut allergies.  Use Olive Oil, and light Castor Oil instead of Almond and Jojoba!)  D loves it.  He uses it once a week.  And he laughs each time he sees the label. 


The gift I made for my lady friends was a stamped clay ring dish which I packaged with some hand salve.  I found the DIY tutorial at this great blog. 

There was some trial and error on this one though.  I found that the best ink for this project was "archival" inks, and the brand that worked best for me was Colorbox.  The other ink pads I used faded and weren't as vivid once the clay dried.  For others i didn't used any ink at all!  I just stamped them nice and hard so that the impression came through.  I liked these ones the best.  I added some gold leaf paint to the edges to make them a little more fancy.   They were a hit with my pals.

Did you make any gifts this holiday? 


Friday, 15 August 2014

Made: Woven Wall Hanging

From: Creative Bug Blog/  A Beautiful Mess/  A Pair and a Spare

Usually, I'm slow to notice trends.  I don't read about them, and usually I don't really care.  I like what I like, you know?  But if there's a trend that centered around a DIY, I'm there.  I love when I figure that out.  and that's what I fell about this trend of woven wall hangings.

I am seeing them EVERYWHERE.  I couldn't read a DIY blog without it popping up, y'all.  And the more I saw them, the more I wanted one.  So, I decided to try my hand at one.  I've woven before, but now I don't have a loom.  I've meant to buy a new one, but never think of it when I have the money-- and there's a new Fossil Store in my town, and other things and places I wanted to go and things I wanted to do.  So I never bought one.  But that didn't stop me!  I made this:


...using yarn and some cardboard! 


That's the best part about weaving-- you can use almost anything and weave.  If you want a full tutorial on the process of weaving little wall hanging, A Beautiful Mess has a great one here.  If you don't own a loom (and don't want to buy one) you can substitute a piece of corrugated cardboard at least as big as you want your hanging.  Then cut some notches in the top and bottom (directly across from each other) to weave your warp onto.  Then you can follow the tutorial as written. 

The good thing about using cardboard instead of a loom, is that you can draw a guide for your image onto the cardboard.  That way you don't have to wing it.  I wanted some triangles in the "Flying Geese" pattern I love on quilts. (Note: The link leads you to a page about the Underground Railway "Quilt Codes."  I don't want to hear about how the theory of the quilt codes were "disproved."  I like the story, whether true or not.  It speaks to the ingenuity of the slaves and their allies while trying to escape an unjust system.)  So I wanted some version of it for my wall.


I used some neutral wool, and some Noro yarn for the triangles, a Japanese wool with awesome colors.  The weaving was really fast!  I finished it in one day.  I started it in the morning with my coffee, and finished it while I was watching Arrow.  I held the yarn double for the weft to make it thicker.  I like how it looks.

    
I hope you give it a try!  It was a satisfying DIY with a great end product.  If you do try it, make sure to link back so I can see it too!


Tuesday, 5 August 2014

Made: Kimono Cardigan


Whoa! Two posts in the same week?  This is a record for me.  Yay me!

ANYWAYS, I finally fell in love with this "kimono" cardigan trend.  (I do hate that its called a "Kimono" cardigan, seems a little appropriative to me, but I digress...)  I like the flowy, comfortable feeling of them.  But by the time I wanted to buy one, they were no where to be found!  This made me really sad.  But then I remembered that I was sort of crafty, so I thought I would make one myself!


It was pretty easy to make this jacket.  And the fabric I bought was only 3 bucks a metre!  So this cost me a total of 7 dollars to make.  And since these babies sell for almost 40 dollars, I got to make something and have a deal!  Which is awesome!  If you can sew a straight line, you can make on too.  For the easiest way to make one, choose a fabric that wont fray when you cut it for the easiest construction, then you won't have to hem any of the ends!  My fabric needed to be hemmed which was what took most of the time in making it.  Of course, I forgot to take pictures, so here is the basic run down of how I made this with my basic tutorial made in Skitch:


Not bad for 2 hours work.  It is a little warm though, so I will probably wear this more in the fall.  I'm thinking of making another one in silk/ cotton to wear now... But I'm not sure how much use I will get out of it.  Summer is almost over :-(


::Top to Bottom::
Kimono Cardigan- Made by me!
Necklace: Pyrrha from Pure Home Couture
T-shirt- Old Navy
Jeans- Torrid
Sandals- Birkenstocks

If you make one, I would like to see it!  Link it in the comments! 

Friday, 7 March 2014

Branch Weaving


Branch weaving showed up in my Pinterest feed, and I thought it looked really cool.  I really wanted to try it that minute.  But I didn't have a branch.  Because the city was living under 3 feet of snow.  And I don't pull branches of trees, because that's bad for them, and I'm not a 10 year old, so I waited until I came across one laying on the ground.

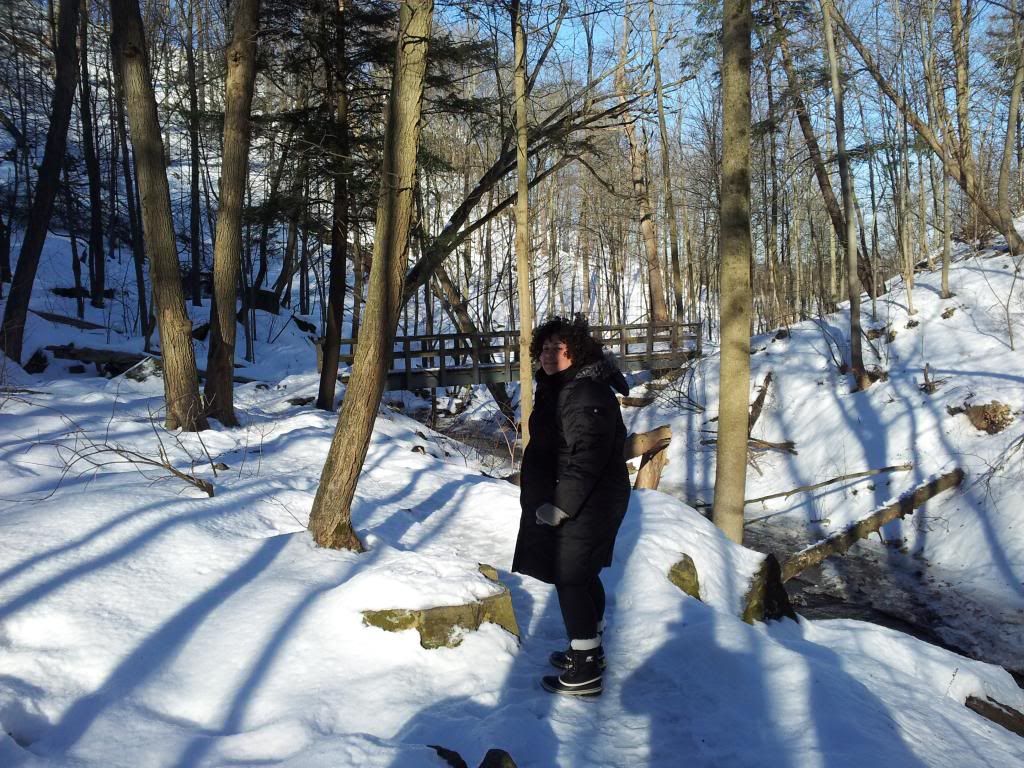
Last week, D and I went on a death-defying hike.  The trail was covered in ice.  So much ice!  What wasn't ice was knee-deep snow.  It was beautiful, but treacherous.  That bridge in the background?  Completely iced over.


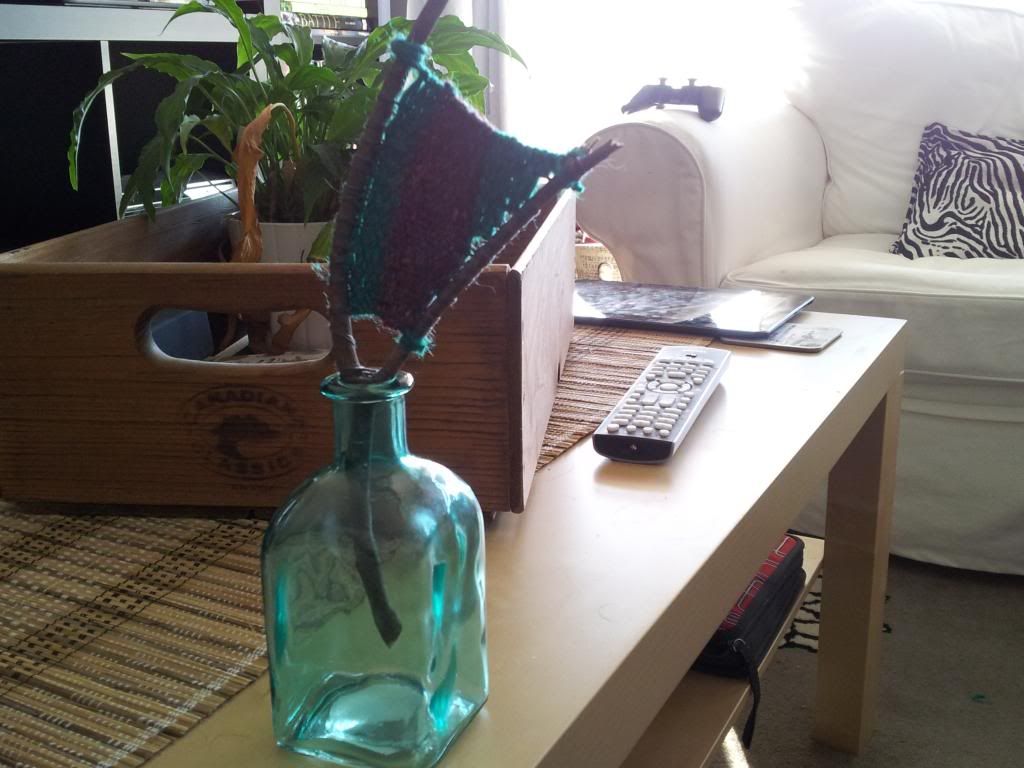
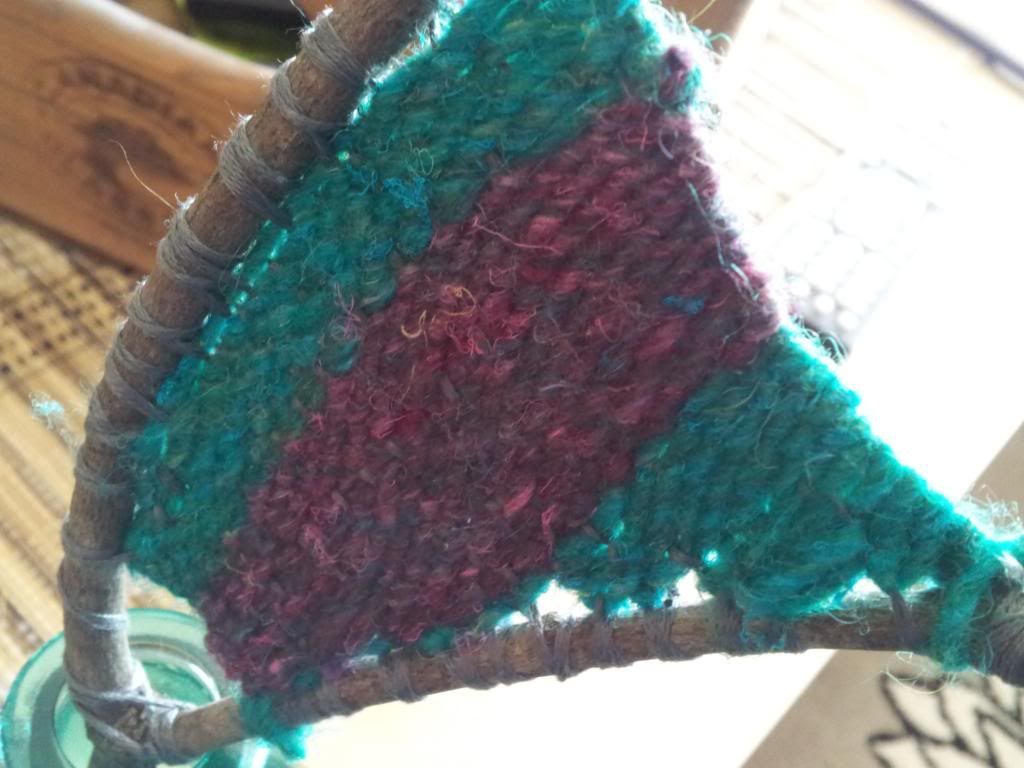
But, I found a branch, and during one of my fave TV shows, I set to weaving on it.  When I finished, I thought it looked nice:


But, I had no idea what its use was or what I would use it for.  I needed to finish one of these, for some reason.  Now that I have, It sat on the coffee table for a few days.

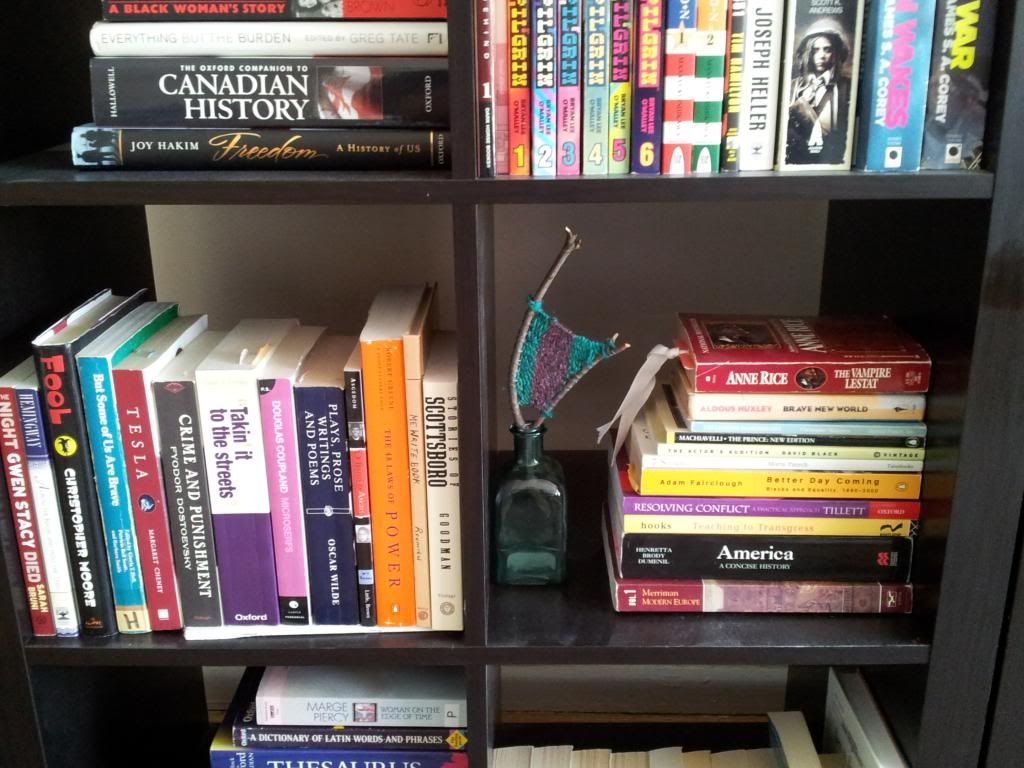
When we came across these bottles on sale for $1, I knew where I could put my new weaving:


So now it lives on my bookshelf.  Making my books a little more interesting.


Monday, 27 January 2014

Warm Knitted Mittens on a Snow Day


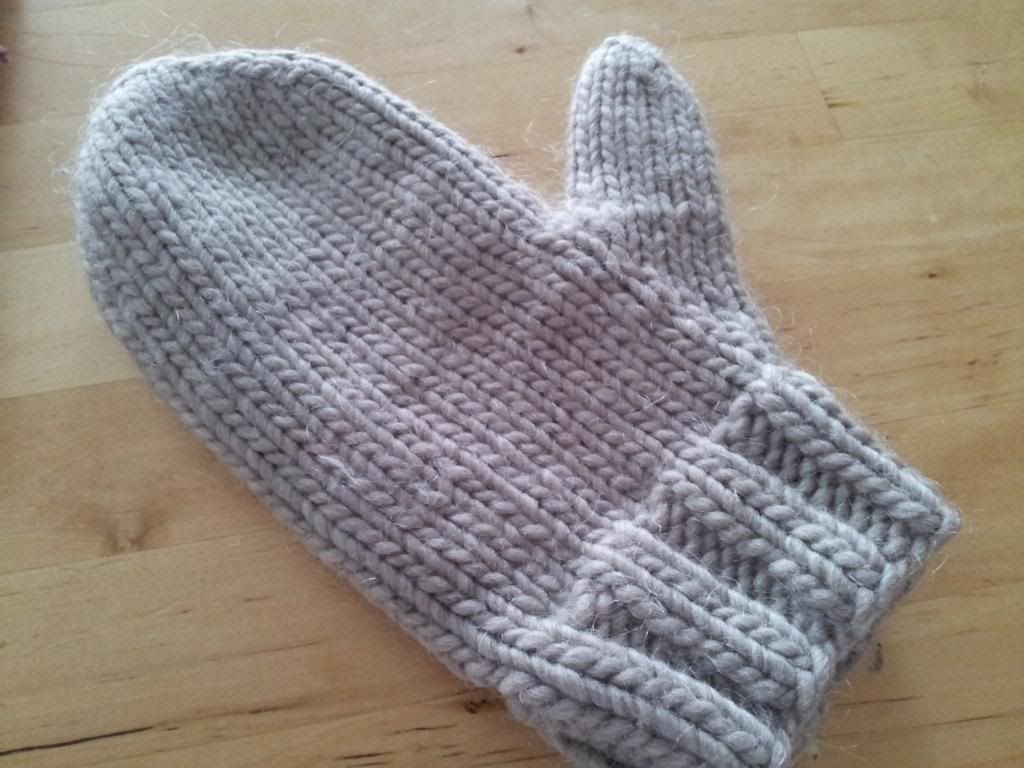
Today was a snow day.  So I sat with some coffee, and knit.  Mittens of course!  There's nothing I love more in the winter than my hand knitted mittens.  They are the only things I wear.  I have even managed to get D on the knitted mitten train.  I made him a pair a few years ago and he loved them.  But this year, he managed to get a hole in the thumb.  So he asked me to make him a new pair.  I've been making these mitts for so long, I don't know where I got the pattern originally.  I thought this time, I would write down the pattern I use so that I had it, and to share with you!  (If you knit that is..)


This pattern uses a bulky yarn.  I usually use Lamb's Pride Bulky for my mittens.  Its soft and dense, and my mitts always turn out perfectly when I make them.  The red and purple mittens above are made with a lighter weight of yarn (Manos de Uruguay Classica) held 2 strands together. 

This pattern makes a nice thick mitten.  Like the kind you would need in Canada (which is where I live.)  Here's what you need:

Materials:
1 skein Lamb's Pride Bulky, or other bulky weight yarn
1 set of 5 Double Point needles US size 9
2 stitch markers in different colors
yarn needle for weaving in the ends

Gauge:
4 sts/ 1 inch

Instructions:
Cast on 32 stitches onto 4 double-pointed needles. Join to work in the round. Mark the beginning of the round with one of the stitch markers.  Begin knitting in 2x2 rib. Continue 2x2 rib for 10 rounds or 2 inches.

Decrease round: begin stockinette stitch and K2tog, K to end of needle, on next needle K to last 2 stitches, SSK, on third needle, K2tog, K to end of needle, on fourth needle, K to last 2 stitches, SSK. You should have 28 sts on your needles.

Increase for thumb gusset: K14, M1, place marker (NOTE: not really necessary, I put one here because it helps me remember the number of increases,) K1, M1, K to end of round. Increase one stitch before the first increased stitch and after the last increased stitch every 3rd row, 4 more times. By the end of this round, you should have 38 sts.

Next row: K14, place next 12 stitches on scrap piece of yarn or a stitch holder. Cast on two new stitches over gap (I use backward loop method) and continue to knit to end of round.You should have 30 sts in the round.

Continue knitting hand portion of mitten until it reaches tip of little finger.

Start decreasing for the top of the mitten: 
First round: K2tog, knit to the end of the needle, on the next needle K to the last 2 stitches and SSK, on the thirds needle K2tog, k to the end of the needle, on the last needle, K to the last 2 stitches, SSK.  
Knit one round even.  Repeat the last 2 rounds until there are 2 stitches on each needle.  Take the yarn needle and pull yarn through the remaining stitches.  Weave in ends.

Thumb:
Pick up the 12 stitches for the thumb and put them on 3 needles, 4 stitches on each needle.  K one round and at the end of the round pick up 1 or 2 stitches over the gap.  Close the gap to complete the round.  K in the round until long enough for your thumb to just poke out the top.  K2tog, K1 to the end of the round.  K one round even.  K2tog to the end of the round.  Pull yarn through the remaining stitches.  Weave in ends.


These mitts are really quick to make up.  I finished the first one in about 2 hours.  I like them because they are quick and really warm.  If you make a pair, will you let me know?  I would love to see your mittens.


Monday, 9 September 2013

Made: Runched Pillow


Are you sick of my new apartment posts yet?  This might be the last one for a while, I'm hoping to post some thoughtful pose up here soon.  I made some throw pillows for the living and bedroom lately.  I was having a really hard time finding pillows in the colors I wanted.  So, in true DIY fashion, I went to the fabric store, and found some great fabrics (on sale!) and set out to make them with my new sewing machine.  I thought I would show you a "Pinterest-almost-success-project" pillow.

I don't usually try the things that I see on Pinterest.  I usually look for my projects through books or other blogs-- there are some talented bloggers out there to learn from!  But I really liked the look of a runched pillow.  And I thought one would look so nice on my bed.  I saw a great tutorial (on Pinterest) and thought I would try it.  I'm not going to go through the steps; if you want to make one use the tutorial.  It is super-detailed.  I will however give you some tips based on making this pillow:
  • You need almost 2 times the width of fabric for your pillow.  If you want a 24" wide pillow,   your fabric needs to be at least 40".  The runching shrinks the size significantly.
  • Draw your lines on your pillow.  Otherwise you will have crooked seams like me.
  • Measure the distances between runchings.  Again, or it will look weird.  Like mine.
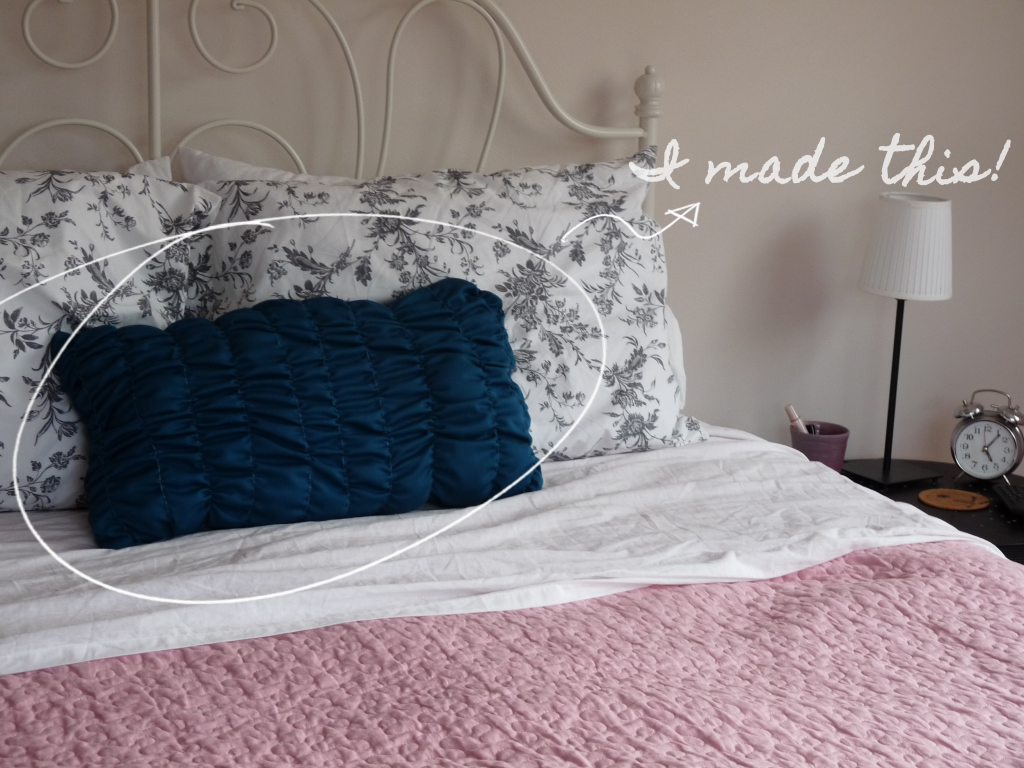
  • Even though the tutorial says to fold over your edge, I didn't.  It made the pillow hard to sew into, well a pillow.  Just gather the material 1/2" from the edge, and make your seam close to the first gathered seam.  
  • Use the same color fabric and thread.  You can really see the thread in this project, so its better if it blends.
  • Don't cut the backing piece of the pillow until you finished the front part.  Then measure for the back piece.  That way it will match perfectly.
  • Go slow when gathering, or you will break the thread.  Ask me how I know.
  • I found it easier to do 3 seams for each line.  I gather the top, the middle then the bottom.  This way I didn't break the thread.  

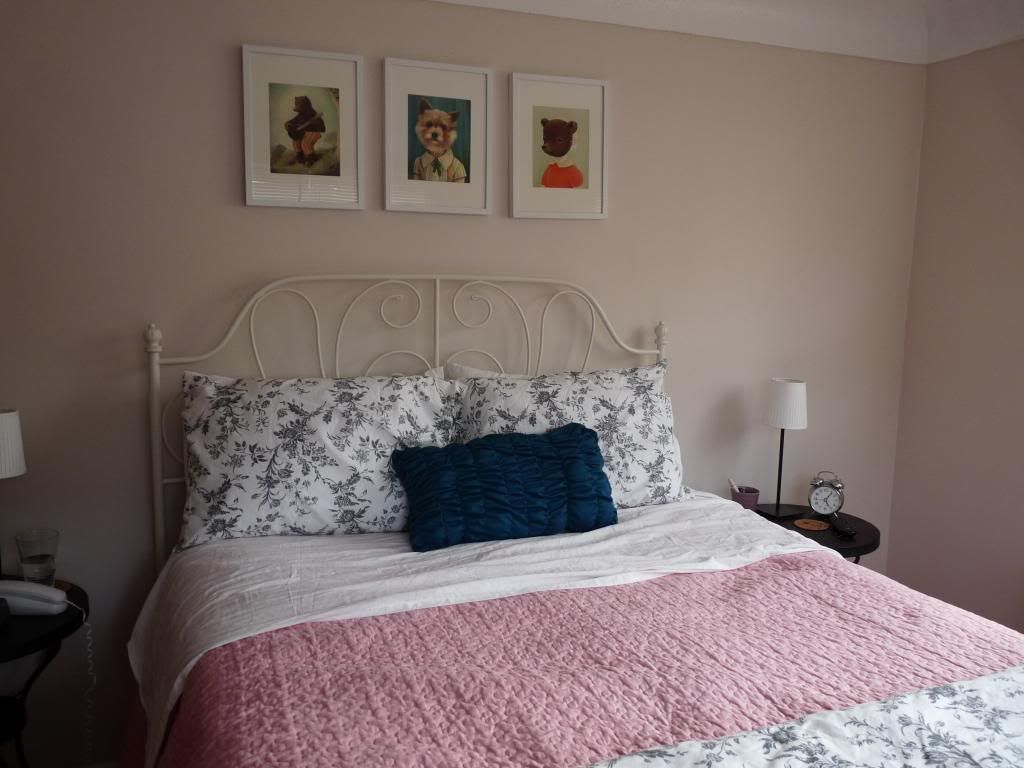
This is what the pillow looks like in my new bedroom:
 

I wanted the pillow to match the paintings hanging above our bed.  I think it does!  Our bedroom is calming, and bright-- pretty much my favorite room in the house!

Friday, 2 August 2013

Made: Bow Clutch (that I will probably use as a make-up case)


I used to be way into quilting.  But then I got the new career, and starting spending all my time on that.  I did use my sewing machine, but mostly for alterations for our clothing.  Not so much for fun.  When my old sewing machine broke, I didn't rush to replace it.  I missed sewing, but it was something I didn't have the time for.  Since I do all my sewing on our dining room table, it wasn't something I could start and leave for an undetermined amount of time.  I guess what I'm saying is I got lazy.  So once I finished my last quilt (for my gramma,) I didn't really do it so much.

For Christmas, D bought me a new sewing machine.  

And this summer, I finally found the time to learn how to use it.  There are a few differences with my machine.  I have come to know my old machine as a training machine.  Thats why it was so easy to use.  This new machine has a bobbin case and stuff, which I have to tread and such.  Its a little harder than the old one.  But, this one has great tension, and metal parts!  Like a grown-up machine should!

So to learn how to use my machine, I made a little pouch for my small knitting projects.  It turned out cute.  I was quite proud of it.  But it was not impressive.

So I tried something a little harder.

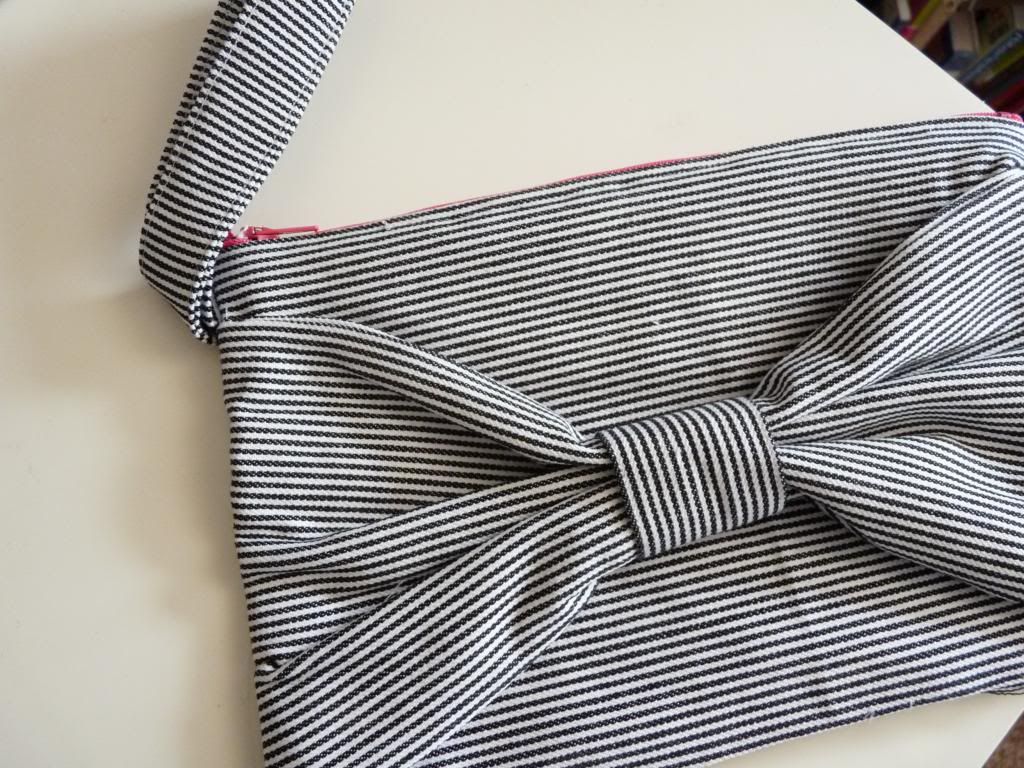
And I made this bow clutch:


I love how it turned out.  I just used some fabric that I had laying around from the last time I was really into sewing.  I think it turned out really cute!  

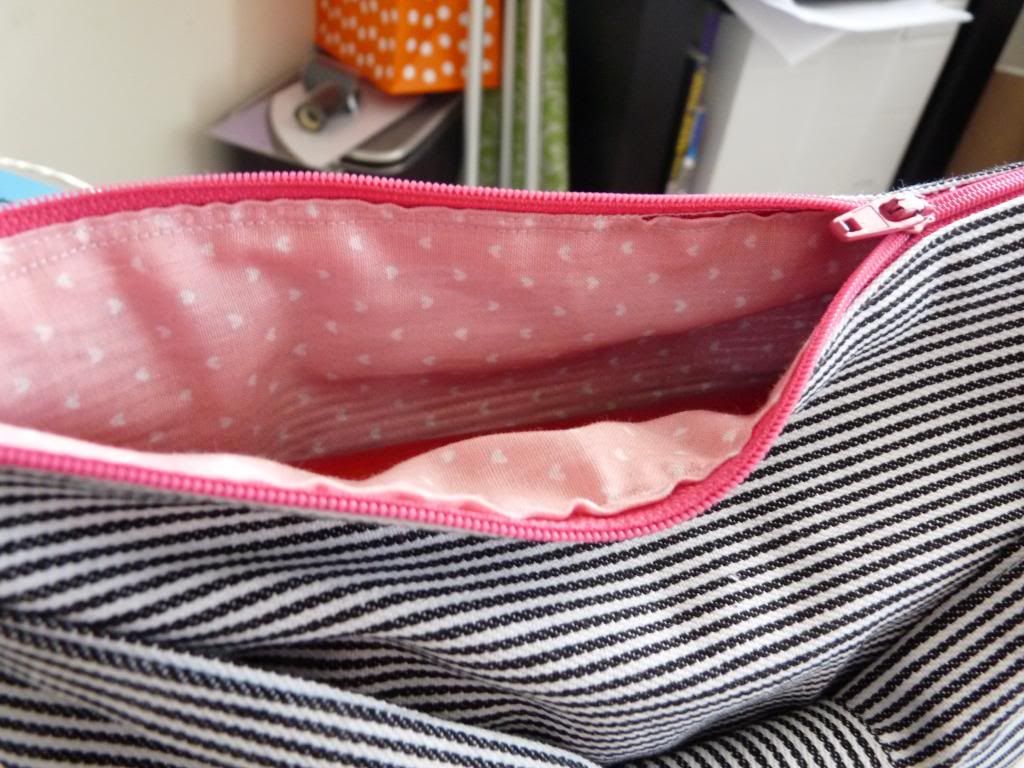
But, I am not a clutch kind of girl.  I need to have my wallet and stuff strapped to my body, or else I will probably lose it.  At the very least, misplace it for a while.  So this clutch will probably turn into some sort of make-up case.  One that I carry around everyday, but in a bigger purse that I can strap to my body.  You know how it is.


If you happen to be a crafty-type and want to make one for yourself,  I used this tutorial from Elm Street Life's blog.  It was so clear, and very helpful.  She outlines every step of making the clutch, with pictures!  Having written my own sewing tutorial, I know how time consuming it is to write one that is helpful.  So if you use it, make sure you tell her how awesome her tutorial is.  

Have you tried sewing anything lately?  Do you sew?  
 

Monday, 29 July 2013

DIY Stationary Cards


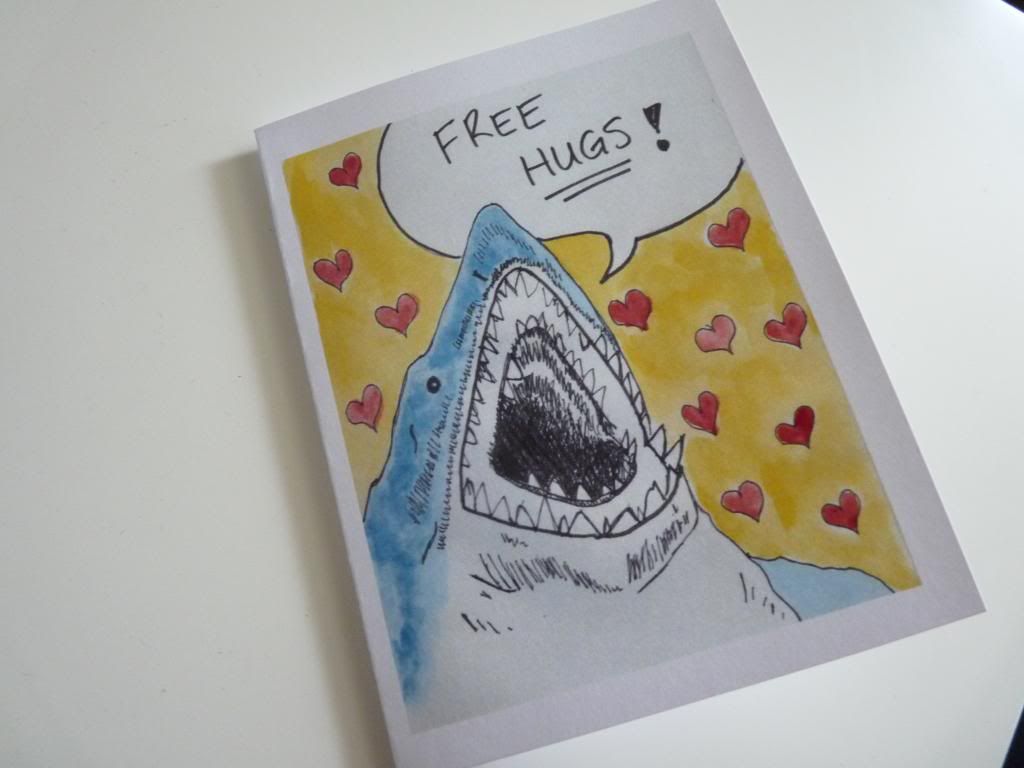
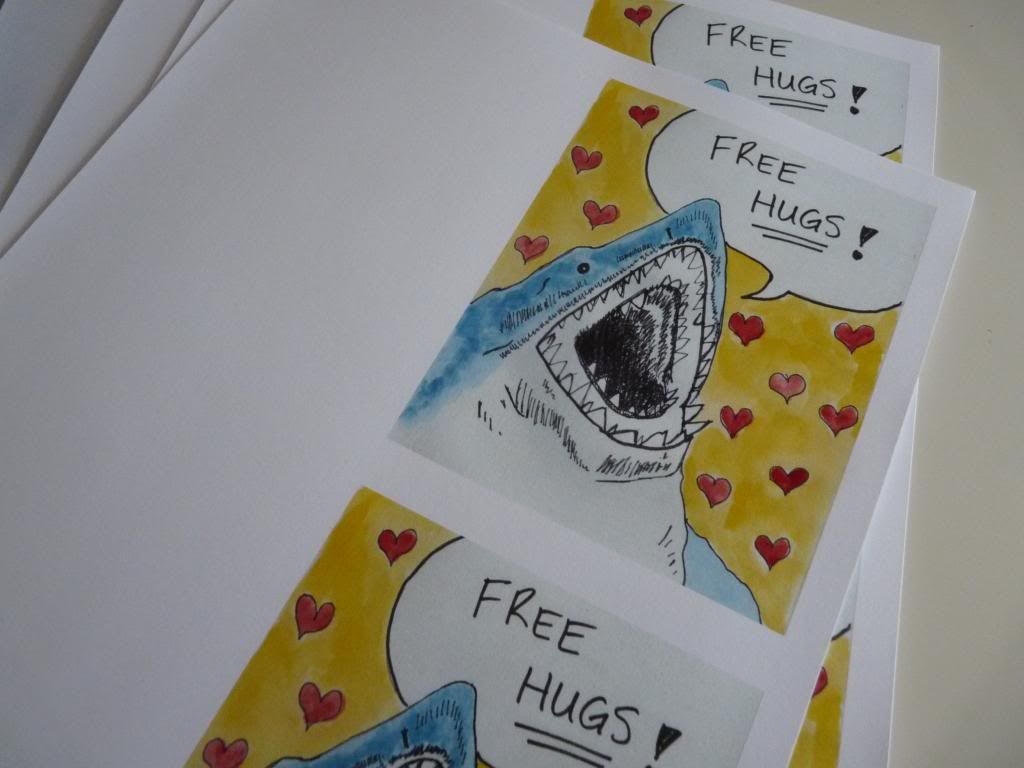
I love note cards.  I buy them a lot.  I like giving little notes to say "thank you," or "what's up?"   I wanted to create little note cards that are more personal; and original.  When I showed people the little shark drawing, they got a kick out of it too.  So, I thought it would be fun to have it on a little card, you know, to send as a pick-me-up to my friends when they needed it.

I would love to be able to make the note cards from scratch when I need them, but that is not always feasible for me because I get so busy.  So I took the picture, and created this little card.  It was super easy-- and really not expensive.


I printed them out on card stock, and cut and folded!  And that's it.  New note cards to give to friends.


Do you buy or make your cards?