Showing posts with label DIY. Show all posts

Tuesday, 25 May 2021

DIY Flax Seed Hair Gel


A close up of my curls, and my hair clip.

Hey Curlies!  I assume that if you are reading this, you have curly hair and you are interested in hair gel!  If not, that's cool too- its always good to know more stuff.  And if it's your first time on this lil' blog WELCOME!  

I have very curly hair.  If you are hip to the lingo, I have Type 3C hair, with low porosity.  It's fine, but I have a lot of it.  And up until October last year, I chemically relaxed it religiously every 6 months for YEARS.  I was also losing my hair in the front of my scalp due to tension alopecia, from pulling it back so tight for so long.  So I cut it all off! And its definitely healthier now.

ANYWAYS, one of the products I use on my hair is really difficult to get in Canada right now.  So I went back to my old curly faithful Flax Seed Gel (FSG) now that I'm curly again.  

What I really like about using FSG is that it holds my curls well.  And there is no hard cast on my curls once it's dry, and it doesn't flake.  I use it will a watered down natural conditioner, and it doesn't flake with that added product.  It also washes out very easily, so there little build up on my hair.  And it makes my hair shine.  I love it so much.

The benefits of FSG are noted in a lot of natural hair websites.  The TL;DR is:

  • its a source of omega-3 fatty acids that improve elasticity and strength for your hair
  • its full of antioxidants that keep hair follicles healthy
  • Flax is a source of protein that helps repair hair
  • has lignans that can decrease inflammation on your scalp

You can buy FSG, but I prefer to make it myself because 1) its really cheap; 2) its pretty easy to do; 3) I can control what goes in it and on my head; 4) I can make it smell like anything I want.  

When I say cheap, I mean CHEAP.  I bought 1 kg of flax seeds for $3.59 CANADIAN.  So cheap.  And all you really need if flax seeds and water.  But, if you want to make your gel work a little more for you, I have a few add-ins that I use that keep my hair moisturized and soft.

The ingredients 

What you'll need:

  • 1/4 cup of Flax Seeds (raw, not roasted)
  • 2 cups water
  • 1 tsp Vegetable Glycerine (Available at drug stores and health food stores)
  • 1/2 tsp some kind of oil that is good for hair (Jojoba; coconut- if your hair likes it; sweet almond oil)
  • 1/2 of Vitamin E oil (or 2 capsules of Vitamin E oil that you can pierce and squeeze into your gel)
  • and 6-10 drops of essential oil (I use Sweet Orange oil because I like refreshing it is; but you can use jasmine, lavender or any other scent you like.)
  • a small pot
  • a mesh sieve, or you can use old pantyhose to strain the gel
  • a stick to stir the gel with
  • a jar to store your gel
I don't use any preservatives in my FSG, so I keep mine in the fridge.  I like to use it cold to help seal the cuticle of my hair.  Without preservatives, it will last about 2 weeks in the fridge, but I use it almost everyday, so I have to make it weekly.

Method: 

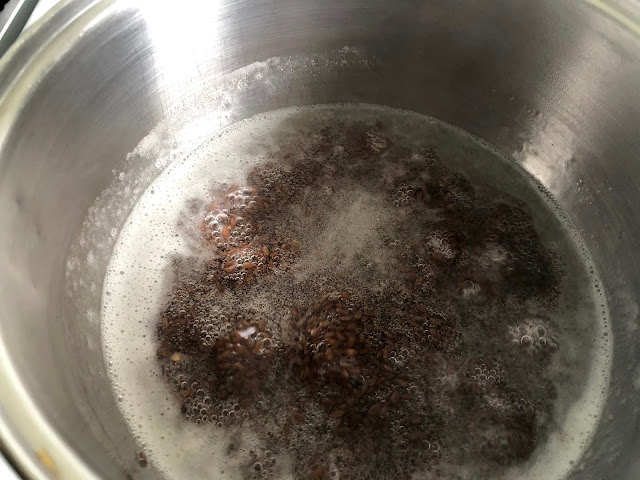
  1. In a small pot or saucepan, add the water, and the flax seeds and heat over medium-high and bring the mixture to a boil.

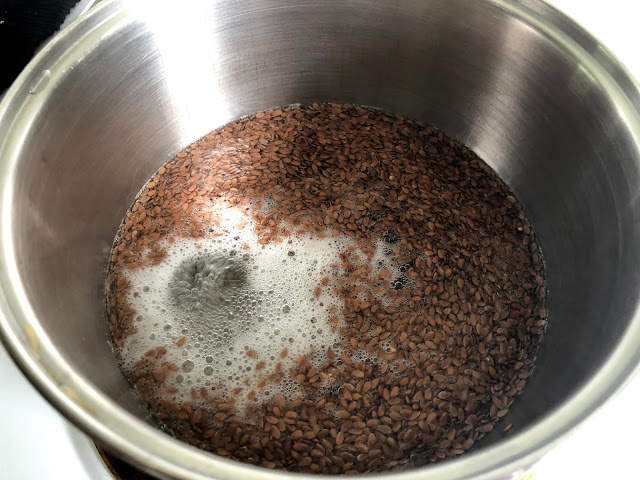
     2.  Once the mixture started to boil, turn down the heat to medium, and let it boil for about 10-12   
          minutes.  Boil it less if you want a more liquid gel.  I like it pretty thick, so I boil it for about 12  
          minutes.  Make sure that you stir the gel often so seeds don't stick to the bottom of the pot and 
          burn.


     3. Once the gel has boiled,  it will be thick and sticky.  I strain it by pouring it into a mesh sieve over a  
         bowl and let it cool.  The gel at this point is still food safe, so you can use any bowl.  Once you add   
         the add-ins, it will not longer be food safe.  This is why I add that stuff to the jar I'm storing it in.

     4.  While the gel is straining and cooling, take your jar and add the glycerine, oils and vitamin E to the 
          bottom and mix with your stick.  


    5.   After your gel has cooled and strained, you can put the seeds in a container in the fridge- you can 
          reuse these seeds to make another batch of gel!  

    6.  Mix your gel and the add-ins- the gel is very viscous-- so I like to put the lid on and shake it well to 
         incorporate all the oils an add-ins.


    7. This is where I like to smell my gel, and add more essential oil.  Without the oils, the smell is not   
        strong, and you can't smell it once it dry.  But I like having a little scent. 

If you've added oil, you will need to shake it before you use it.  But that's it!  That's how I make my gel!

Will you give it a try?  If you have questions, don't be afraid to ask below in the comments!


Saturday, 26 December 2020

DIY Earring Display

My statement earring collection may be out of control...


You may or may not know, that I cut all my hair off.  Yep, I'm one of those girls who, in lockdown, decided to go for the big chop.  And since then, I've been obsessed with statement earrings.  So I started making them.  And then, selling them here.  

As a result, I've increased my earring collection immensely.  And they were sitting in a box.  Which was frustrating to find to wear.  So, I challenged myself to make an earring display out of what I have in my house.  I couldn't buy anything new to create this, and I think it turned out well for repurposed items. 

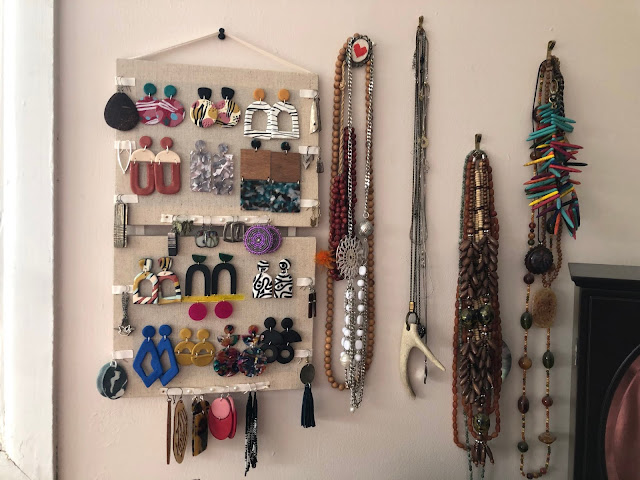
To make this display I used 2 small jute canvasses, a roll of natural-coloured ribbon, some of those pearl stickers, a picture hanging kit and some glue.  That's it!  Its pretty sturdy, and it holds a lot of earrings- evidently- but I can still see all the pairs I have to choose which ones I want to wear on any given day.

And then I hung up my necklaces to complete my jewelry display.  I like it hanging over my dresser so that I can choose my accessories after I'm dressed.  

Not that I'm getting dressed all that much these days.  But when it's time to get dressed again, I'll be ready.

Monday, 23 November 2020

Pine Needle Basket-Weaving

When I was in university, I majored in a liberal arts type major.  When I was with my science or engineering friends they would introduce me and say my major was basket weaving.  Little did they know that I would grow to love basket weaving, and looking back, I would have majored in it if I could have.

ANYWAYS, a few years ago, I learned that my grandfather was bi-racial like I am- he was Black and Indigenous- which is really cool.  I started researching about that part of my history, and talking to members and elders from my grandad's tribe in NC.  I learned a lot in those conversations.  While researching the arts that this group does, I came across pine needle basket weaving.  I thought it was really interesting- that the throw away part of the tree could be harvested and used to make baskets is really neat.  I looked up some tutorials, and started weaving.  It takes a bit to get the hang of it, but by the time I finished my first basket, I was feeling pretty good about it.  


I spent some time this late summer and fall collecting pine needles.  I live in Canada now, on the Eastern part of the country where the types of pines that we would have in NC are not available here.  Where Southern Indigenous groups would use Ponderosa or Longleaf Pines, which don't grow in Ontario.  So I used needles from the Red Pine with are considerably shorter (by like half) which means weaving them is a little tougher, but still doable.  Because the needles I use are shorter, I make smaller baskets.  

It is pretty fascinating to make something truly from scratch.  I had to forage for the needles, sort them, remove the fascicle sheaths (the part that attaches them to the tree), wash them, boil them and then I could use them to weave.   My house smelled like pine for a while... Luckily Don likes the smell.  

I also may have made Don come and get needles with me.  He actually liked it.  That was actually a fun day.  

Depending on what I want the basket to look like, I start with a wooden piece for the centre or not.  This one, I used a laser cut out flower for something different.  I weave with wax covered thread, and I use a plastic straw as my gauge to keep my coils even.  I did love sitting outside and weaving in the sun.  


And this is the basket all finished!  I love how it turned out.  Its cute, and I painted the wooden centre to match the thread.


And I made a little basket with black thread and no centre, that I really loved.  I love the bowl shape, so a lot of my baskets are that shape.  These baskets are very sturdy, but little.  And useful.  I couldn't believe how useful these little baskets are.


I've made about 6 of these so far.  They are relaxing, if a little time-consuming, and I think cute.  Once they dry out, they turn this really pretty reddish color.  This is one of my more rewarding crafts.  I feel more connected to the artisans that would have made these in the past and currently. Which is super cool.  


Tuesday, 13 October 2020

Macrame All the Way!


I love learning new skills.  And I needed a plant hanger.  So I took up macrame and added another craft to my craft-lexicon.  Its relaxing.  But its not passive.  Its a lot of reaching (especially if you are working on a large piece).  But the results are really nice.  Its not the cheapest of hobbies, thicker rope is pretty pricey, so you don't want to waste it.  

But it is kinda quick, and the things you can make are really nice.  And its pretty quick to learn.  You can make nice things with 2 knots, and then you can learn a bunch of knots if you are so inclined.


This is the first thing I made.  I went for it.  And I learned a lot while making this, even though it only used 3 knots.  It hangs in my bedroom as part of Operation: Macrame my bedroom.  I'm going for a whimsical, but light theme for my bedroom, and this def fits.  It is pretty large too.  A little ambitious for my first macrame hanging, but I'm glad I powered through.


The other hanging I made for my bedroom is this plant hanger.  I got this lovely pot at the nursery I buy my plants from.  And its looks lovely.


I have a lot of plants.  So learning this has allowed me to hang my plants around.  One of my friends said it looks like "a hug for a plant." It does.


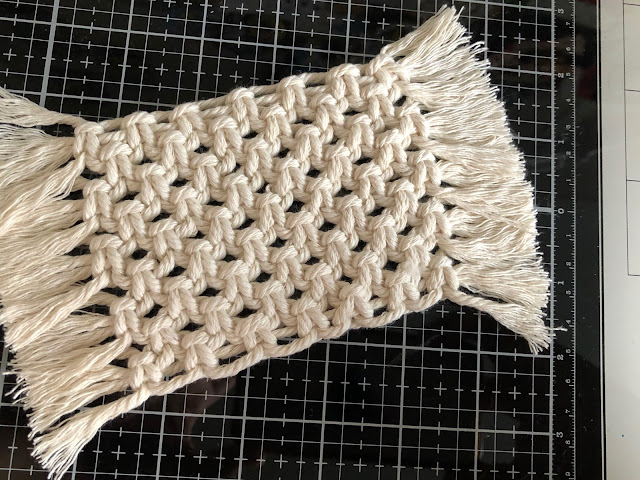
I have enough plant hangers, so I started looking for things I could make with knotted rope.  So I started making these coasters since I wanted some for our nightstands.  And I think they looked pretty cute.

I really enjoyed learning this, and I'm thinking of other ways I can incorporate macrame into my crafts.  Ooooh, maybe a lamp shade?


Thursday, 1 October 2020

Hand Sewn Patches (Iron-On because I did enough sewing)


For the past few weeks, I've been obsessed with embroidering iron-on patches for my jacket.  

You see, I couldn't find my favourite denim jacket when I was changing my closet over to fall and winter clothing (because I have a small closet, I store off-season clothes).  I was really sad, and I knew I'd miss it, so I bought a new one.  But, then I found it-- Of course I did.  So now I have one that I want to sew patches onto.  And since my tastes run, ahem, weird, I wanted to make my own.  And that's how it started.


I still haven't figured out my style.  I like super detailed things, so the patches I've made have a lot of details.  I waver between botanical illustrations, and graffiti.  Extreme. 


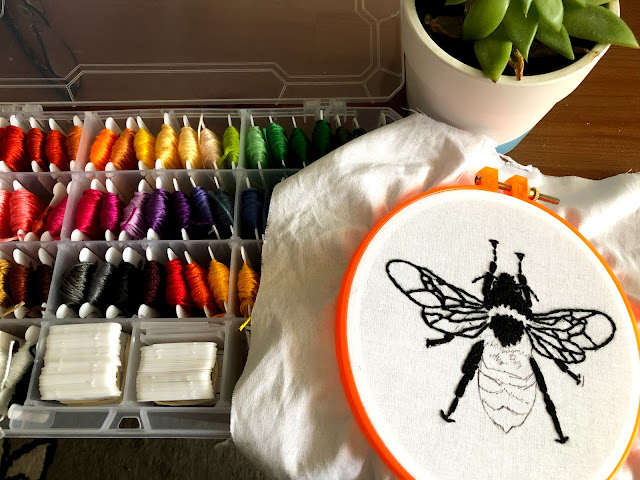
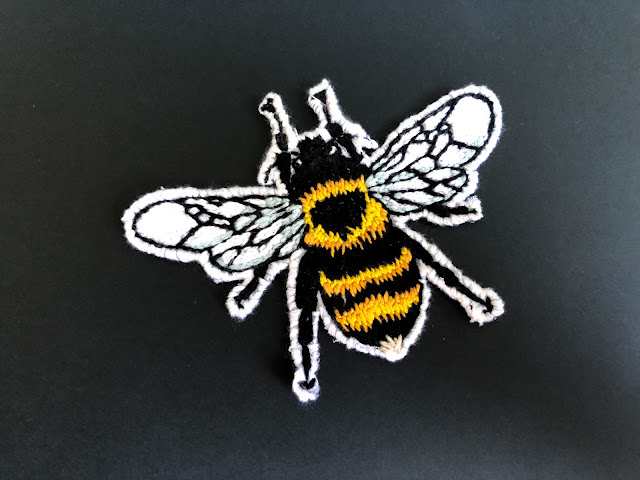
This bee was the first one I completed.  It was, ah, a little ambitious for my first one, but I like how it turned out.  


The process is kind of long though.  First I need an idea of a patch I want to make.  Then I sketch it out in a notebook, or on some paper.  Then I ink up the sketch so that I can see the lines to trace it onto the cloth. I trace it onto the cloth (I use cotton broadcloth for the backing).  I put my cotton and my stabilizer fabric onto the hoop, and start sewing.  I mostly stitch at night.  Its pretty calming.  


I've been saying "Dope" a lot since I got this shirt from my aunt:


So, you know... it made its way into my art.  And just because I think it so pretty, here's my organized embroidery floss container:


Sigh.  I love it when things are in rainbow order.