Showing posts with label Crafts. Show all posts

Thursday, 29 July 2021

How I Make my Pink Lemonade Earrings


For my video this week, I decided to show the process of making some earrings that I sell on my site www.bassmakes.com.  It's not a tutorial per se, but it is how I go about making polymer clay slabs and cutting out earrings.  

I like these earrings for the summer- the bright lemons and the deep pink- they are really happy little dangles!  Super cute!  I didn't show how I made the lemon cane that I use in the slab, but I can do a video about that if anyone wants one.  

I was inspired by some scrapbooking paper I saw- I thought "THOSE HAVE TO BE EARRINGS!"  And that's how these happened.  

ANYWAYS, I hope you enjoy this relaxing video.  You'll hear my voice again next video.

Enjoy!


Sunday, 11 July 2021

A (Hopefully Anti-Poke) Needle Book


I was watching YouTube, you know, as you do during a pandemic, and I came across a tutorial for a Needle book.  Looking at my state of needle storage, I thought that was a brilliant idea to coral my pointy things.  The tutorial I watched was by Nik the Booksmith Needlebook for Sharp Pokey Things - Tutorial
and I wanted to try and make it my own.  Not being a professional book smith, or really good at sewing, I made one anyways!  It was not as difficult as I thought.  If you want to make on too, here are the details and the video tutorial below.

Here's what you need for the project: -Design paper or cardstock - Felt -Button -Elastic cord - Glue - Scissors -Paper trimmer (optional) 
- Sewing Machine (optional) or needle and thread 
- any decorations you want to use (that's the fun part!)

Preparation: 

  1. You will need to cut your felt into 3 pieces: 1 piece 6.5" x 4.25" for the booklet, and 2 pieces 1.25" x 2.25" for the needle storage parts.  
  2. Then you will need 2 pieces of cardstock for your covers that measure 4" x 3".  You can use fabric, but the cardstock makes the booklet "Anti-Poke." 
Once you have your pieces cut out, you're ready to put it together!  Follow the instructions in the video for step-by-step instructions.


Monday, 17 May 2021

Happy Organized Fun Time! (Cleaning the craft room)


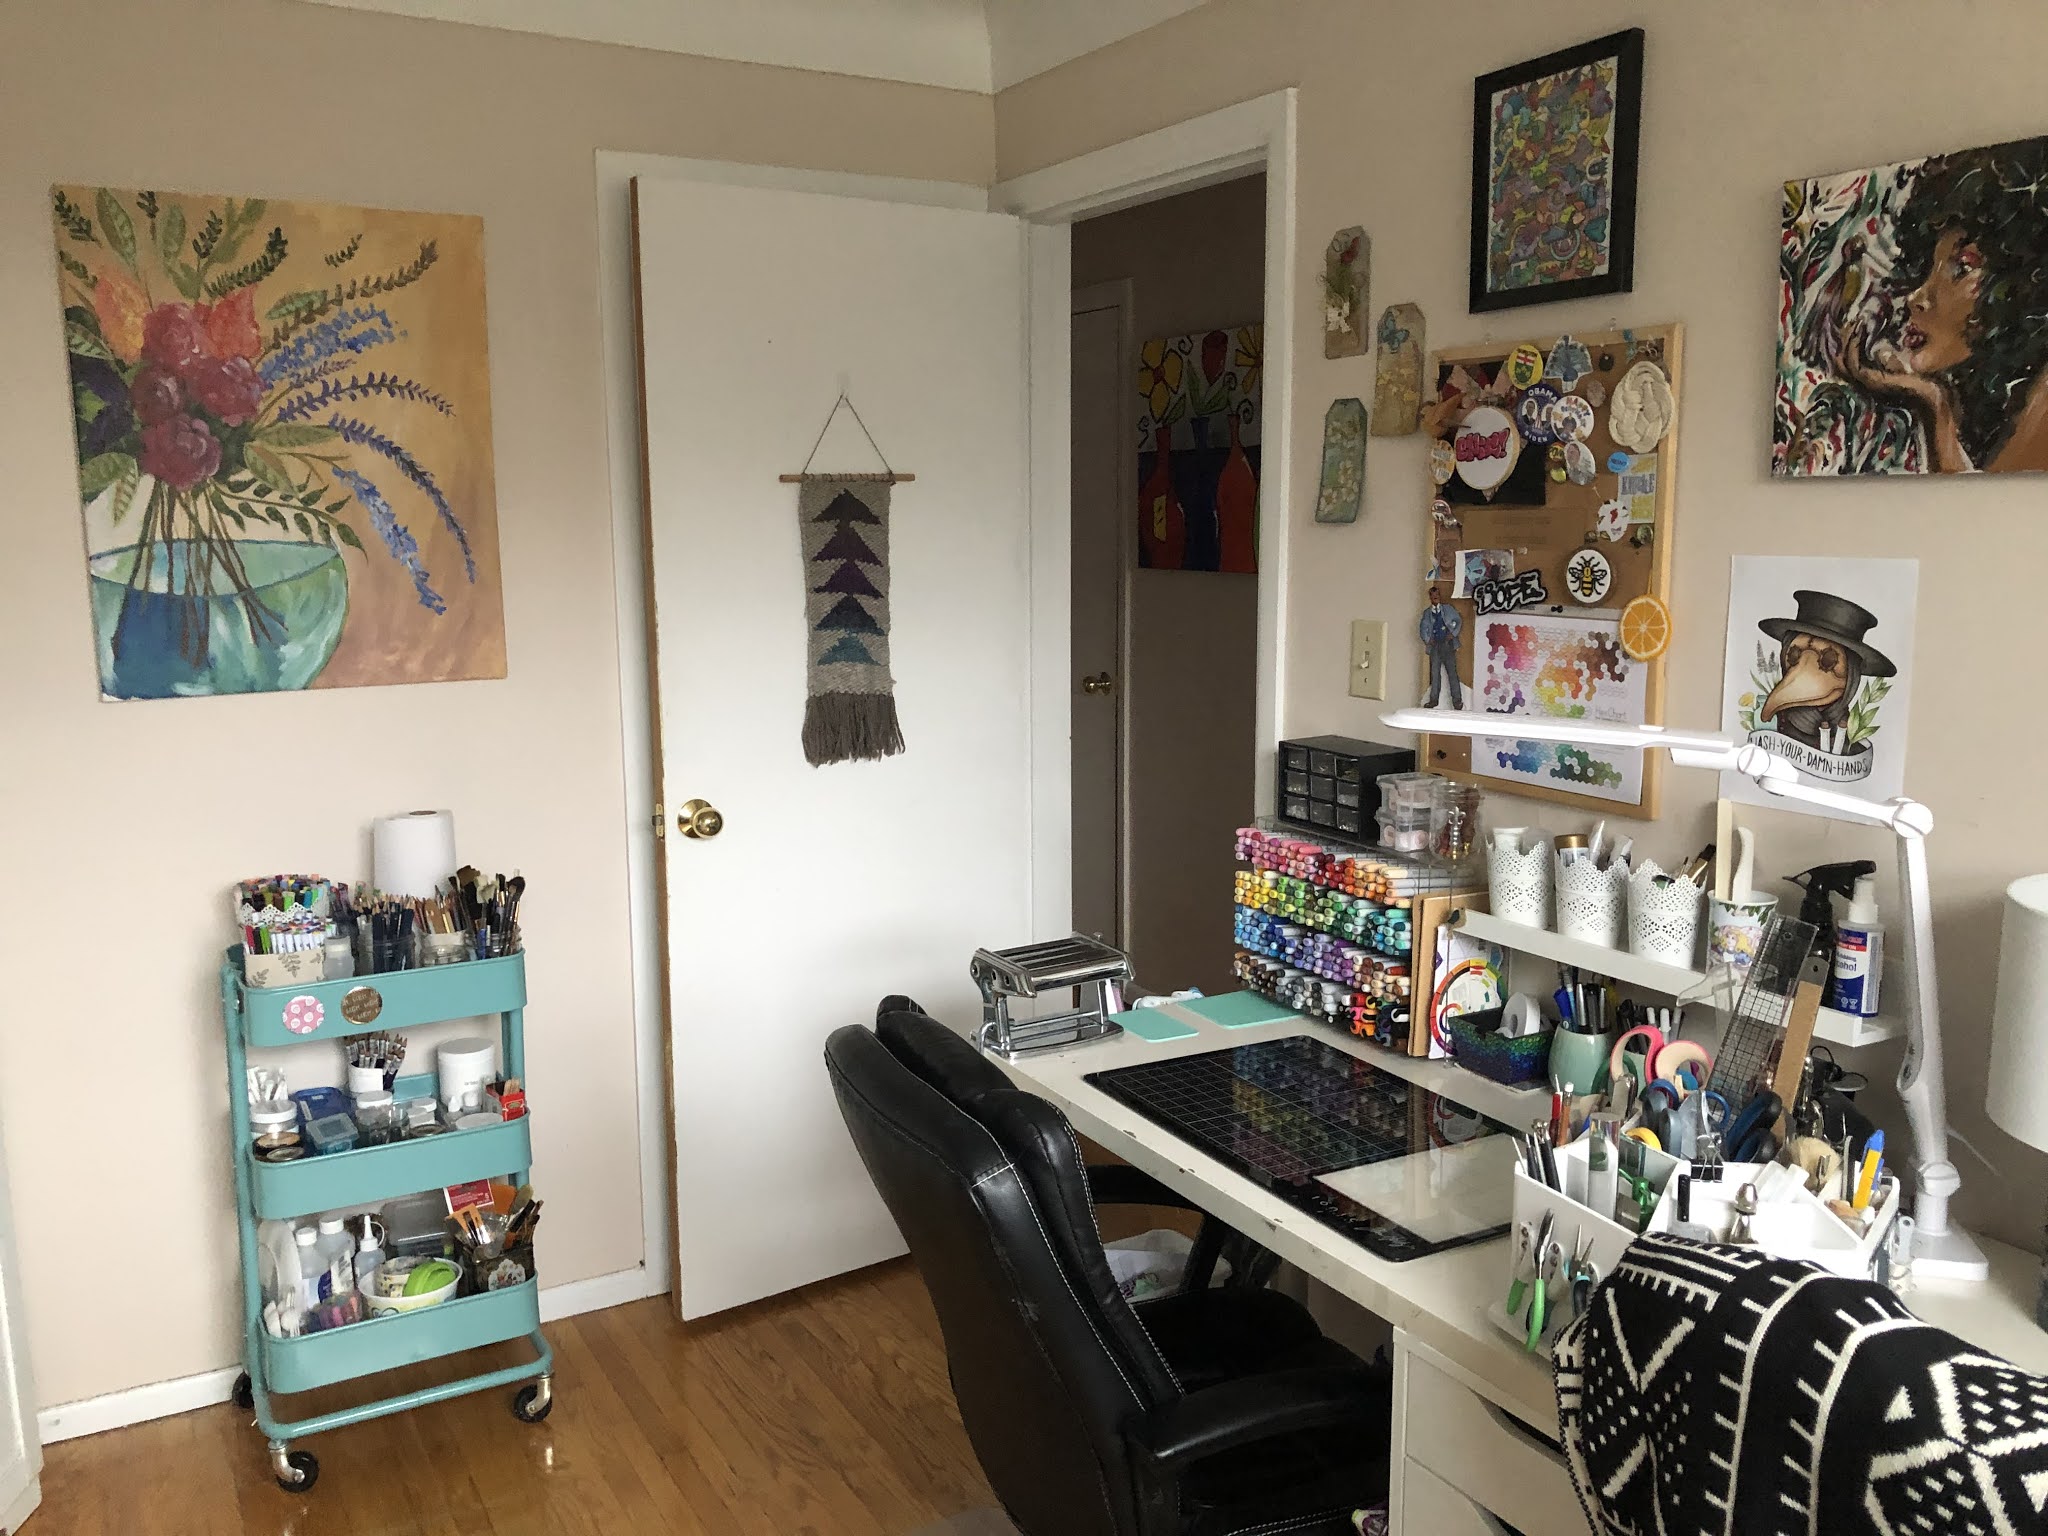
Oh, I love when things are all lined up in rainbow order!  I recently had a week's vacay- and since I can't go anywhere, I decided to redo and reorganize my craft room!  Since I'm teaching from home, I spend most of my time in this room either crafting or teaching.  I wanted it to be comfortable, organized and bright- so that I can concentrate on working and playing.

Before

It's not so bad I guess.  This is cleaned up, but it's still shabby.  And it's has things all crammed in spaces where things shouldn't be like in between my cupboards, I had too much furniture in there; it didn't match; and there was way too much plastic.  And junk.  Way too much junk.  And craft supplies that I didn't use.  And I am an art work hoarder.  I keep a lot of my artwork. 

It took a solid week of cleaning, and going through EVERY ITEM and purging junk.  I know that people use the Kondo question, "Does it spark joy?"  I don't do that.  The Bass method is, "Will I use this?  Will I need to buy it again?" And the main one, "What will I use this for?"  And got down to it. 

(I didn't thrown more than one grocery bag of trash away.  I donated craft supplies to a daycare, and gave some to my crafty friends.  The furniture and organizer went to the storage locker for my classroom)

After (from the door)

It's still busy.  But its more organized for sure.  the Drawers (from IKEA) better organize my supplies and oddly had a tone of room in them despite the size.  I was surprised.  I was able to make room for the inventory for my shop, and have a dedicated space for my paper and some stronger boxes to hold the this and that.  All my stuff is accessible while I'm working, which I love.  


After

The best part is that there is nothing crammed into little spaces.  Its cleaner, and easier to clean.  I also have space to show my art work.  


I found a better way to add art to my shelves- any frames are attached to the wall in-between the shelves and the shelves actually hold things that I can't hang on the wall.  That way I get double use out of this wall.  


I also have space for my plants, which where living in the kitchen.  I was also able to organize the stuff for my online shop, where I can find each collection easily.  

Overall, I'm really happy with hoe this room turned out.  The rest of my house is not as crowded as my craft room was- I think that's a craft people thing:  everything has potential.  At least, I know that the stuff I gave away can have potential-- somewhere else.
       

Monday, 23 November 2020

Pine Needle Basket-Weaving

When I was in university, I majored in a liberal arts type major.  When I was with my science or engineering friends they would introduce me and say my major was basket weaving.  Little did they know that I would grow to love basket weaving, and looking back, I would have majored in it if I could have.

ANYWAYS, a few years ago, I learned that my grandfather was bi-racial like I am- he was Black and Indigenous- which is really cool.  I started researching about that part of my history, and talking to members and elders from my grandad's tribe in NC.  I learned a lot in those conversations.  While researching the arts that this group does, I came across pine needle basket weaving.  I thought it was really interesting- that the throw away part of the tree could be harvested and used to make baskets is really neat.  I looked up some tutorials, and started weaving.  It takes a bit to get the hang of it, but by the time I finished my first basket, I was feeling pretty good about it.  


I spent some time this late summer and fall collecting pine needles.  I live in Canada now, on the Eastern part of the country where the types of pines that we would have in NC are not available here.  Where Southern Indigenous groups would use Ponderosa or Longleaf Pines, which don't grow in Ontario.  So I used needles from the Red Pine with are considerably shorter (by like half) which means weaving them is a little tougher, but still doable.  Because the needles I use are shorter, I make smaller baskets.  

It is pretty fascinating to make something truly from scratch.  I had to forage for the needles, sort them, remove the fascicle sheaths (the part that attaches them to the tree), wash them, boil them and then I could use them to weave.   My house smelled like pine for a while... Luckily Don likes the smell.  

I also may have made Don come and get needles with me.  He actually liked it.  That was actually a fun day.  

Depending on what I want the basket to look like, I start with a wooden piece for the centre or not.  This one, I used a laser cut out flower for something different.  I weave with wax covered thread, and I use a plastic straw as my gauge to keep my coils even.  I did love sitting outside and weaving in the sun.  


And this is the basket all finished!  I love how it turned out.  Its cute, and I painted the wooden centre to match the thread.


And I made a little basket with black thread and no centre, that I really loved.  I love the bowl shape, so a lot of my baskets are that shape.  These baskets are very sturdy, but little.  And useful.  I couldn't believe how useful these little baskets are.


I've made about 6 of these so far.  They are relaxing, if a little time-consuming, and I think cute.  Once they dry out, they turn this really pretty reddish color.  This is one of my more rewarding crafts.  I feel more connected to the artisans that would have made these in the past and currently. Which is super cool.  


Tuesday, 14 April 2020

Made: 3x3 Card and Card Holder


Sometimes you just want to make a bunch of little gifts to give to people so that they can have a bright spot in their day. Since its week 4 of Quarantine for me, I decided to make little things to give to the people that help me get food, and deliver medicine to me just so that they have one little nice thing in this dreary time.

So I made a tutorial, just in case you want something quick and cute to make to give to someone who could use a pick-me-up.

Materials:


1 12" x 12" sheet of 3" x 3" cut aparts (I used the Craft Smart Llama Love)
1- 6 1/2" x 7 1/2" solid coloured cardstock
1- design paper cut to 3 1/4" x 4"
1- design paper cut to 3 1/4" x 1 1/2"
5- kraft card stock (or any colour for card bases) cut to 6" x 3"
5 3x3 envelopes
Ribbon to decorate (optional)
Glue
Scissors
Paper Trimmer (optional)


Method:


Who are some people that you can make these for?


Friday, 15 August 2014

Made: Woven Wall Hanging

From: Creative Bug Blog/  A Beautiful Mess/  A Pair and a Spare

Usually, I'm slow to notice trends.  I don't read about them, and usually I don't really care.  I like what I like, you know?  But if there's a trend that centered around a DIY, I'm there.  I love when I figure that out.  and that's what I fell about this trend of woven wall hangings.

I am seeing them EVERYWHERE.  I couldn't read a DIY blog without it popping up, y'all.  And the more I saw them, the more I wanted one.  So, I decided to try my hand at one.  I've woven before, but now I don't have a loom.  I've meant to buy a new one, but never think of it when I have the money-- and there's a new Fossil Store in my town, and other things and places I wanted to go and things I wanted to do.  So I never bought one.  But that didn't stop me!  I made this:


...using yarn and some cardboard! 


That's the best part about weaving-- you can use almost anything and weave.  If you want a full tutorial on the process of weaving little wall hanging, A Beautiful Mess has a great one here.  If you don't own a loom (and don't want to buy one) you can substitute a piece of corrugated cardboard at least as big as you want your hanging.  Then cut some notches in the top and bottom (directly across from each other) to weave your warp onto.  Then you can follow the tutorial as written. 

The good thing about using cardboard instead of a loom, is that you can draw a guide for your image onto the cardboard.  That way you don't have to wing it.  I wanted some triangles in the "Flying Geese" pattern I love on quilts. (Note: The link leads you to a page about the Underground Railway "Quilt Codes."  I don't want to hear about how the theory of the quilt codes were "disproved."  I like the story, whether true or not.  It speaks to the ingenuity of the slaves and their allies while trying to escape an unjust system.)  So I wanted some version of it for my wall.


I used some neutral wool, and some Noro yarn for the triangles, a Japanese wool with awesome colors.  The weaving was really fast!  I finished it in one day.  I started it in the morning with my coffee, and finished it while I was watching Arrow.  I held the yarn double for the weft to make it thicker.  I like how it looks.

    
I hope you give it a try!  It was a satisfying DIY with a great end product.  If you do try it, make sure to link back so I can see it too!


Friday, 7 March 2014

Branch Weaving


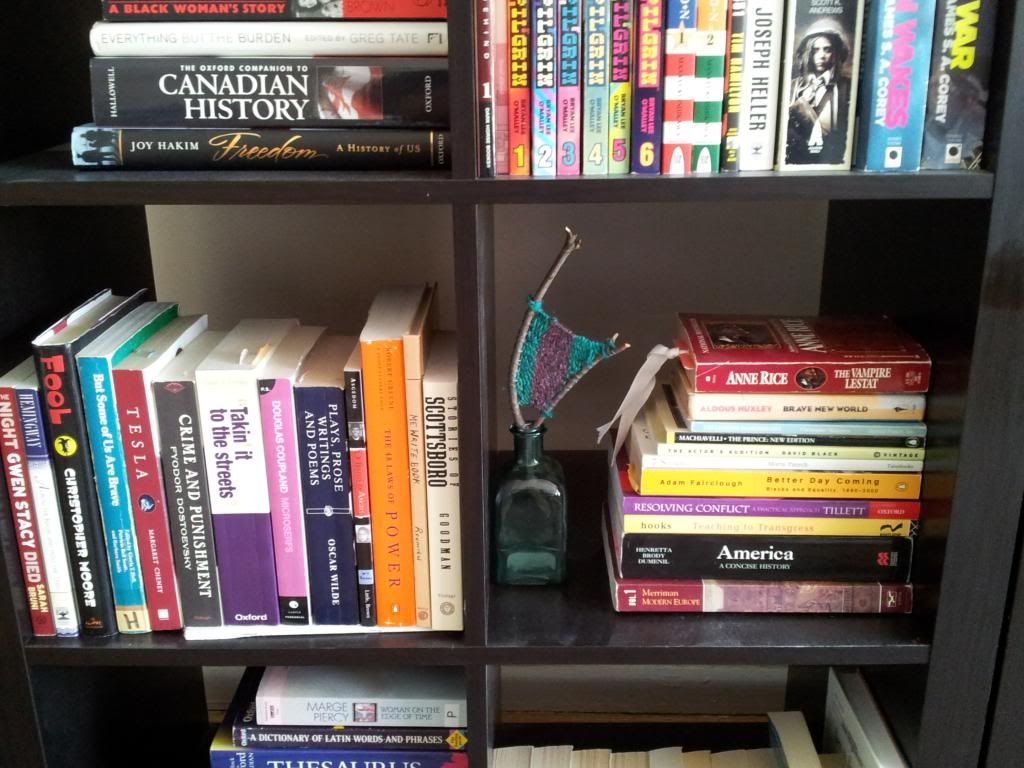
Branch weaving showed up in my Pinterest feed, and I thought it looked really cool.  I really wanted to try it that minute.  But I didn't have a branch.  Because the city was living under 3 feet of snow.  And I don't pull branches of trees, because that's bad for them, and I'm not a 10 year old, so I waited until I came across one laying on the ground.

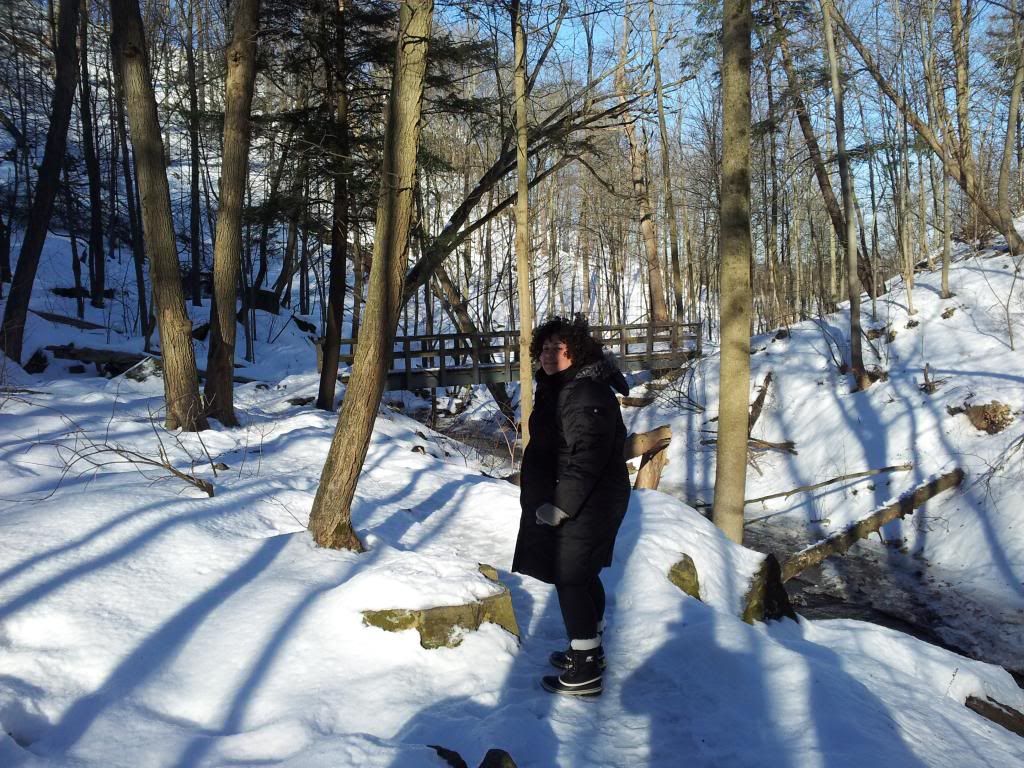
Last week, D and I went on a death-defying hike.  The trail was covered in ice.  So much ice!  What wasn't ice was knee-deep snow.  It was beautiful, but treacherous.  That bridge in the background?  Completely iced over.


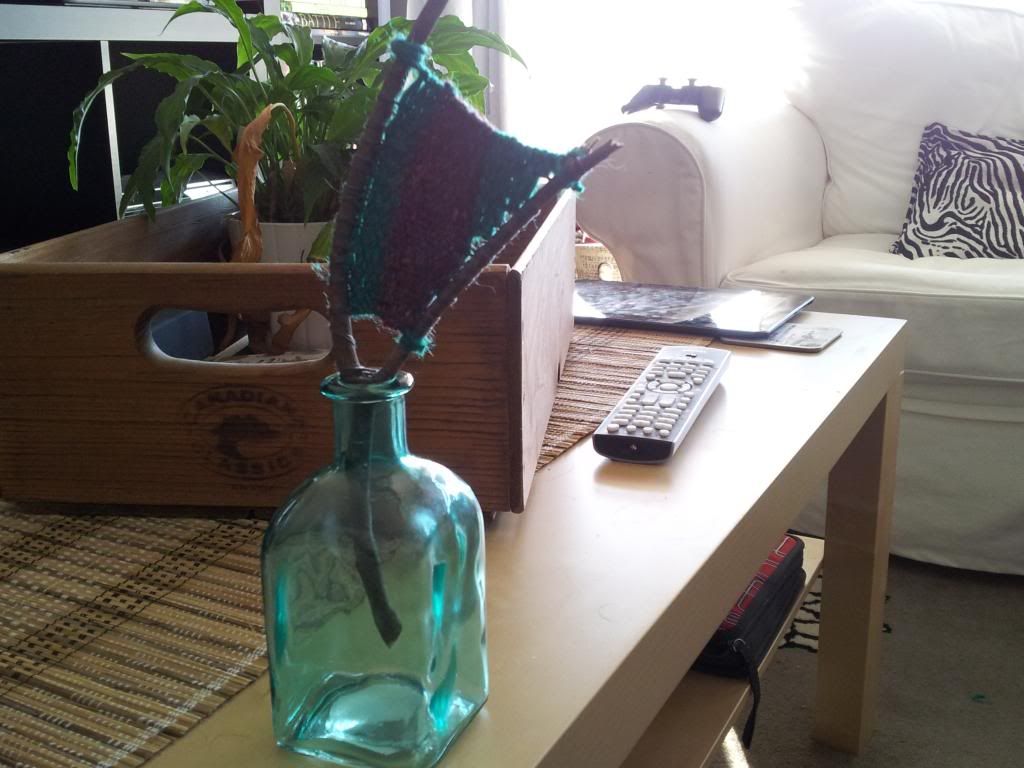
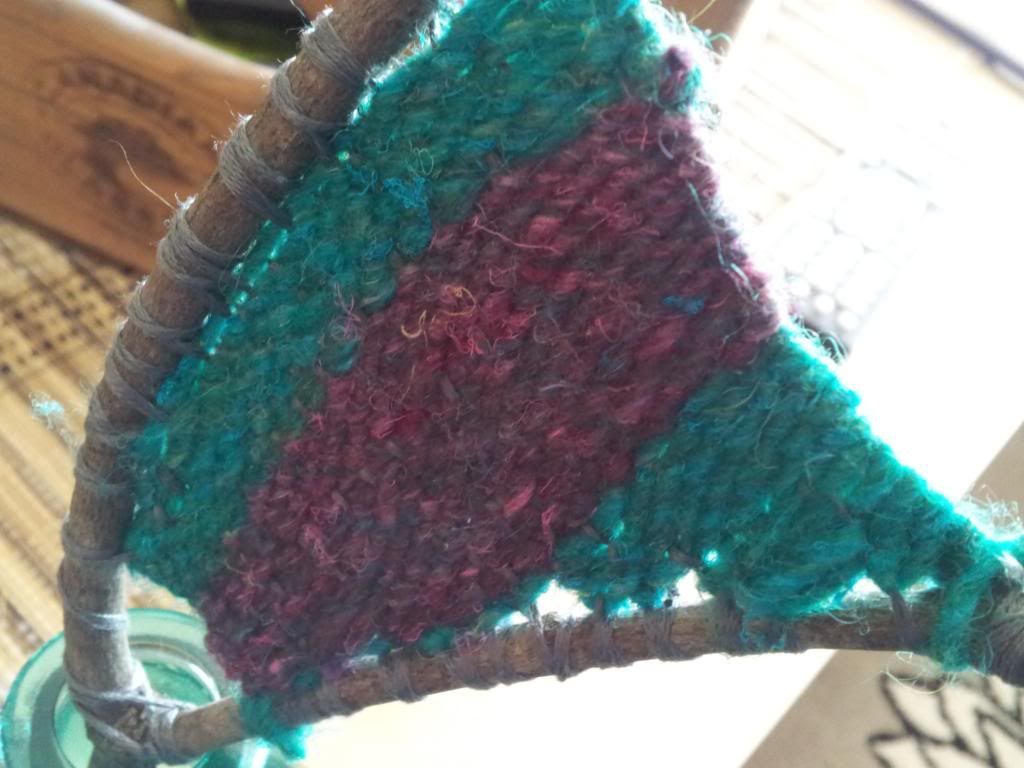
But, I found a branch, and during one of my fave TV shows, I set to weaving on it.  When I finished, I thought it looked nice:


But, I had no idea what its use was or what I would use it for.  I needed to finish one of these, for some reason.  Now that I have, It sat on the coffee table for a few days.

When we came across these bottles on sale for $1, I knew where I could put my new weaving:


So now it lives on my bookshelf.  Making my books a little more interesting.


Monday, 27 January 2014

Warm Knitted Mittens on a Snow Day


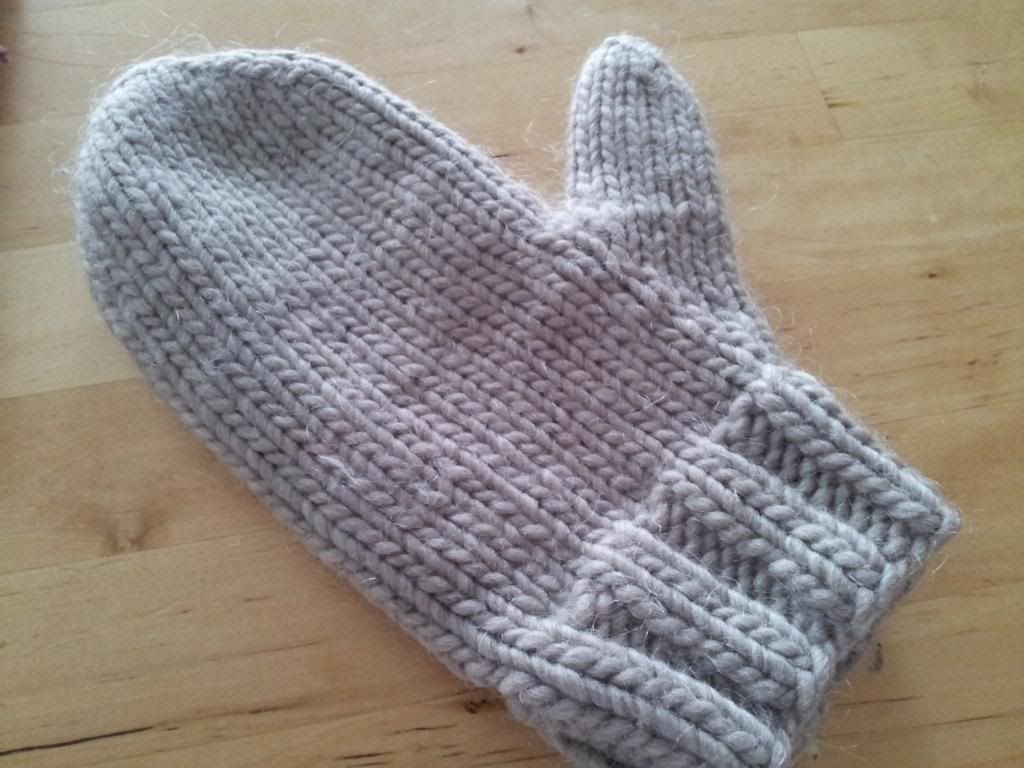
Today was a snow day.  So I sat with some coffee, and knit.  Mittens of course!  There's nothing I love more in the winter than my hand knitted mittens.  They are the only things I wear.  I have even managed to get D on the knitted mitten train.  I made him a pair a few years ago and he loved them.  But this year, he managed to get a hole in the thumb.  So he asked me to make him a new pair.  I've been making these mitts for so long, I don't know where I got the pattern originally.  I thought this time, I would write down the pattern I use so that I had it, and to share with you!  (If you knit that is..)


This pattern uses a bulky yarn.  I usually use Lamb's Pride Bulky for my mittens.  Its soft and dense, and my mitts always turn out perfectly when I make them.  The red and purple mittens above are made with a lighter weight of yarn (Manos de Uruguay Classica) held 2 strands together. 

This pattern makes a nice thick mitten.  Like the kind you would need in Canada (which is where I live.)  Here's what you need:

Materials:
1 skein Lamb's Pride Bulky, or other bulky weight yarn
1 set of 5 Double Point needles US size 9
2 stitch markers in different colors
yarn needle for weaving in the ends

Gauge:
4 sts/ 1 inch

Instructions:
Cast on 32 stitches onto 4 double-pointed needles. Join to work in the round. Mark the beginning of the round with one of the stitch markers.  Begin knitting in 2x2 rib. Continue 2x2 rib for 10 rounds or 2 inches.

Decrease round: begin stockinette stitch and K2tog, K to end of needle, on next needle K to last 2 stitches, SSK, on third needle, K2tog, K to end of needle, on fourth needle, K to last 2 stitches, SSK. You should have 28 sts on your needles.

Increase for thumb gusset: K14, M1, place marker (NOTE: not really necessary, I put one here because it helps me remember the number of increases,) K1, M1, K to end of round. Increase one stitch before the first increased stitch and after the last increased stitch every 3rd row, 4 more times. By the end of this round, you should have 38 sts.

Next row: K14, place next 12 stitches on scrap piece of yarn or a stitch holder. Cast on two new stitches over gap (I use backward loop method) and continue to knit to end of round.You should have 30 sts in the round.

Continue knitting hand portion of mitten until it reaches tip of little finger.

Start decreasing for the top of the mitten: 
First round: K2tog, knit to the end of the needle, on the next needle K to the last 2 stitches and SSK, on the thirds needle K2tog, k to the end of the needle, on the last needle, K to the last 2 stitches, SSK.  
Knit one round even.  Repeat the last 2 rounds until there are 2 stitches on each needle.  Take the yarn needle and pull yarn through the remaining stitches.  Weave in ends.

Thumb:
Pick up the 12 stitches for the thumb and put them on 3 needles, 4 stitches on each needle.  K one round and at the end of the round pick up 1 or 2 stitches over the gap.  Close the gap to complete the round.  K in the round until long enough for your thumb to just poke out the top.  K2tog, K1 to the end of the round.  K one round even.  K2tog to the end of the round.  Pull yarn through the remaining stitches.  Weave in ends.


These mitts are really quick to make up.  I finished the first one in about 2 hours.  I like them because they are quick and really warm.  If you make a pair, will you let me know?  I would love to see your mittens.


Friday, 11 October 2013

Cross-stitch Sentiment Art- Sentitmenart? Sartiments? Help me think of something here...


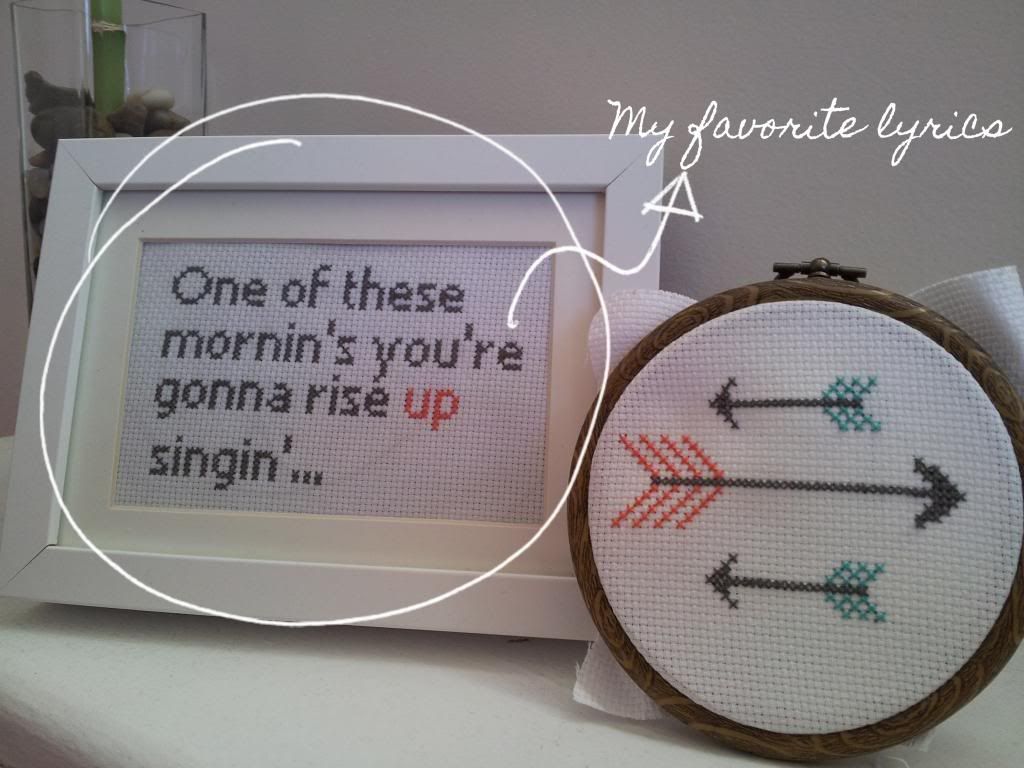
One this I've been doing a lot of lately is cross stitching.  I really like it.  Its relaxing; and its really versatile.  One thing I really love stitching is quotations.  I made these little things while watching TV.  It was really to put one of these together.  Pretty inexpensive too!  If you want to try and make your own, but have no idea how to cross stitch, I would have a look at this site. It even has pictures! 

To make my quotations, I used 16 count fabric (makes the letters a little bigger), a size 5 sharp needle, and 2 of the 6 strands in a length of embroidery floss.

The other super helpful site was this one, the Cross Stitch Writing Tool.  All you have to do is type in your words, and it will chart out the letters for you!  You can save the file as a PDF or print it out!  I typed in my words, and chose a font, and I was ready to start stitching!
The arrows I just made up.  But there are thousands of free cross stitch patterns of arrows out there.  Just use a little imagination, and sew it up!

But seriously.  I'm really into the trend of running two words together that have no business jammed up against each other.  Frenemy?  Love it.  So, in that tradition, what should this be called?  Sentitment-artity?  Cross- stitchitments?


Friday, 24 August 2012

Made: Paint Chip Matchbook Notebook


I am always looking for a piece of paper or my notebook to jot something down.  I have a lot of ideas for blogging and such when I'm out on the open road.  But I don't carry my usual notebook everywhere because it is much too big and heavy.  So, I made these little notebooks out of some paint chips I had laying around.  I can throw them into my bag, no matter how small, and I always have somewhere to write ideas.  They are very handy, and super easy to make. 


What you need:
  • paint chip- I think these are from Walmart, they are for CIL brand paint, but any paint chips will do; it would just change the size and shape of your book.
  • Stapler
  • Paper, I used scrap paper
  • scissors- I used a rotary cutter; it made things much easier.
  • ruler
  • clear tape (optional)
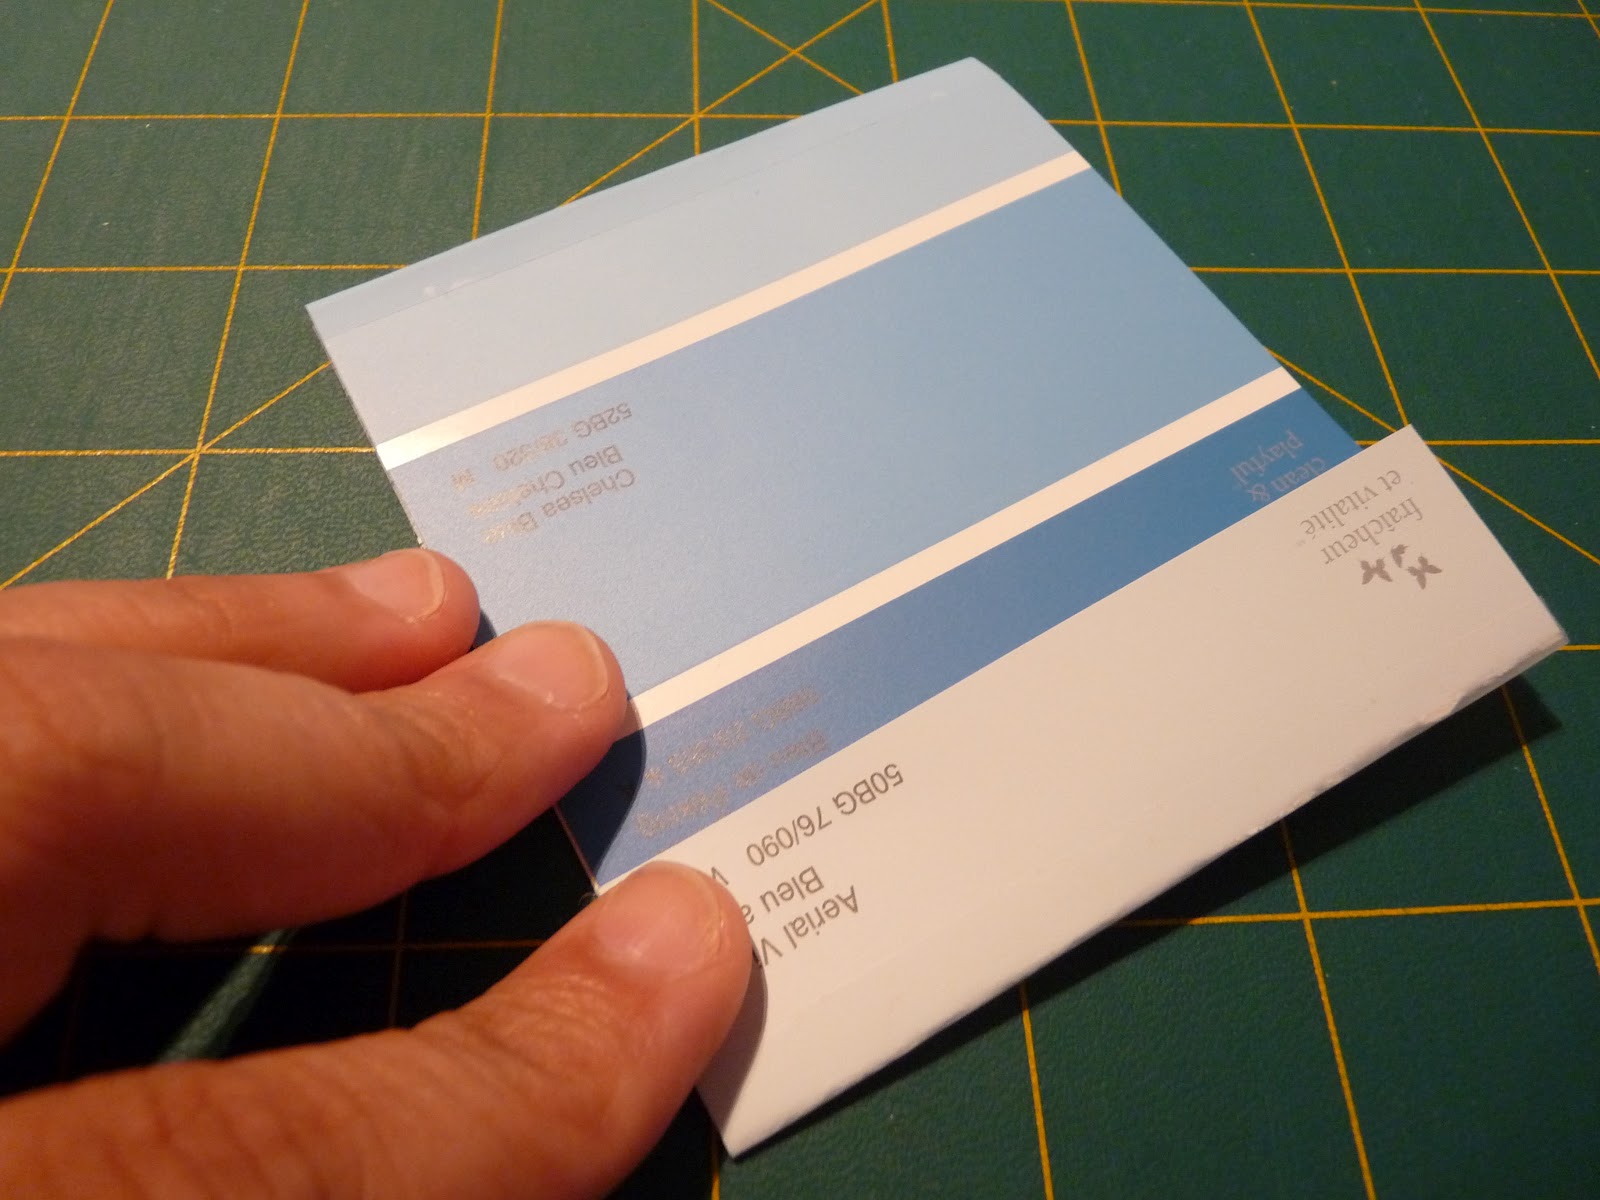
Fold your paint chip into three like a match book.  My dimensions were, 8.5 cm for the top section, 9.5 cm for the middle section and 2.5 cm for the flap.  I creased it well, and cover the fold with clear tape to reinforce them.  But that's totally optional.


Then it will look like a big matchbook.
 

Next, cut your paper the length and width minus a 1/2 cenitmeter of the entire paint chip.  You are going to fold the stack of paper in half to make the pages of your notebook.
 

I forgot to take a picture of the next part, but its easy.  Take the folded edge of your pages, and tuck them under the 2.5 cm flap.  Staple once or twice like a matchbook.  The fold should be under the flap so that you can flip the pages.


And there you have it!  A little notebook!


If you are anything like me, you made 6 and threw them in all of your bags.


What is your notebook solution?  Do you carry one?  Do you just grin and bear the extra weight? 


Friday, 17 August 2012

DIY Week: Mason Jar Soap Dispenser


Are you sick of DIY Week yet?  There are only a couple more projects to go!  Today's DIY makes use of those awesome Mason jars again.  I like to make jam and pickles in the summer, and so sometimes I go hog wild buying jars.  Around this time of the year, they are pretty cheap so we buy a bunch in different sizes.  Whatever I don't use for canning I can use in the future, or for little projects like this one.

I make my own dish soap, hand soap and (hopefully soon) I will be learning to make my own lotions.  I don't mind storing these in a regular jar, but I also like to have the convenience of a pump container for these products.  So I figured out how to re-use an old pump dispenser from a plastic bottle with one of my mason jars.  The process is pretty simple and quick.  So if you have an old bottle that you want to up-cycle, this is something you can try.

The first thing you have to do it drill a hole into the lid of your jar.  I use my 3/8 bit and drilled a big hole as close to the center as I could.  Then I used some needle nose pliers to bend the sides of the hole inwards to make the hole big enough to accommodate the straw holder part of the pump.


I know that hole doesn't look pretty, but you don't see it, so don't worry about that.  After it is just big enough for the pump, stick the pump through.  I put a little hot glue around the top of the hole to seal it and protect it from rusting before I push the pump through.


The lid should be sitting on top of the lid, but the bottom part of the pump should be nice an snug in the hole.  You could use it like this if you'd like.  But I like my pump to be a little more secure, and a little more waterproof.  So, I used my handy hot glue gun to seal the underside of the pump.


The hot glue works really well sealing the holes around the pump.  And I use a brand of glue that is non-toxic.  I have thought about using other glues or caulking, but this one works great, so if it ain't broke...  Let the glue cool and harden, then put your jar together.  I like this because the jar is easy to refill; I get to reuse a part of waste that is not easily recycled, and I get so see the products inside the jar.  Sometimes when I make dish soap, I put a sprig of rosemary in for aroma and to make it look pretty for my kitchen.  I should go and make some dish soap now!


You could use this jar for other purposes too.  I use them to buy refills of products that come in bulk (like my current lotion) and then I switch in the pump top once I get the products home.  It is really handy to have some of these tops laying around, just in case you need a container.  So don't throw away those pumps!  Reuse them over and over again.  If it breaks, peel away the glue, replace and recycle the pump and start again! 

Only 1 more day of DIY Week left!
 Every day of this week I shared a new DIY project.  To review the tutorials, you can click on the tutorial tab at the top of the page, or the tag DIY Week under the posts.
  I hope you find them useful!