Wednesday, 20 August 2014

Peach Season


The summer is awesome for those of us who live in the region called the Niagara Green Belt!  We live in a temperate area where there are so many orchards and farms of all types.  And at this time of the year is my favorite fruit harvest-- peaches!

Remember this gem?


That doesn't really have anything to do with this other than its a song about my favorite fruit that I sing when I'm eating peaches.  And now, hopefully you will too.

ANYWAYS, the point of this post was to implore you to roast and/ or grill your peaches.  They are so yummy raw, but roasting them ups your game!

The picture above is of a peach roasted in the oven, with ice cream and a yummy pecan mush.  I'm southern so I eat pecans on EVERYTHING.

To roast your peaches:
  1. Wash then cut your peaches in half and remove the stone.
  2. Put your peaches into an oven safe baking dish 
  3. Roast/ Bake your peaches at 350 for an hour or so.  They are finished when they are soft and juicy and the skin on the edge of the cut has curled slightly.  
There you go.  Eat them as dessert by themselves.  Or you can add ice cream and a yummy nut mush.

Yummy Nut Mush:
1/2 cup of pecans (walnuts work too)
2 tbsp soft butter (I used Earth Balance which was great)
2 tbsp of brown sugar

Add all ingredients to food processor and pulse until it comes together.  Serve a spoonful with your roasted peaches and ice cream and enjoy.

Seriously, roasting these peaches changed my life.


Monday, 18 August 2014

My Kijiji skills are strong


For 2 years-- 670 days-- I have been looking for a kilim rug.  It's not that I couldn't find one, I found many I love at prices I did not love.  I'm not cheap, per se; I like the word the French use economisee.  I couldn't justify to my wallet (or my partner) spending more than 600 dollars on a rug. But after a year of stalking eBay and kijiji, I found one!  And at a really good deal, probably too good...

ANYWAYS, I contacted the seller and drove an hour to pick it up and after a good vacuuming and a quick clean, it ended up in my dining nook.

And I love it.


Friday, 15 August 2014

Made: Woven Wall Hanging

From: Creative Bug BlogA Beautiful MessA Pair and a Spare

Usually, I'm slow to notice trends.  I don't read about them, and usually I don't really care.  I like what I like, you know?  But if there's a trend that centered around a DIY, I'm there.  I love when I figure that out.  and that's what I fell about this trend of woven wall hangings.

I am seeing them EVERYWHERE.  I couldn't read a DIY blog without it popping up, y'all.  And the more I saw them, the more I wanted one.  So, I decided to try my hand at one.  I've woven before, but now I don't have a loom.  I've meant to buy a new one, but never think of it when I have the money-- and there's a new Fossil Store in my town, and other things and places I wanted to go and things I wanted to do.  So I never bought one.  But that didn't stop me!  I made this:


...using yarn and some cardboard! 


That's the best part about weaving-- you can use almost anything and weave.  If you want a full tutorial on the process of weaving little wall hanging, A Beautiful Mess has a great one here.  If you don't own a loom (and don't want to buy one) you can substitute a piece of corrugated cardboard at least as big as you want your hanging.  Then cut some notches in the top and bottom (directly across from each other) to weave your warp onto.  Then you can follow the tutorial as written. 

The good thing about using cardboard instead of a loom, is that you can draw a guide for your image onto the cardboard.  That way you don't have to wing it.  I wanted some triangles in the "Flying Geese" pattern I love on quilts. (Note: The link leads you to a page about the Underground Railway "Quilt Codes."  I don't want to hear about how the theory of the quilt codes were "disproved."  I like the story, whether true or not.  It speaks to the ingenuity of the slaves and their allies while trying to escape an unjust system.)  So I wanted some version of it for my wall.


I used some neutral wool, and some Noro yarn for the triangles, a Japanese wool with awesome colors.  The weaving was really fast!  I finished it in one day.  I started it in the morning with my coffee, and finished it while I was watching Arrow.  I held the yarn double for the weft to make it thicker.  I like how it looks.

    
I hope you give it a try!  It was a satisfying DIY with a great end product.  If you do try it, make sure to link back so I can see it too!


Wednesday, 13 August 2014

My Favorite Iced Tea


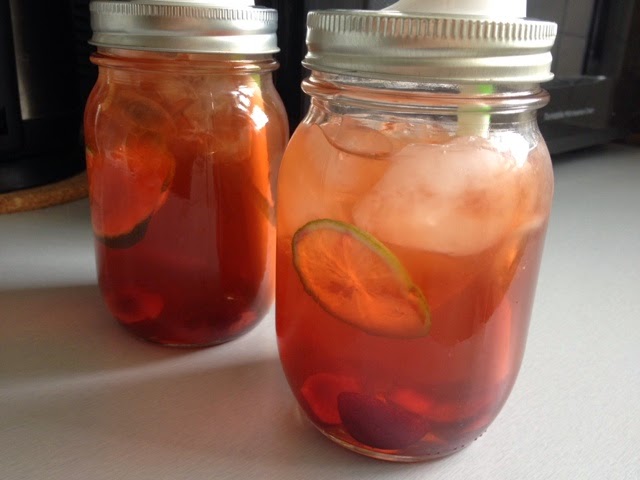
Oh summer- the time when all I drink it seems is water, iced coffee and iced tea.  But I'm picky about my iced tea; I don't like that stuff that comes in a can, or a bottle.  Nope.  Only the home made stuff for me.  And its so easy to make, why wouldn't you make some homemade iced tea.  There are endless ways to make it your own!  I especially like using herbal tea bag, usually fruity.  I find them refreshing.  But I have used regular ol' black tea and its turned out nice too.  This formula, I guess, is for my current favorite iced tea.  Its refreshing, not too sweet, and caffine-free so you can sip it into those hot summer nights.


You need the basic iced tea materials: A kettle (or a pot and stove), a heat-proof pitcher (I got this Le Crueset one from Winners for 15 bucks!) and some tea bags.  I'm into the herbal berry teas byCelestial  Seasonings, but my absolute favorite is the Very Berry tea from Clipper Teas.  I just ran out when I was making this pitcher.  It turned out really nice too.  Not pictured it the sweetener you want to use.  I use honey most of the time.  You can use a wet or dry sweetener, it doesn't matter.  

Ingredients:

4 tea bags, any kind
3 cups boiling water
2 tbsp sweetener (or more or less according to your own taste)
4-5 cups cold water
Ice to serve
Any garnishes that you want, I used limes and cherries

Method:

1) Boil your water in a kettle or on the stove. 

2) In your pitcher or another heatproof container, steep your tea bags in the water for 15-20 minutes.

3) After you have steeped the tea, you will have a concentrated tea base for your iced tea.  While the tea is still hot, add you sweetener, and stir well.  Make sure that your sweetener is melted, dissolved and incorporated into the base.  

4) Taste.  You want it to be sweeter than you want the finished tea to be because you will be dilouting the tea with water and ice.

5) Add cold water to the tea.  Start with 4 cups and keep increasing until you have the strength of tea desired.  I like pretty strong tea, so I don't add the full 5 cups.  

6) Stir well, and that's it!  Serve in glasses filled with ice and any garnish!  Sip and feel Southern!


We like to sit outside and read and talk while sipping iced tea.  Its a pretty Southern thing to do.  Can we take a minute to look at the cool lids I found for mason jars??!:


They are made by Ball, and they were super cheap.  I got 4 lids and 4 reusable plastic straws for 2 bucks!  They were great for keeping the bees and wasps away.  If you don't have the time to make your own, these are a great buy.  You can use them without the straws, that is my favorite part about these lids.  

Enjoy!  


Tuesday, 5 August 2014

Made: Kimono Cardigan


Whoa! Two posts in the same week?  This is a record for me.  Yay me!

ANYWAYS, I finally fell in love with this "kimono" cardigan trend.  (I do hate that its called a "Kimono" cardigan, seems a little appropriative to me, but I digress...)  I like the flowy, comfortable feeling of them.  But by the time I wanted to buy one, they were no where to be found!  This made me really sad.  But then I remembered that I was sort of crafty, so I thought I would make one myself!


It was pretty easy to make this jacket.  And the fabric I bought was only 3 bucks a metre!  So this cost me a total of 7 dollars to make.  And since these babies sell for almost 40 dollars, I got to make something and have a deal!  Which is awesome!  If you can sew a straight line, you can make on too.  For the easiest way to make one, choose a fabric that wont fray when you cut it for the easiest construction, then you won't have to hem any of the ends!  My fabric needed to be hemmed which was what took most of the time in making it.  Of course, I forgot to take pictures, so here is the basic run down of how I made this with my basic tutorial made in Skitch:


Not bad for 2 hours work.  It is a little warm though, so I will probably wear this more in the fall.  I'm thinking of making another one in silk/ cotton to wear now... But I'm not sure how much use I will get out of it.  Summer is almost over :-(


::Top to Bottom::
Kimono Cardigan- Made by me!
Necklace: Pyrrha from Pure Home Couture
T-shirt- Old Navy
Jeans- Torrid
Sandals- Birkenstocks

If you make one, I would like to see it!  Link it in the comments! 

Saturday, 2 August 2014

Bringing it back: The Lady Hankie


Summer is in full force now and it is getting humid y'all.  And with the heat and the humidity, comes sweat.  Didn't see that one coming did you?  Well, today I'm talking all about sweat.  I do it.  You do it. Your grandmother does it too.  We all sweat.  Its natural.  Being from a Southern (U.S.) family, I think its perfectly normal too be sweaty in the summer.  But the Northern people-- oh the North!  Here people do everything and anything to look like they are not sweating.  So weird.  Its hot, just be sweaty!  

When I was younger, all the adults I knew in the South always had a small towel or something with them on hot days.  It would be draped over their shoulder or in a pocket, but it was there.  My daddy still does this.  And I love it.  He is unapologically sweaty.  He always has his cloth to wipe his brow.  And I love that.  

In the summer, I had a habit of having a paper towel or something in my bag for if I got really sweaty.  I would clandestinely wipe my brow or upper lip when no one was looking.  I was a sweat apologist.  Keeping it secret.  Keeping it quiet.  But I'm older and wiser now; and somewhat sweatier.  So while I was with my friend Kate on an antiquing mission, I bought a bunch of vintage handkerchiefs.  I didn't know exactly why I bought them, but my heart had a plan.  

As we walked around the village of Waterford, I began to sweat.  Then I remembered that my Gramma had a hanky that she used to wipe her brow in her hot ass kitchen.  So I pulled out my hankie and right on the street mopped my sweaty brow.  

It felt glorious.

I can't reccomend it enough.  Get a pretty hankie.  Go outside.  And when you get sweaty, don't apologize.  Just pull out your beautiful cloth and pat yourself.  Free yourself from the cult of dryness that is unnatural.  Be proud.  Be sweaty.  And bring back the lady hankie!

Wednesday, 23 July 2014

Health at any size?


Oh Natalie Dee, you make anything funny- even this serious-ass post.

I'm thinking of buying a scale.   Hear me out. 

I am still a supporter the idea of "Health at any Size."  I am still proud of who I am and what I look like.

But 3 weeks ago this happened:
 
My mom had a heart attack, at 55 years old.  She had already been diagnosed with Type 2 Diabetes, as had my dad.  My maternal grandfather had died of a heart attack.  My paternal grandmother has heart disease, had a triple bypass 10 years ago, and was in the hospital because of her heart 5 weeks ago.  My paternal grandfather was diabetic before he passed away in October.

Heath-wise, this has not been a great year for the Bass clan.

Health-wise I have been okay, other than some skin conditions and joint pain.  The joint pain is annoying, but something I could live with.

But, here's the thing:  I don't want to live with it.  Here's the other thing:  I don't want to have a heart attack too.

For a long time, my doctors have been telling me that I would be in less pain if I lost some weight.  For a long time, I have been telling them, that if I was healthy in other ways, could they be sure that it was my weight that was the problem?  I'm active, and I eat healthily, how was my weight an issue?

In terms of my pain, I have tried everything else.  

So I have changed a few things, yes with the end goal of losing weight.

But I refuse to pay into the billion-dollar industry that tells me I'm less than human because I'm fat.  
(But I have paid into it a little.  I bought a pedometer and started tracking my food intake.)

Its going ok.  I haven't weighed myself, but my clothes are bigger.  I haven't noticed any change, but others have.  Which is good I guess.  Right?  If I had a scale, I would have some concrete data to track my progress.

But I have some concerns.

1.  I am afraid that this is going to turn into an unhealthy fixation with food and calories.  I track everything I eat.  I worry about calories in excess.  I dream about the amount of calories I have for the day.  I plan my day around what I can eat.  Eating has turned from something I enjoy and look forward to, to a chore that is full of measurements and dissatisfaction.  And in some way, I get a sick feeling of pride from this.  "Look at my suffering!  I am doing what a fat person should do.  I am at war with food.  I am a noble, and good fat person from being miserable with food."  What am I doing to my self-esteem with this concentration on caloric input/output?

2. It's all for nothing.  I will do this, and be largely unhappy doing it, and nothing will change.  I will still be unhealthy and fat and have nothing to show for all this work.  I will still have a heart attack anyways.

3.  My fat friends/ blog buddies will shun me.  Will this be a weight loss blog?  Not likely.  But I will share things that work for me from time-to-time; and products I like etc.  Because this is a blog about me, and this is part of me now.

4.  That I will send the wrong message about weight-loss and fatness.  Because, sometimes, I get the message confused too. I feel good when someone compliments me on my "self-control" which is messed-up because they are really commenting on how my unhappiness is justified because I'm fat and enjoying food would be obscene. That I somehow agree with the idea that obesity is an "epidemic" and that thinness is the only way to be healthy.

5. Can I say that I'm a health at any size supporter, if I am "dieting?"

I know that I have some contradictory worries there, but, for me, this process is full of contradictions. I look forward to when exercise won't hurt.  I'm happy when my clothing is too big-- which again is messed up because I am happy that I am literally starving myself.  I want to be healthy, but I find myself wondering what my face will look like if I get thinner.  I rail against the diet industry, but search their website for ideas and recipes.  I say I'm against diets-- but aren't I on one technically?

Let's talk about this.  I need help figuring some of this stuff out.  Thanks for listening.


Thursday, 24 April 2014

Try it: Pizza Contest!


Tonight for dinner, we decided to do something fun.  Its been really busy in our house for a while, and we needed to laugh, and be competitive.  So D and I had a pizza contest for dinner.  We bought these little bread shells for pizzas and had them in the freezer.  The rules were that you could use anything we had in the house for toppings-- but it had to be an original pizza, one we have never made before.


Here's my entry: The Popeye!  It has Alfredo sauce instead of tomato sauce, mozzerella cheese, lots of baby spinach, grilled chicken and parmesan cheese on top!  For seasoning, I added some basil and black pepper, and that was all.  When I saw D's, I felt that my pizza was a little plain.  But I had faith that it would be delicious.  It had all my favorite things on it...

 
To tell you about his pizza entry, here's D:

D here.  I called my pie the Meatball Mozzarella Dream Team.  Okay, so maybe that's a little overboard.  Mix the above two ingredients with some onions and Parmesan over some kind of tomato sauce.  Overall a good pizza, just missing some kind of kick at the end.  Not sure what that could be yet, but all good things to those who wait.  Am I right?  Of course I'm right...I think.

We were our own judges.  The criteria was "tastiness" (?), combination of flavors, presentation, and who was the better looking chef. (So, that one was a tie.)

D won presentation.  I just threw stuff on top of my pizza and didn't really care about what it looked like.  The colors were pretty.  D had concentric circles of meatball, and in between those pieces were slivers of onions.  Dude takes care in his pizza making.

As for flavor... I won.  My pizza was kinda rich with the creamy Alfredo sauce, but it was good with the chicken and spinach and basil.  So yummy.  I thought it tasted like when you have a bowl of Chicken Alfredo pasta, and you sop the remaining sauce up with a piece of bread.  Don't you do that?  Of course you do.

So who won?


Since my pizza won 2 of the categories (excluding the best looking chef), that made my pizza the winner!  D agreed.  He thought his was missing something.  I think it would be good with a spicy sauce and some peppers.  That way it could be the "Spicy Meatball."

How do you have fun dinners?  Do you eat something special? 


Sunday, 20 April 2014

Indoor Gardening: Window Herb Garden


Spring may actually be here.  We will see.  But for now, the sun is making me happier than I have been for a while.  A bright day can even make me productive! 

I've had an idea that I wanted a herb garden in the kitchen for a while since we have that nice big window in there-- but no ledge.  I have found a lot of inspiration online for ideas to add plants to a space where there is none.  The most inspiring and inventive DIY solution I found came from A Beautiful Mess (of course),  but I don't have a workshop, or all those great tool to work with.  Plus, it wasn't really what I wanted.  I wanted to make sure that I could have different types of herbs, which is difficult if they have to share a planter.  So I needed something that would separate the plants. 

On a wander through Ikea (my favorite place!) I saw these great hanging planters, and thought of a new plan for my hanging herb garden.  These pots are the perfect size for the herb plants they sell at my local grocery store, so I bought 3 and planned my herb garden for my kitchen window.

Want your own hanging herb garden?  Here's what I used:

Shopping List

3 SKURAR Hanging planter pots from Ikea- $4.99 ea ($15.00)
3 herb plants, I found mine at my grocery for $2.99 ea ($9.00)
3 plastic planting pots, because my herbs came in biodegradable pots- 1.00/ 6pk
3 hooks, I bought a package of 6 white vinyl coated hooks so that they would be inconspicuous- 1.00/ 6pk


I love how they look in our very small kitchen.  It makes it much more alive!  Here's what I learned while hanging and planting our herbs:
  • I shortened 2 of the pots chains by removing 11 links from each chain.  To do this I used some needle nose pliers and twisted the 11th link.  
  • If your plants have biodegradable pots, you will need a plastic pot to put them in, or else once the pot breaks down, your plant will be sitting on the bottom of the planter, and there will be no room for drainage. If you don't have plant pots, you can re use yogurt containers with some holes in the bottom.
  • Use hooks instead of nails, it provides space between the plant and the window for blinds or drapes.
  • Herbs need direct sunlight, so make sure you hang them in a sunny window.  Our windows face west, so we get late afternoon sun.
D and I finished this in just under an hour.  And it made me so much happier!  I'm not sure if I'm going to shorten the chains some more that that they are all the same length, and sit in the top half of the window.  We'll see how they grow like this.  Do you live in an apartment?  How do you fulfill your gardener's itch? 


Thursday, 13 March 2014

Carving out a Reading Nook


I love to read.  I read everyday.  Most of the time, I read before bed.  I find that its the best way to calm me down; and then I can really get into a story.  When I read, I need a quiet place.  So when I thought about making a little spot for reading, my bedroom became a great place for such a thing.  There's not much to my reading nook, just a comfy chair, a table for a drink, and some cushions and soft things.  And a light.  I may change the light, but for now its a great place for me to read and relax before sleeping.

Do you have a special place to read?  Where is it? 


Friday, 7 March 2014

Branch Weaving


Branch weaving showed up in my Pinterest feed, and I thought it looked really cool.  I really wanted to try it that minute.  But I didn't have a branch.  Because the city was living under 3 feet of snow.  And I don't pull branches of trees, because that's bad for them, and I'm not a 10 year old, so I waited until I came across one laying on the ground.

Last week, D and I went on a death-defying hike.  The trail was covered in ice.  So much ice!  What wasn't ice was knee-deep snow.  It was beautiful, but treacherous.  That bridge in the background?  Completely iced over.


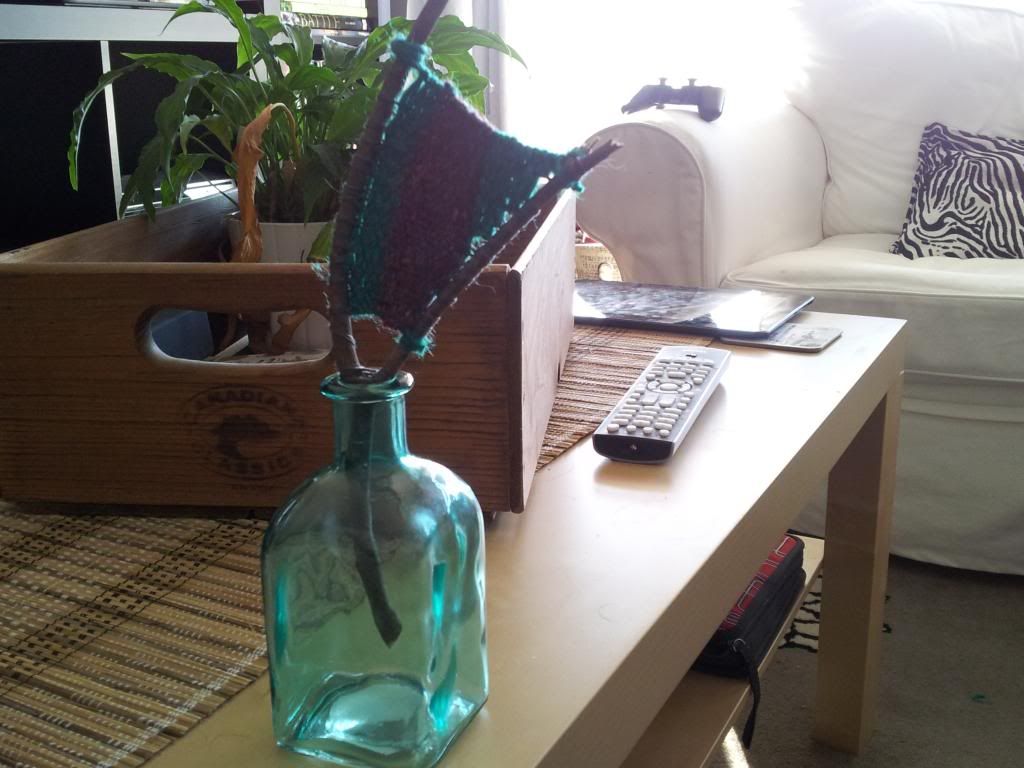
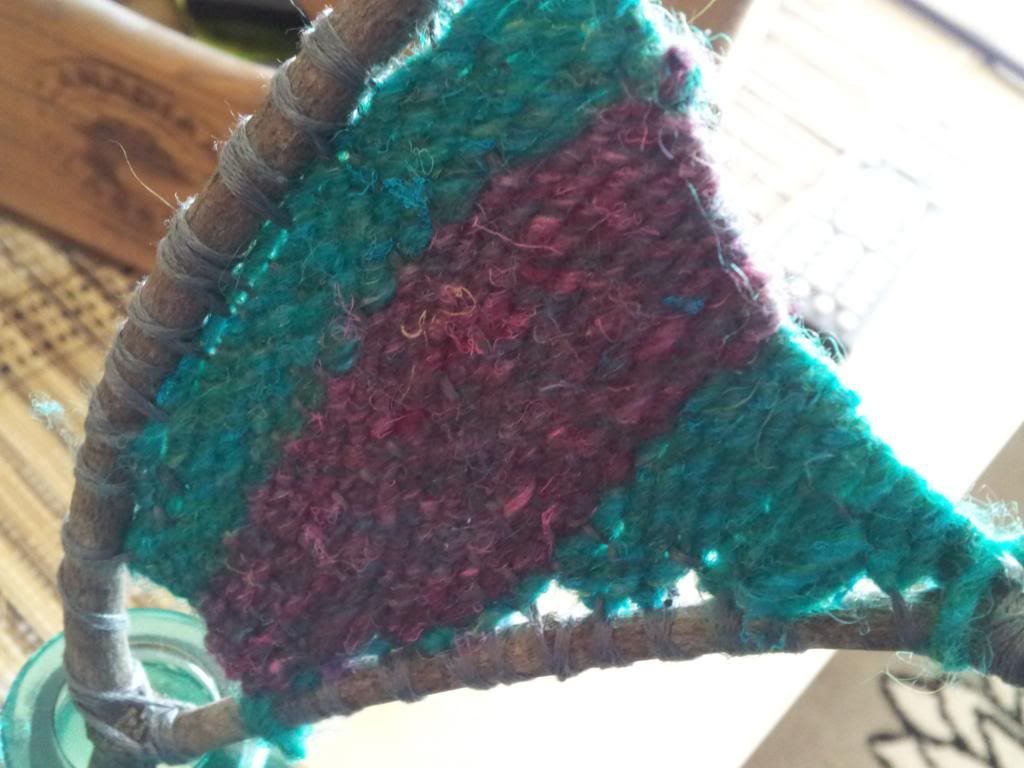
But, I found a branch, and during one of my fave TV shows, I set to weaving on it.  When I finished, I thought it looked nice:


But, I had no idea what its use was or what I would use it for.  I needed to finish one of these, for some reason.  Now that I have, It sat on the coffee table for a few days.

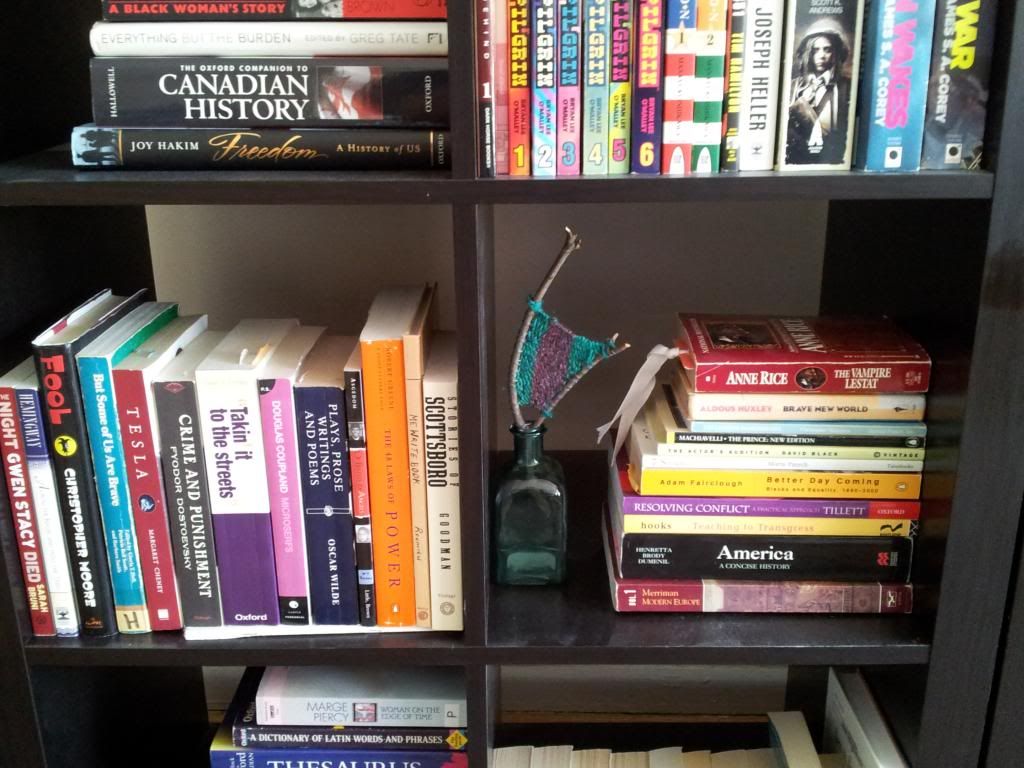
When we came across these bottles on sale for $1, I knew where I could put my new weaving:


So now it lives on my bookshelf.  Making my books a little more interesting.


Saturday, 15 February 2014

Homefront Progress


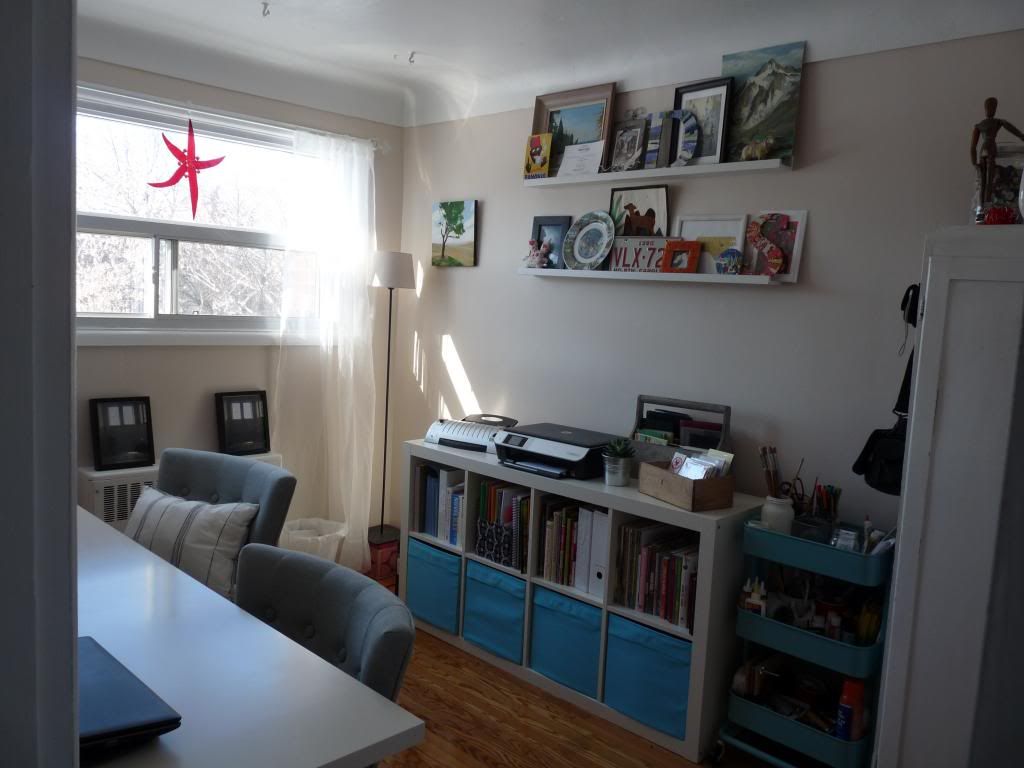
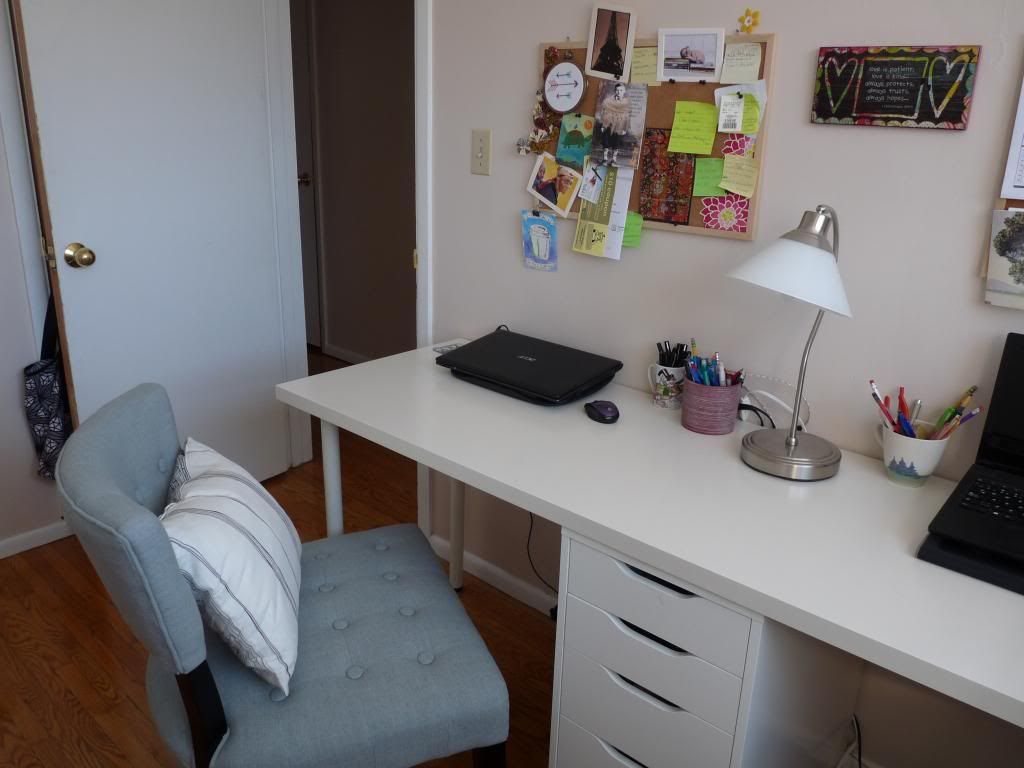
Slowly, we are starting to make this place our own.  It took us a while to get used to the space, and figure out what furniture we needed (or needed to get rid of.) This room, our office was one space that I was never happy with.  I felt that it was mainly storage, and not that pretty for a while.  I didn't have any plans for the craft supplies etc that I had.  So I made it my mission to turn this room into a space that I like in work in by the end of the winter.

In an attempt to make our workspace look a little more organized, we went to Ikea for Valentine's Day (so romantic!) and bought a cart for my crafty stuff.  With the shelf and the cart and the cabinet, I think it looks cleaner and more organized.  Everything is accessible, and with the cart I can pull over my supplies if I need them.


I'm able to keep all of my materials, and yarn and knitting books all in one place.  I love how bright this room is now!  Its a really great place to be creative.  Its not a huge room, which is fine, so we used a few tricks to make it a place where D and I could both use it and be creative.  The back wall is mainly storage:  The bookshelf holds our books and the bottom baskets hold other things not easily stacked on a shelf (mostly yarn.)  With the bookshelf on its side, we use the top as an extra counter top.  I can move the laminator and use our counter-top ironing board if I am sewing.  Otherwise, it holds our color printer and some journals.  I am a sucker for a journal.


The big purchase we made for this room was the chairs.  I wanted really comfortable chairs that you could sit in for hours.  In the end we decided on this accent chairs that we found.  They are so cozy:  I can sit on them cross-legged, the back is really supportive.  They are great!  They were not super expensive, but they were more than I would usually spend on a chair.  They were worth it!  I love sitting in here now. 

It feels really good to get a room to where you want it.  Still working on some other rooms in the house.  I hope you don't mind if I continue to share my progress in decorating our space!

Do you have a room that gives you trouble?


Thursday, 13 February 2014

Six words

I was told that Ernest Hemingway once won a bet by writing a six word story that was as touching as a full-length novel.  Apparently the story was this:

For sale: Baby shoes, never worn.

I don't know if this story is true, it may not be.  But it is an interesting idea.  I was thinking, if I had to write an autobiography in only six words, what would I write?  Here's what I came up with:


I'm interested in your thoughts.  What would your 6 word biography be?


Monday, 27 January 2014

Warm Knitted Mittens on a Snow Day


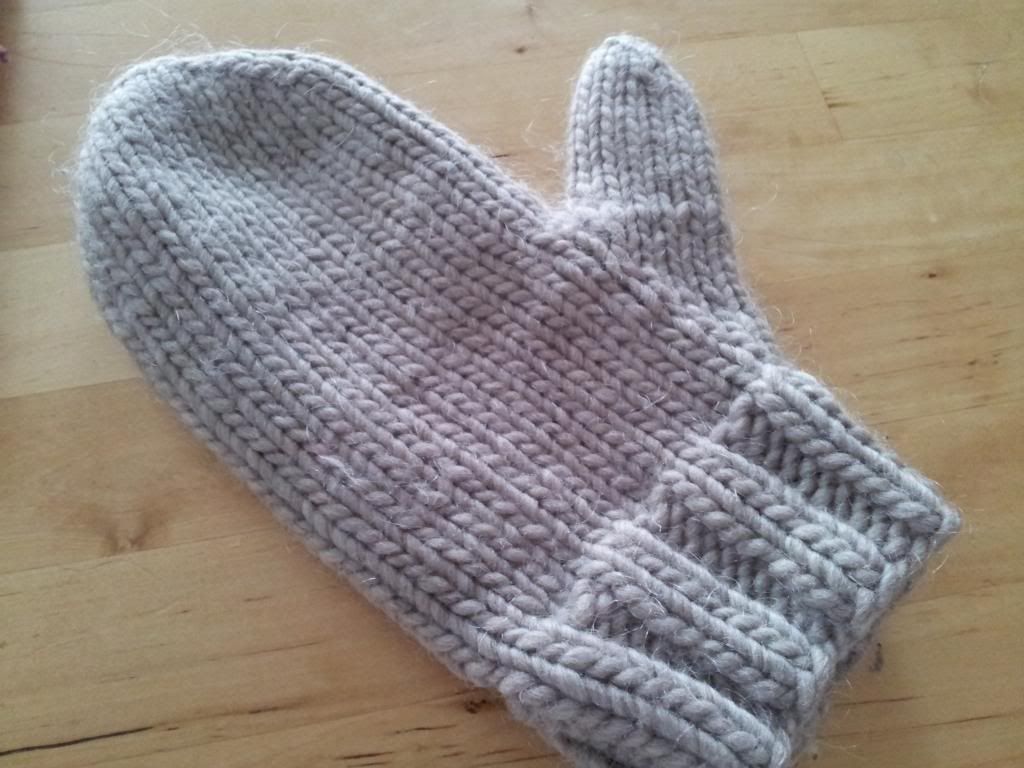
Today was a snow day.  So I sat with some coffee, and knit.  Mittens of course!  There's nothing I love more in the winter than my hand knitted mittens.  They are the only things I wear.  I have even managed to get D on the knitted mitten train.  I made him a pair a few years ago and he loved them.  But this year, he managed to get a hole in the thumb.  So he asked me to make him a new pair.  I've been making these mitts for so long, I don't know where I got the pattern originally.  I thought this time, I would write down the pattern I use so that I had it, and to share with you!  (If you knit that is..)


This pattern uses a bulky yarn.  I usually use Lamb's Pride Bulky for my mittens.  Its soft and dense, and my mitts always turn out perfectly when I make them.  The red and purple mittens above are made with a lighter weight of yarn (Manos de Uruguay Classica) held 2 strands together. 

This pattern makes a nice thick mitten.  Like the kind you would need in Canada (which is where I live.)  Here's what you need:

Materials:
1 skein Lamb's Pride Bulky, or other bulky weight yarn
1 set of 5 Double Point needles US size 9
2 stitch markers in different colors
yarn needle for weaving in the ends

Gauge:
4 sts/ 1 inch

Instructions:
Cast on 32 stitches onto 4 double-pointed needles. Join to work in the round. Mark the beginning of the round with one of the stitch markers.  Begin knitting in 2x2 rib. Continue 2x2 rib for 10 rounds or 2 inches.

Decrease round: begin stockinette stitch and K2tog, K to end of needle, on next needle K to last 2 stitches, SSK, on third needle, K2tog, K to end of needle, on fourth needle, K to last 2 stitches, SSK. You should have 28 sts on your needles.

Increase for thumb gusset: K14, M1, place marker (NOTE: not really necessary, I put one here because it helps me remember the number of increases,) K1, M1, K to end of round. Increase one stitch before the first increased stitch and after the last increased stitch every 3rd row, 4 more times. By the end of this round, you should have 38 sts.

Next row: K14, place next 12 stitches on scrap piece of yarn or a stitch holder. Cast on two new stitches over gap (I use backward loop method) and continue to knit to end of round.You should have 30 sts in the round.

Continue knitting hand portion of mitten until it reaches tip of little finger.

Start decreasing for the top of the mitten: 
First round: K2tog, knit to the end of the needle, on the next needle K to the last 2 stitches and SSK, on the thirds needle K2tog, k to the end of the needle, on the last needle, K to the last 2 stitches, SSK.  
Knit one round even.  Repeat the last 2 rounds until there are 2 stitches on each needle.  Take the yarn needle and pull yarn through the remaining stitches.  Weave in ends.

Thumb:
Pick up the 12 stitches for the thumb and put them on 3 needles, 4 stitches on each needle.  K one round and at the end of the round pick up 1 or 2 stitches over the gap.  Close the gap to complete the round.  K in the round until long enough for your thumb to just poke out the top.  K2tog, K1 to the end of the round.  K one round even.  K2tog to the end of the round.  Pull yarn through the remaining stitches.  Weave in ends.


These mitts are really quick to make up.  I finished the first one in about 2 hours.  I like them because they are quick and really warm.  If you make a pair, will you let me know?  I would love to see your mittens.


Saturday, 11 January 2014

The Comeback

Well, well, well... Looks who's decided to grace this blog with her presence... Stephanie.  To what do we owe the honor?

Look, blog I'm sorry.  I've been really busy.

A likely excuse.  And a common lie for you, isn't it?

Ok, I haven't been that busy.  But I haven't been that interesting either.

Feeling sorry for yourself again?

What? No!

C'mon...

Ok, maybe a little.  But you know, the winter and all that.  It was freezing here-- even for Canada!  And so I haven't been getting out there and trying new things.  And I spend all my time at work, on work.  You know how the fall and winter are.

Why don't you try making a schedule.  That works for other bloggers.  And then people would get your witty repartee again.  If anyone still reads this, that is.

Now, now blog, let's not get nasty...

I'm sorry.  I've been feeling neglected.  You have that other blog that you write on...

I do, but that's for work.  You know that.  You said you wouldn't mind.

I don't, I guess.  But back to that schedule thing...

You are right, I will start a schedule, and make sure I post something, even if I think its innocuous and silly.

Those are the best posts.

Um, thanks?  Anyways, I will post on weekends.  Is that ok?

Its a start.  And better then nothing.

Than.  Better than nothing.

Listen, you better wrap this up, you're starting to correct your own grammar.

Ok.  Well, see you either tomorrow or next weekend.  With something to talk about.  Goodnight.

Night.